

Vinyl fabrication
Vinyl cutter safety training
Hello MakerSpace
The moment of truth has arrived! It’s time to meet the MakerSpace. Visit the website to become familiar with it.
General shop safety forms
Since this is the first tool you’re learning, you may not be familiar with safety issues that affect every machine in the lab. We are required to keep paper copies of all training records. We recommend you keep a copy as well. Familiarize yourself with the following:
- General Shop Information | Please read this general orientation
- General Shop Safety Training | Please read and fill out form
Equipment-specific safety forms
Once general training is complete, we can turn our attention to individual equipment, starting with the vinyl cutter. You’ll use this form to record your training on specific machines:
- Equipment Specific Safety Training | Please read the front page of this form, and have it filled out for your vinyl cutter specific training below.
Hello Vinyl Cutter
Safety training step by step
- 1 — Vinyl Cutter SOP | Read this standard operating procedure prior to live demo.
- 2 — Live Safety Demo | This occurs during studio time. If you miss this demo, you must still receive this step of training outside of studio time. For outside of studio training, read here and then reserve a time below.
After training: safety resources
Follow up your training with refresher materials, or expand on your training by diving into the tool documentation. For example: we train using roll material, but you may want to learn more about single-sheet cutting, so that can be learned by consulting the user manual.
- Vinyl Cutter at Abington∞MakerSpace | Visit this page at the MakerSpace website for troubleshooting, material guide, software guide, and safety videos that parallel our live training.
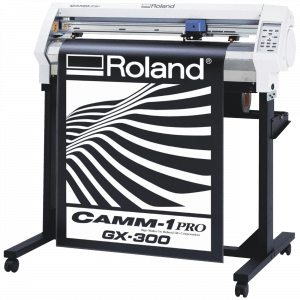
- Roland GX-300 Quick Start Guide | Excerpts of the User Manual for general use of the tool.
- Roland GX-300 User Manual | Long form reference. There is a copy of this manual in the red binder found adjacent to the machine.
Production
Reserve the tool
First, reserve tool time. Even if you are cutting during class time, reserve the tool. Reservation sign-up sheets are at the website main page:
If this is your first time reserving, read the How to Reserve section of this page for policies and general guidelines on figuring out how much time to reserve.
Run the job
This is a general overview. Many of these steps are detailed in the live safety demo, and can be reviewed in the safety video referenced above if you need a refresher.
- Choose a vinyl color on a roll: white or black are standard and always free in the MakerSpace. If using a sheet of your own, refer to the user manual for setup.
- Load your .svg or .pdf file onto the vinyl cutter computer by downloading from the cloud or transferring on a flash drive. NOTE: Copy the file from the flash drive onto the hard drive. Never work a file directly off of a flash drive. Immediately after transfer, safe-eject the flash drive and remove. Every time you try to reboot a computer with a flash drive still mounted, Elon Musk beats a baby seal with a baseball bat! Please don’t let that happen!
- Open your .svg file in Inkscape. If the file does not look correct, try the .pdf instead. If that also looks janky, go back to your .ai file and inspect. NOTE: you can technically run the file out of Illustrator, but it’s much simpler to work with Inkscape.
- ALWAYS inspect the file just before printing. Look for duplicate vectors, too-small detail, or items that did not transfer correctly. Ask a monitor for assistance if you are unsure about the file.
- When running from a roll, ALWAYS re-set the art-board size to 27 inches wide X 63 high.
- After resizing, ALWAYS group and move your vector work to the BOTTOM of this art-board.
- Always do a blade test before running a job, and aways check the vinyl roll or sheet for alignment.
- Run your job. The tool works fast. If something goes wrong you can shut it down quickly and save vinyl from being wasted.
Post-production
The machine is fast, but post-production can be slow. Weeding the vinyl and transferring are hand work and takes some practice: that’s one reason we have multiple copies of the decal! Training for post-production work has already been covered by the live demo and the safety training video mentioned above.
Reserve a time
Most people find it more convenient to use our tools to do these steps. Reserve an Open Workspace (just one of the empty tables) at the MakerSpace. Reserving not only guarantees that you have a space to work, but it gives us data to prove the MakerSpace is wanted and needed by our community — meaning we are rewarded with more resources to serve you!
Weeding: removal of ground vinyl
Use a pair of tweezers and/or an X-Acto knife to carefully remove the waste vinyl from the ground areas. Pay attention during the live demo to develop your technique for removal.
Application of transfer tape
Starting in the middle and working toward edges, apply the transfer tape. After burnishing it down, cut the decals into individual pieces. Again, be attentive during the live demo for the proper technique!
Transfer decal
Decals can go on any smooth surface: wood, drywall, metal, glass. In the case of glass, a special fluid is applied which inhibits the formation of air pockets. During the live demo, use of the glass fluid will be discussed, but not explicitly shown. If you need a refresher or want to learn advanced techniques, visit:
Document the results
Show off your finished decal on your process journal or blog by taking simple but careful photographs. It takes literally less than 60 seconds of extra thoughtfulness to go from nasty photography to nice. These casual photos of a coffee cup were captured less than a minute apart from each other:
NASTY
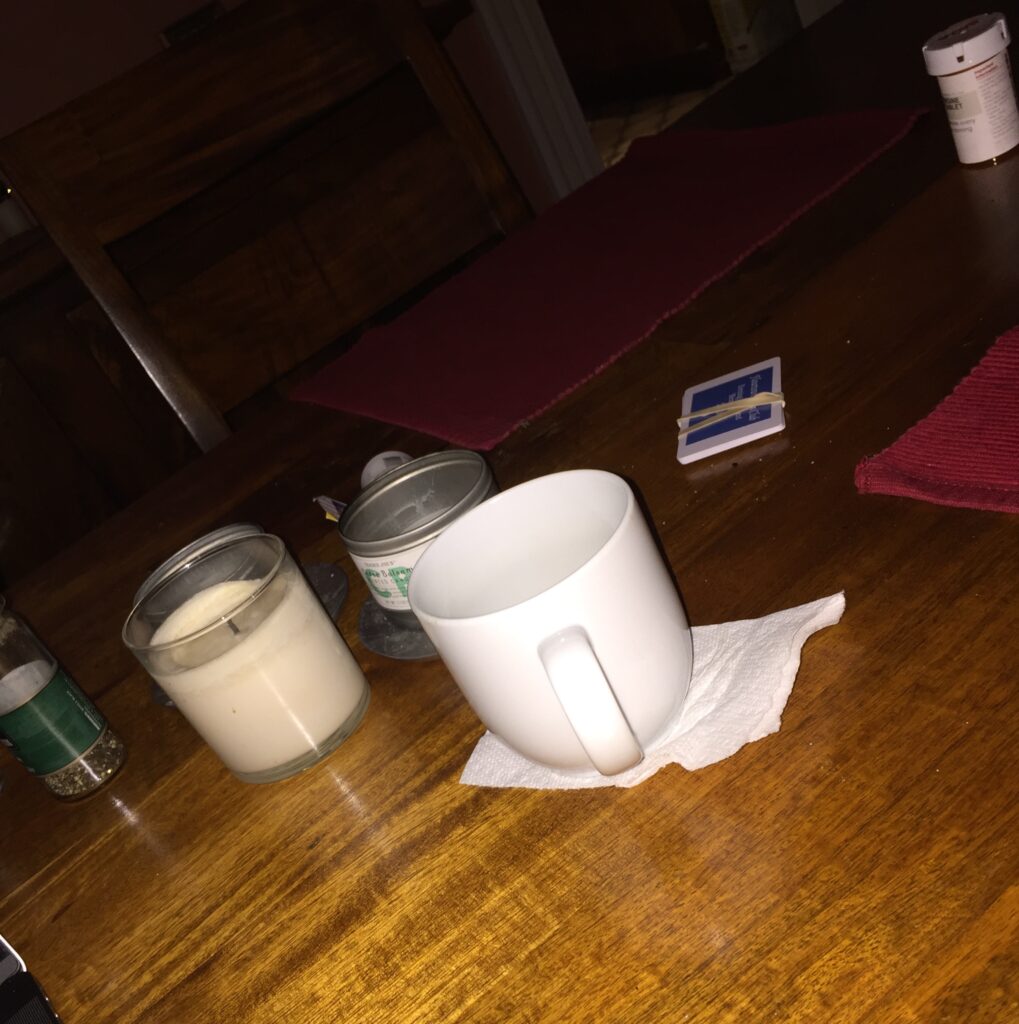
What is this even a picture of?!? Did my cat take this? Fluffy, let go of my iPhone, you’re blinding me with that bloody flash!
NICE

Ambient light, square format, just enough background with the focus clearly on the cup. It’s always nice with coffee!
The pictures you take for this are not random snapshots! They’re documentation of your work as a designer. It’s fine to use a smartphone camera—for many, it’s the best camera they own—but please be mindful of good photography practice.
Recommended photo tips
- Clean the lens! | When you pull your phone out of your linty pocket with your smudgy fingers, the lens gets dirty. Lens cloth and cleaner are best, and MakerSpace has some. But even wiping with your T-shirt is OK!
- Framing | Use the Grid to help compose your image. (In iOS: Settings>Camera>Grid. In Android: Settings>Apps>Camera>Grid Lines). Choose a frame proportion (like Photo or Square in iOS) and orientation.
- Composition | Your work is the focal point. Provide only enough background for us to understand this is an image of your fabrication in real space, and make sure everything the field of view is there because you want it there.
- Avoid digital zoom | Instead, move closer to your subject.
- NO flash | Always a terrible outcome! Use natural light or position indoor lights deliberately. MakerSpace has a light-box and phone tripod. Just sign up for an Open Workspace, and use these tools for easy, simple, professional results!
- Steady yourself or use a pocket tripod | Lean against a wall or furniture to help steady your hand. Otherwise, a small tripod is a good choice. MakerSpace has a phone tripod you may use.
- Play with editing and exposure | You can make color more saturated, crop an image, brighten a dark image or vice versa. But: avoid filters, please! They are a passé, gimmicky unforced error.