Topological transformations
Introduction: topological transformations
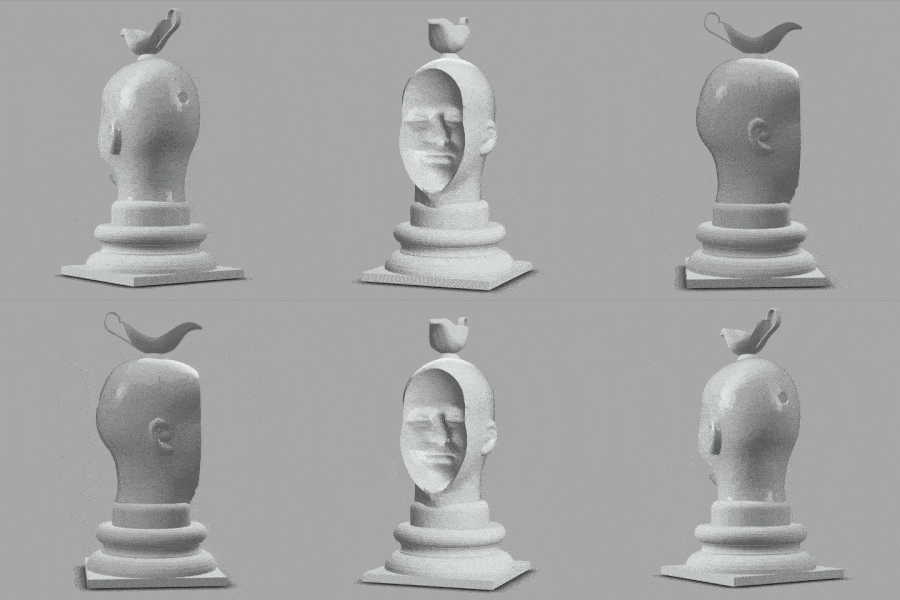
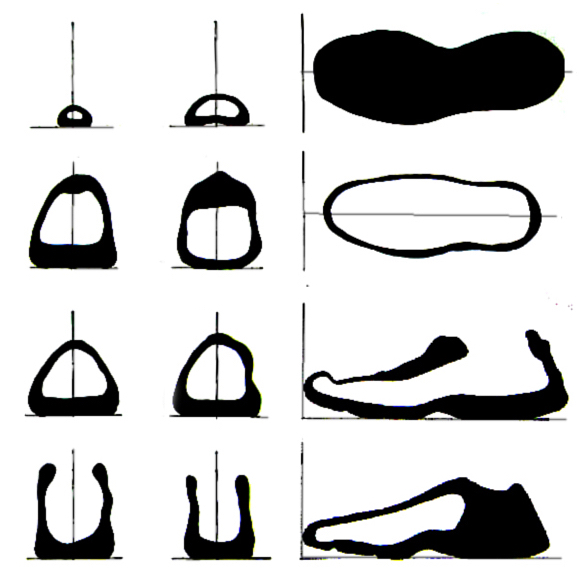
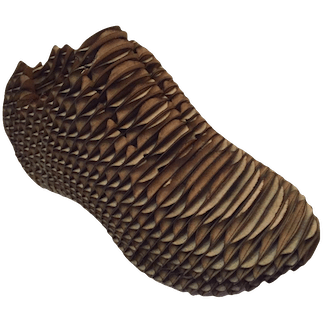
The goal of this work is to generate a topologically transformed object of your choice. The transformation occurs when we intersect the object with a series of stacking slicing layers or a modulated egg-crate system. Where the surface of the object mass intersects with such a system, it implies the form of the original object.
The transformation also implies a change of material: wood, acrylic, cardboard or some other flat sheet good suddenly takes on a dynamic, three-dimensional quality that is as beautiful as it is counterintuitive.

Reference object
Select the right kind of object
Your first task is to select an object from which to develop orthogonal reference planes. The criteria for the object:
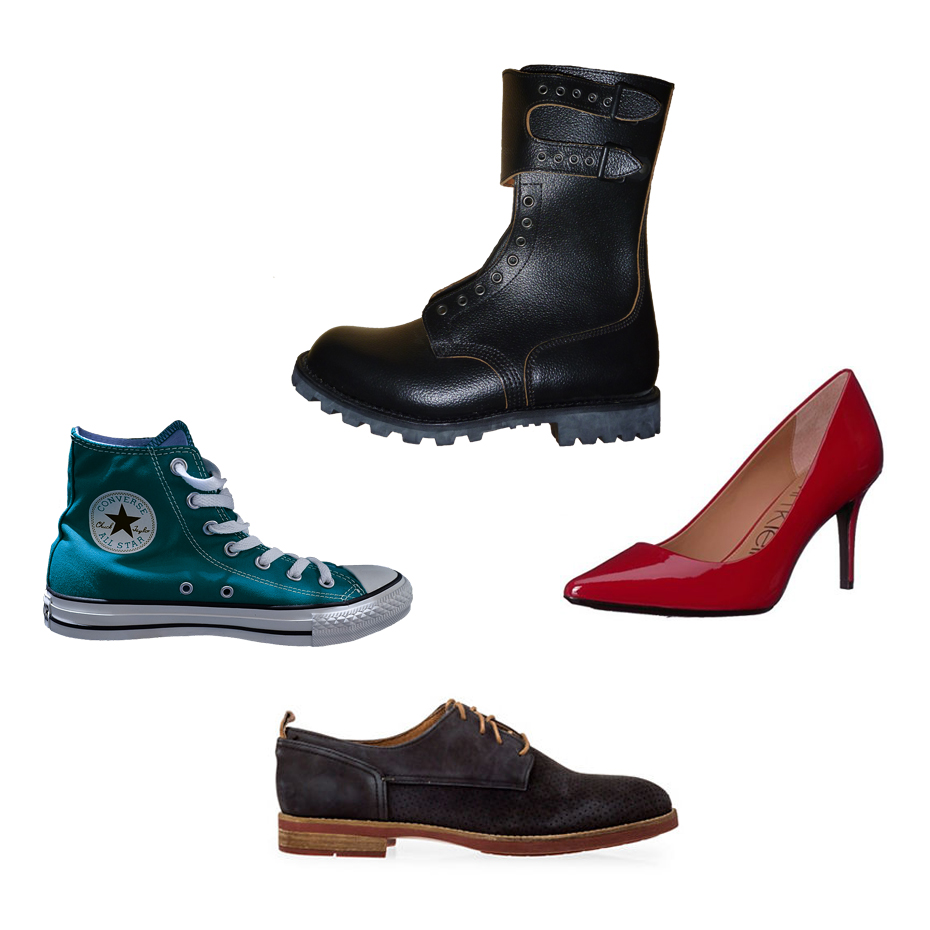
- Asymmetrical | Near-symmetry but with a clear datum (axis for near-symmetry, horizontal plane). Bilateral symmetry is allowed, but radial symmetry is prohibited. For example, if choosing a vessel, teapots or spray bottles yes, wine glasses or round bottles no.
- Volume | Object can contain an opening, but should primarily be volumetric. For example, if choosing a shoe, no sandals or open toes.
- Scale | You should be able to conveniently carry and measure.
- Analyze-ability | You should be willing to make marks or apply masking tape to the object for the purposes of analysis.
YES

NO
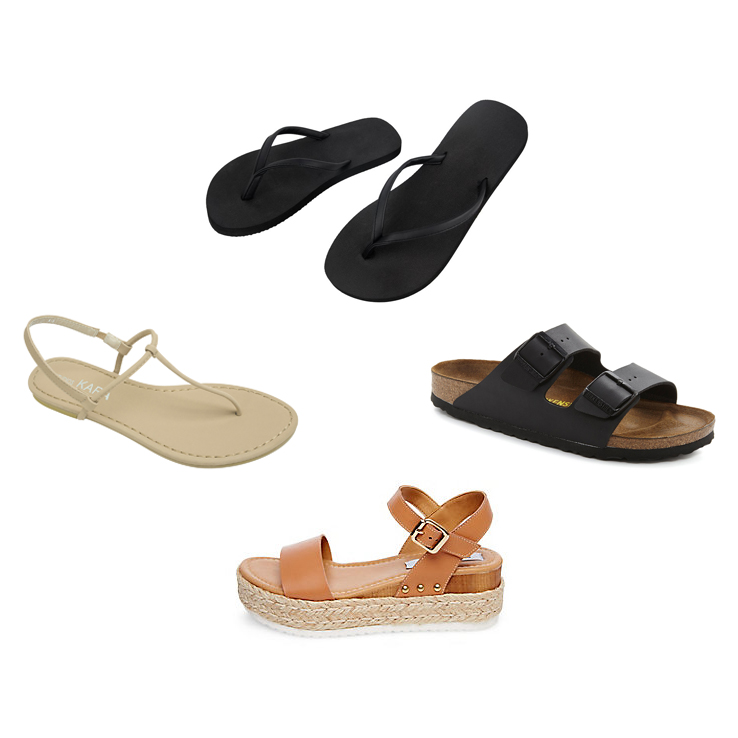

Choose for success
Popular items that work well but are not illustrated here include:
- SLR cameras
- Ergonomic computer mouse (interesting curves and near-symmetry, similar to a shoe)
- Game controllers
- Sea shells (like a conch shell, not like a clam shell)
- Small, semi-rigid tote bags (like a small Coach-style shoulder bag the size of a shoe, not like a big, floppy purse)
Riskier items
Gray area — items that could make the cut but have issues:
- Non-proprietary figurines (if no one owns the IP, it’s OK—but it could be too detailed or too small)
- Baseball caps (must be stabilized by adding a fill material like tissue paper, and the bill must be artificially thickened)
- Beats headphones (must be artificially “thickened” at the headband)
- Jewelry (must be a crazy large brooch, can’t be a tiny earring or a floppy necklace—could also have too much detail)
- Kitchen utensils (often too large or small, often too flat—though one of our best models ever was a gravy boat done by an advanced modeler!)
- Stuffed animals (Too furry and floppy most times, but if semi-rigid, it’s a possibility for an advanced modeler. Sometimes issues with IP.)
Definitely no!
Other items that have been rejected (and why):
- Proprietary figurines, action figures, or stuffed animals (Bipeds and quadrupeds are often too detailed, must have advanced modeling knowledge. And you don’t own the IP on Iron Man or Buzz Lightyear!)
- Book bags (floppy, too large)
- Motorcycle helmets (too large)
- Airpods (too small)
- Key rings (unstable, often too small and too detailed)
- Puppies or kittens (too squirmy—not a joke, someone actually asked!)
- Staplers, pens, other office supplies (generally not volumetric or interesting enough)
- Phones, laptops, external drives (Boring. Flat. Did I say boring? And flat.).
- ID cards, paper money, coins (You’re kidding, right? Yes, someone actually asked. See comment above.)
Hopefully, this gives you enough guidance to select an object that is interesting to you!
Analyze the object
Recall hidden geometries such as the concept of datum:
- In a sketchbook or other visual analysis tool, establish a datum or data.
- The ground plane — how an object sits on a table or the ground — is a datum.
- An axis (or axes) of symmetry is a datum (or data).
- The length of an object measured starting from one side? That starting point is a datum (example: place a shoe with the heel up against a wall — that wall is a datum).
- Carefully decide where these significant points of origin should be for your object. In the next project step, we will use them to draw the object.
- Download and print some graph paper at left. If you are taking a studio I teach, we have graph paper available at the Abington MakerSpace.
Concept
Create a 3-view orthographic drawing of the object
Using our analysis above, we will develop a 3-view-based orthographic projection of your object using a pencil on graph paper. Here, we can see a 3-view drawing of the top, side, and front view of a shoe. What is the datum (or if more than one, data?) What appears to be the unit of measure module creating station points?
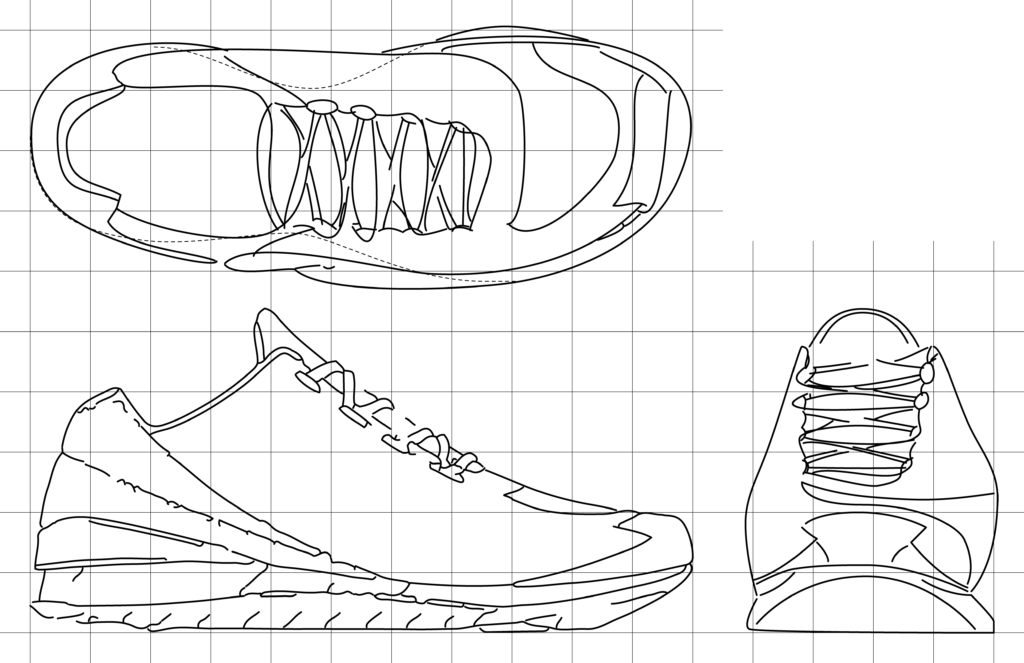
Object with near-symmetry: video demonstration
Creating this orthographic drawing can be hard. Here, we have a demonstration of the setup for the ortho drawing of the shoe. This is a detailed video demonstration lasting about 50 minutes. I have kept this demo at real-time length; expect your ortho drawings to take about the same time as this.
If you need to go back and review a particular step in the process, please reference the timestamp links below. These will open in the Youtube site, so don’t concurrently play the video above if you use the links:
- 00:00 — Introduction and description of tools
- 03:03 — Preparation of sample objects to draw
- 05:25 — Preparation of paper
- 10:13 — Establishing datum elements and station points on object
- 18:37 — Organizing ortho views on paper
- 19:50 — Drawing the top view
- 33:18 — Drawing the side view
- 40:44 — Establishing the 45 degree mirror projection line and drawing the front view
- 47:17 — Drawing internal detail
Other kinds of objects
Your object may exhibit different properties than the demonstration, and this may suggest alternatives to the workflow.
Object based on bilateral symmetry
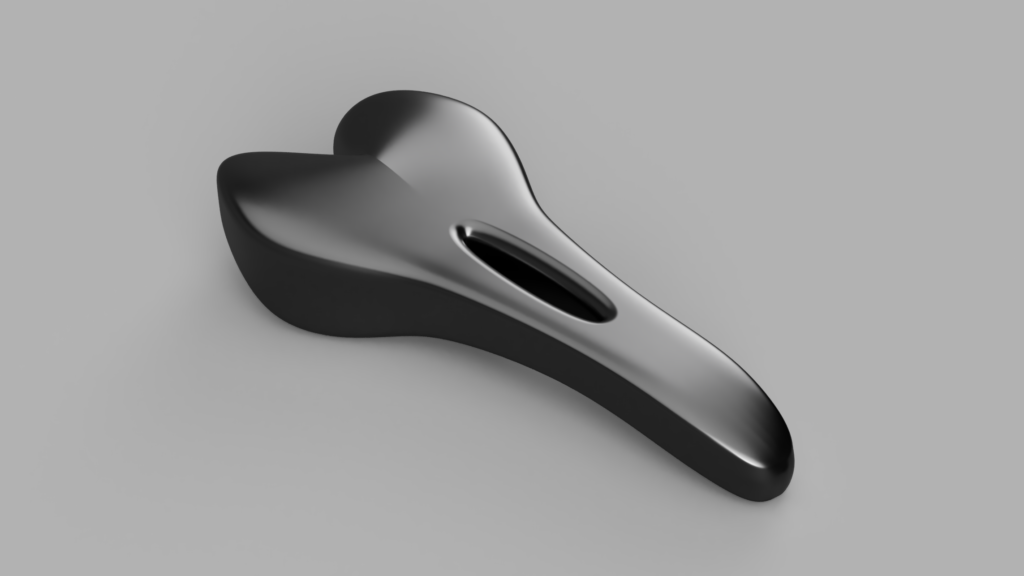
Unlike the shoe, which has near-symmetry, your bike seat tutorial is an object that contains pure bilateral symmetry. When drawing such objects, however, finding the datum for various views will be identical to the shoe: a centerline and edge for the top view, a ground plane and edge for the side, and ground plane and centerline for the front.
Object based on a cylinder primitive
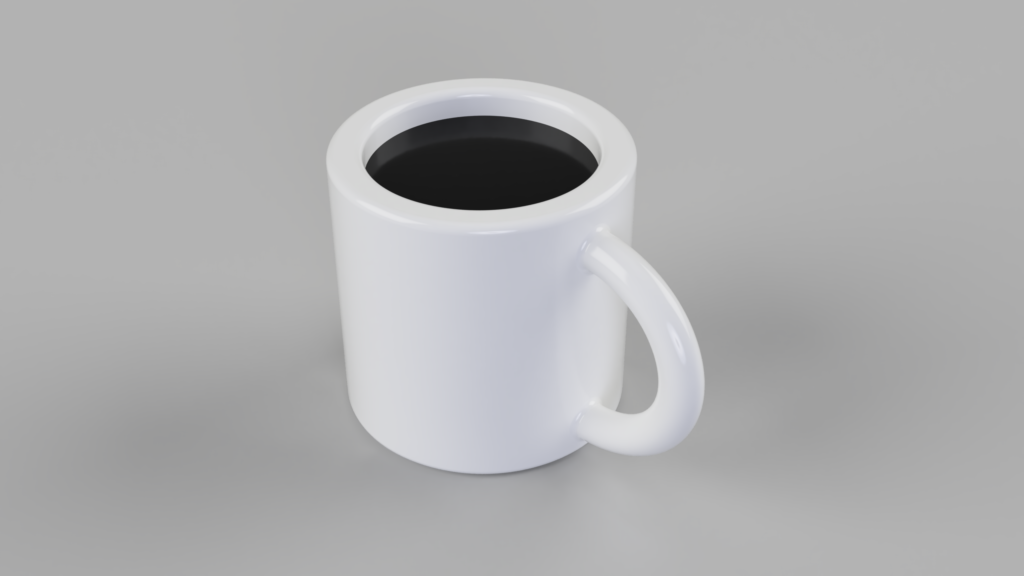
Like the bike seat, this coffee cup model has bilateral symmetry, but it’s also based on a cylindrical primitive. If part of your object is based on rotational symmetry or has no obvious edge, it will contain two centerlines to find the axis of rotation. The datum for the various views would be: two centerlines for the top view and a centerline and ground plane for the side and front views.
Object based on combined bodies
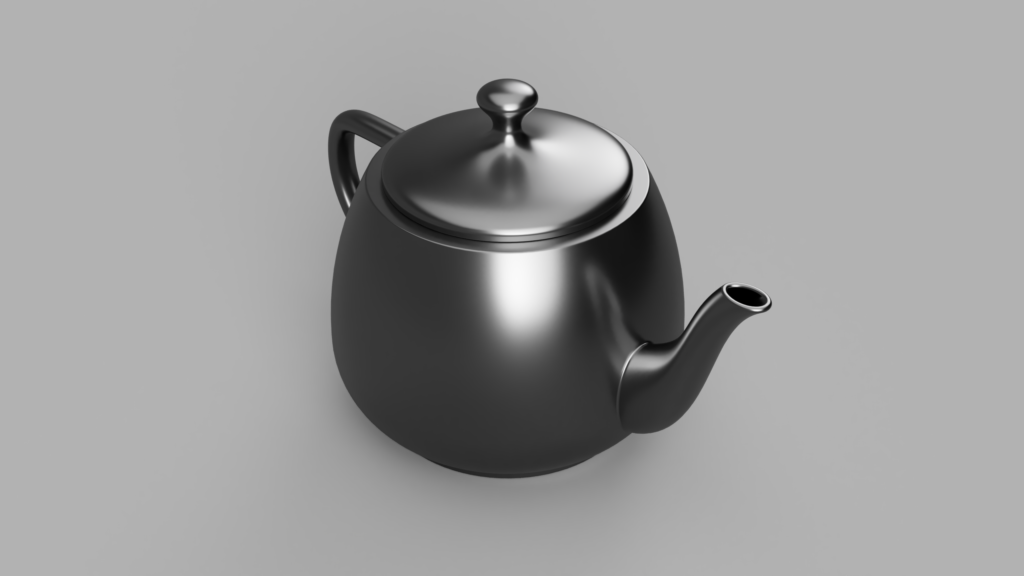
Like the cup, this tea pot can be based on a cylindrical primitive. It also contains a handle like the cup. In addition, it has a lid and a spout.
Instead of trying to tease the handle, spout, and lid out of a single body, you can use a Combine to make one body out of multiple bodies. Recall the hole in the bike seat exercise: instead of subtracting, we would use the Combine function to Join.
When you draw an object that looks like it would be easier to model this way, try to visualize the different bodies in the drawing. For this pot, I might draw how the lid, spout, and handle might intersect the main body of the pot, each as their own object. How much overlap should you create to make an effective Combine?
Digitize the drawing
After you’ve completed your drawing, use a good-quality flatbed scanner to digitize it. You may have your own scanner at home, but if not, you may use the flatbed scanner available in MakerSpace, either during class, or by making an appointment for an open Workshop Space.
After saving your 3-view scan as a .jpg or .png file, break it up into separate drawings:
- Duplicate the digital file until you have as many copies as there are views… 2 or 3.
- Open one file in a simple image editing program like Preview in Mac, and locate the top or front view.
- Drag a marquee to isolate the drawing, and crop it. In Preview for Mac, use Command+K to crop. Name the file after the view on save as .jpg or .png.
- Repeat the process for the remaining view(s).
Use these digitized sketches to fulfill the Concept phase of the project. Post them in your process journal or blog.
Iteration
Hello Fusion 360
Import orthographic views
The individual view images can now be brought into Fusion 360 as reference planes as Canvases, such as you learned about in the LInkedIn Learning bike seat tutorial. As you are working in your new file, remember:
- Set your units to the preferred type (inches or millimeters) under Document Settings in the Browser.
- Orient the drawings by importing them to the correct plane.
- Calibrate the drawings so they have the right relationship to the units.
- Move the drawings into the correct location based on the datum of the various views.
- And, be analytical: chances are you only need two out of the three drawn views to model. Which ones will work best for you?

The process of modeling
Use knowledge gained in the bike seat tutorial work to model your object. Try not to over-model: this is a surface model, and minor changes in material in the surface will not be seen.
- RESOLUTION OF MODEL | Remember the end game is a volumetric description of the mass of the object, to be cut out in layers or an egg-crate in a fairly thick material. A good rule of thumb to evaluate whether a detail is worth modeling: is it smaller than the thickness of your material stock? That thickness determines the resolution of the model. With cardboard, that’s about 3/16 inch.
- OPENINGS TO INTERIOR SPACES | What if your object has an opening to an interior space? The trick here is to imply the interior without actually modeling it. Create an indentation at the opening of about a quarter to a half inch, allowing the lip of the opening to be articulated but keeping enough mass in the model otherwise. If necessary, exaggerate the thickness of the lip material so that it can be rendered in your material. A good rule of thumb is to make this lip at least as thick as the material stock.
- WHAT TO KEEP? | Another funky issue arises when encountering details like straps on a handbag, shoelaces, or other flimsy forms. Avoid any outright floppy or highly changeable form: if the strap or lace moves around too much, don’t include it.
Saving historical states
Saving historical states of the project is a fundamental habit of digital discipline. What do we mean by historical states? Simply that we save the model to a significant general level of completion, copy the file, and then continue working with the new copy.
There are several important advantages to saving historical states:
- If you don’t like where your model is going, you don’t have to start completely over. Just go back to the last satisfactory historic state.
- If you want to document iterations of modeling, there’s no better way than having states of the model that directly reflect your process.
- If you run out of time, you have something that is presentable at a general level of completion based on the level of detail you reached at the last historical state.
In my shoe sample, you can see the historical states listed in the data panel:
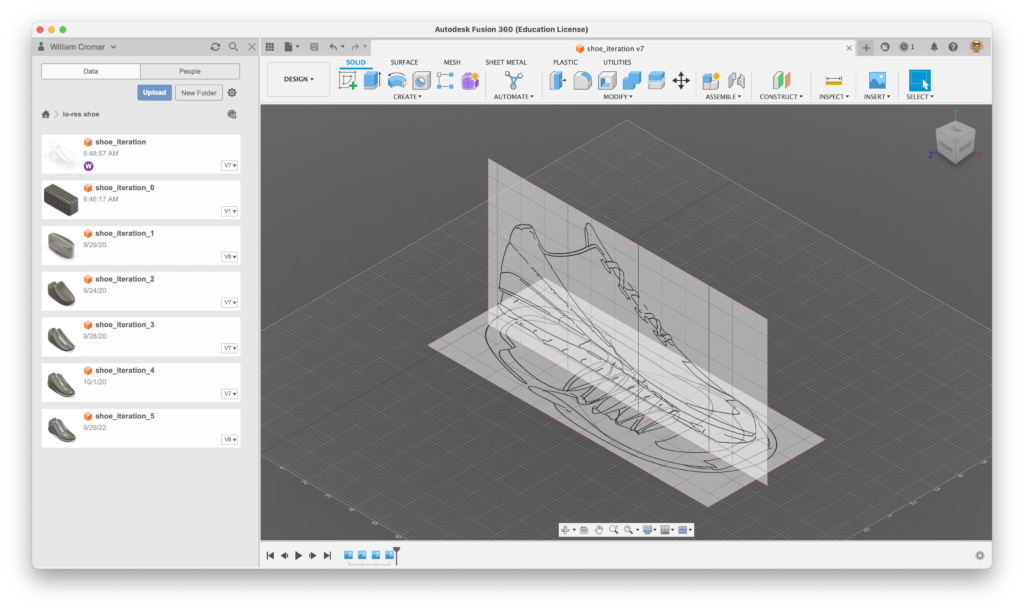
Each one of those states represents a significant stage of the process: placing the Canvases, modeling the primitive, solving the top view, solving the side view, etc. Those stages are detailed in a pair of video demonstrations below.
Video demonstrations
These videos are a real-time documentation of the modeling of my sample shoe. Don’t be intimidated by it: work to the level of detail that is appropriate for your level of modeling experience. You can see it’s taking me about 90 minutes overall to make this model. If it’s taking you longer, that’s OK. However, your model should not exceed 3 hours of effort. We’ll discuss this more under Synthesis below.
Part 1: beginners
If you are a beginning modeler, aim for this level of detail.
Part 1 shows how to import and calibrate ortho drawings, model the top profile, model the side profile, and develop a smooth curvature between the two ortho views.
Timestamps for steps in the process are below:
- 00:00 — Introduction and description
- 01:40 — Inserting, calibrating, and moving Canvas reference images
- 04:50 — Creating and positioning the body
- 07:02 — Profiling the top with symmetry, selection sets, scaling faces, and moving edges
- 14:25 — Working with Soft Modification
- 18:44 — Profiling the side
- 30:19 — Resolving ortho views with curvature
- 39:27 — Next steps for part 2
Part 2: advanced modelers
If you are an advanced modeler, aim for this level of detail.
Part 2 shows detail using adding edges, making creases, and creating the inference of a hole, then finishes off by showing how to distort symmetry into a true shoe shape.
Timestamps for steps in the process are below:
- 00:00 — Introduction and description
- 01:31 — Overview of creases, adding edges, bevels, and deformations
- 04:05 — Adjusting edges to receive a crease
- 15:45 — Creating and scaling a crease
- 19:02 — Adding edges to develop more geometry for detail
- 21:23 — Emulating a hole in an object
- 22:00 — Deforming to create the undercut
- 32:01 — Applying a fillet in solid modeling space to soften a corner
- 34:02 — Deformation for overall asymmetry with large Soft Modifications
Use the historical states of your model to fulfill the Iteration phase of the project. Post them in your process journal or blog. If you need assistance with embedding the models, visit Embeds.
Synthesis
When you are satisfied with the level of your model, bring it into the Slicer add-on you practiced in the exercise. If you have run into difficulty completing a model to your satisfaction, be mindful of a couple of things:
- Completion is better than perfection | It is very easy to go down the perfectionist rabbit hole when 3D modeling. Don’t! Remember your material stock is a very low resolution corrugated cardboard and you can waste time on perfecting details no one will ever see. The product is not the model: it’s the fabricated object!
- Something is better than nothing | Since your model is an abstraction of an object, and not the object itself, a selective level of detail can be a feature, not a bug. What level of detail expresses the essence of the object to you? That’s really your focus.
- What happens if I miss the boat? | You’ve created the bike seat model: use that if the project model turns out to be a failure. Don’t toss out your failures! The are part of the process. Use them in your process journal or blog, and reflect on how you pivot to an alternative when things don’t go as planned.
To the Slicer: layers or egg-crates
Choose whichever style of slice makes the most sense for your project, but be aware of the number of sheets it creates. We’ll determine the number of sheets allowed per class based on enrollment, but this will always be a variable to limiting tooling time. If there are too many sheets based on that standard, change slicing style and/or scale the object. The typical limit in one of our studios at school is 2 sheets of 11 X 19 corrugated cardboard.
Material thickness
Use a digital caliper, such as we have available in the Abington MakerSpace, to find the thickness of your material BEFORE you slice. Take a measurement in three different places on the material: you’ll be surprised that there may be as much as a 10% difference in thickness on one piece of stock! This is normal. Use the average of the three thicknesses, or just take the middle value of the three if they are close.
Generate layout vectors
Slicer creates a PDF for your vectors, as you did with your exercise. Below see an example of the PDF exported from Slicer, generated from the sample shoe project below. This project is an example of a stacked layer configuration. Based on the size of the model, material thickness, angle of slice, and format of material sheet, Slicer will auto-generate an optimized layout of vectors.
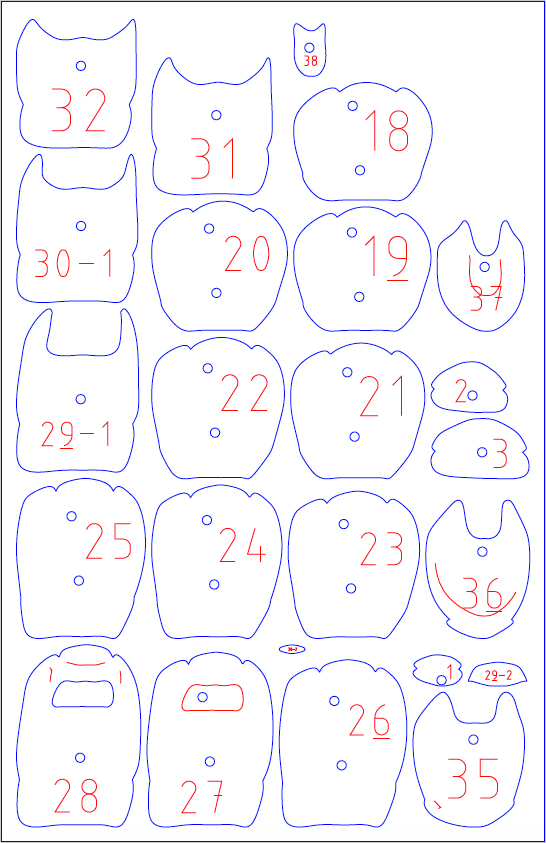
The PDF in the sample is a 2 page file…
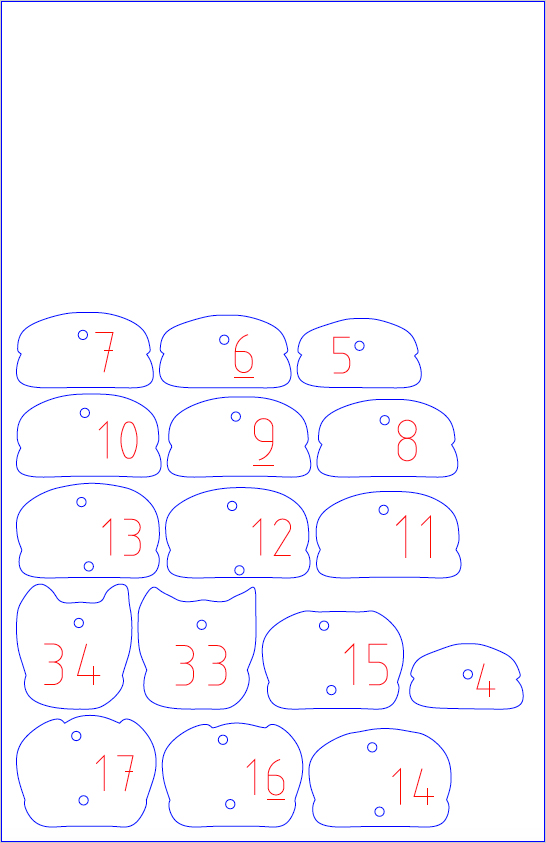
… corresponding to the 2 sheets generated by Slicer
Optimize the PDF in Illustrator
The numbers Slicer generates are vector objects, not text. They are far too large and intrusive, increasing laser time and leaving unsightly engraving marks. You need to move them to a new layer, which can be turned off in the laser interface so they don’t get cut. This can be done in Illustrator.
But this is not so easy! The PDF that Slicer creates is wonky, filled with linked files, groups, and clipping mask objects. Thanks, Autodesk.
Those unnecessary artifacts must be disabled before you can isolate the red vector objects.
Video demonstration
This video shows you how to go through the Slicer step-by-step, and also shows you how to optimize the PDF in Illustrator. Time stamps for reference:
- 00:00 — Introduction and description
- 00:40 — Fusion model to Slicer
- 02:02 — Creating custom sheet size
- 05:01 — Creating stacked slices
- 05:54 — Scaling stacked object sized for two sheet output
- 07:23 — Model issue detection
- 08:26 — Creating dowel registration
- 11:05 — Creating PDF
- 12:15 — Open PDF and embed objects
- 14:09 — Release and ungroup clipping mask
- 15:35 — Applying stroke width to blue vector cut lines
- 17:44 — Isolating red stroke objects on new layer
Use the fabrication-ready file of your sliced model to fulfill the Synthesis phase of the project. Post the PDF link in your process journal or blog, and export a .jpg or .png to illustrate it as an embedded image. If you need assistance, visit Embeds.
Next: Fabrication
The laser engraver does two things: it can cut through material, and it can etch a surface. To take advantage of both of these ways of working we’ll bring two files to the machine:
- The file you created in the Logo etch exercise will engrave a rubber stamp.
- The file you created here will cut cardboard into 2D model pieces that you can assemble into a 3D object.
The laser is by far the most dangerous machine in the shop, but you will be trained to operate it safely!
