

Pacing
Pacing: controlling duration with MovieClips
Pacing refers to the rate of speed with which something occurs. In music, the word tempo suggests certain beats-per-minute (bpm) rates indicated by terms like largo (40-60 bpm, slow and dignified), moderato (108-120 bpm, moderate), or allegro (120-168 bpm, brisk), which are times indicated on a metronome. Play around with tempo on this beautifully coded metronome by Ezekiel Victor.
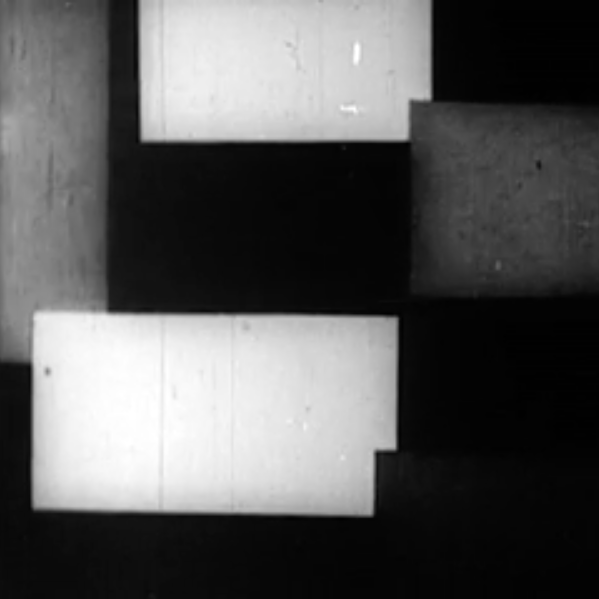
Pacing is key to Hans Richter’s film Rhythmus 21 (1921). With the most simple forms, Richter was able to explore the transformations of shapes over time through size. Everything is understood through an even, consistent pace, which leads to a contemplation of the purity of form.
In the 1970s, Lillian Schwartz made cutting edge experimental computer animations at Bell Labs. Her work may look like the earlier Richter animation, but the video was programmed using a computer. Her process was similar to our exercises. In her 1971 animation UFOs, the introduction of the computer results in faster edits and elemental shapes. The psychedelic aesthetic fit the topic. WARNING: Video may trigger viewers with photosensitive epilepsy — discretion is advised.
Library and symbols
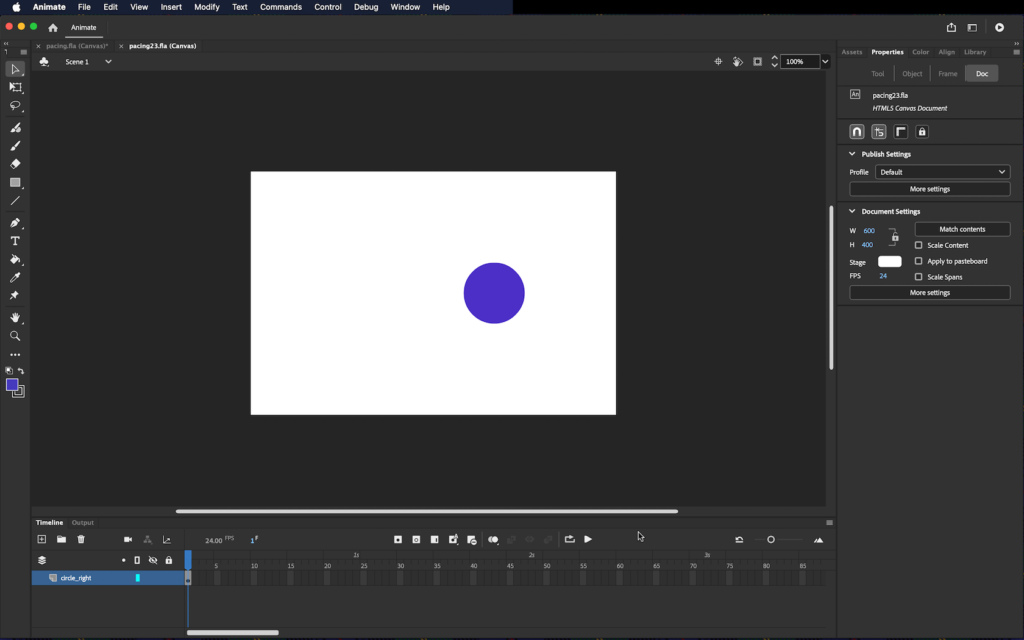
Open Animate and click the HTML5 Canvas button in the Create New area of the Animate startup window, to create a new document. In the Properties tab change the Canvas size to 600 X 400 px.
Double-click Layer 1 and rename it circle_right. Using the Oval tool, hold the Shift key to draw a circle on the right side of the Canvas. The circle is added to the first frame in the Timeline. Use the Position and Size values under the Properties tab to set the W (width) and H (height) values to 100 px, then the X to 350 and the Y to 150 to set the origin at a precise location. As we did in the previous exercise, delete the stroke object, leaving only the fill object with no stroke.
Tip: Holding the Shift key while drawing constrains the ratio of the shape proportions to be equal.
Note: Don’t forget that whatever happens on the Canvas corresponds to a frame in the Timeline.
Creating a Symbol from a shape
In the Rhythm exercise we used shapes. Now we are going to convert our circle from a shape into a Symbol. Symbols are reusable graphic or textual elements stored in the Library panel. When we drag a Symbol to the Canvas, we are actually using an instance — a kind of copy — of the Symbol.
In a non-programming metaphor, you could think of cat as a symbol and your particular cat as an instance of that symbol.
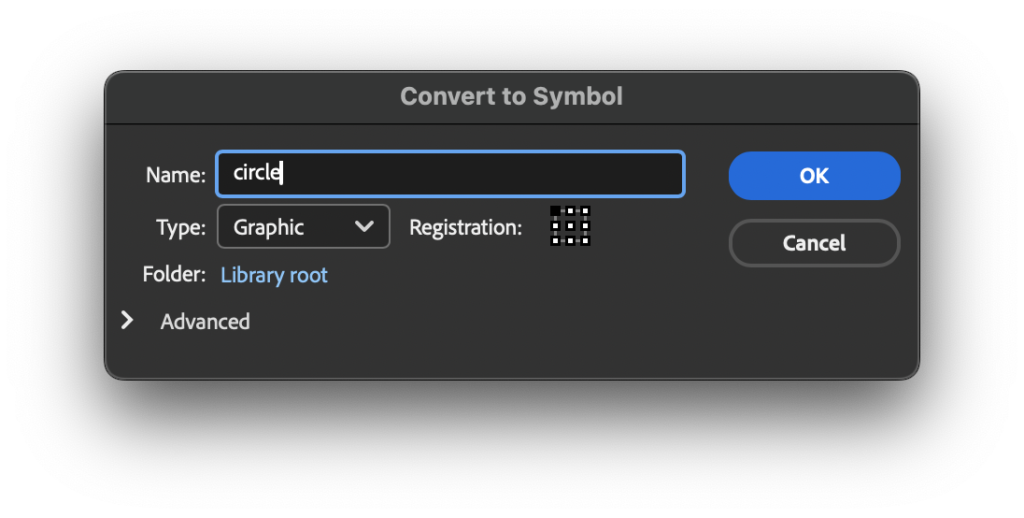
For each instance, we can change certain properties of the original Symbol, like color, size, transparency, position on the canvas, and so forth. However, if we make a change to the Symbol itself, such as changing the shape from a circle to a square, it will be reflected in all instances of the Symbol. Select the circle with the Selection tool and then choose Modify > Convert to Symbol. Name the new symbol circle and choose Graphic from the Type pull-down menu.
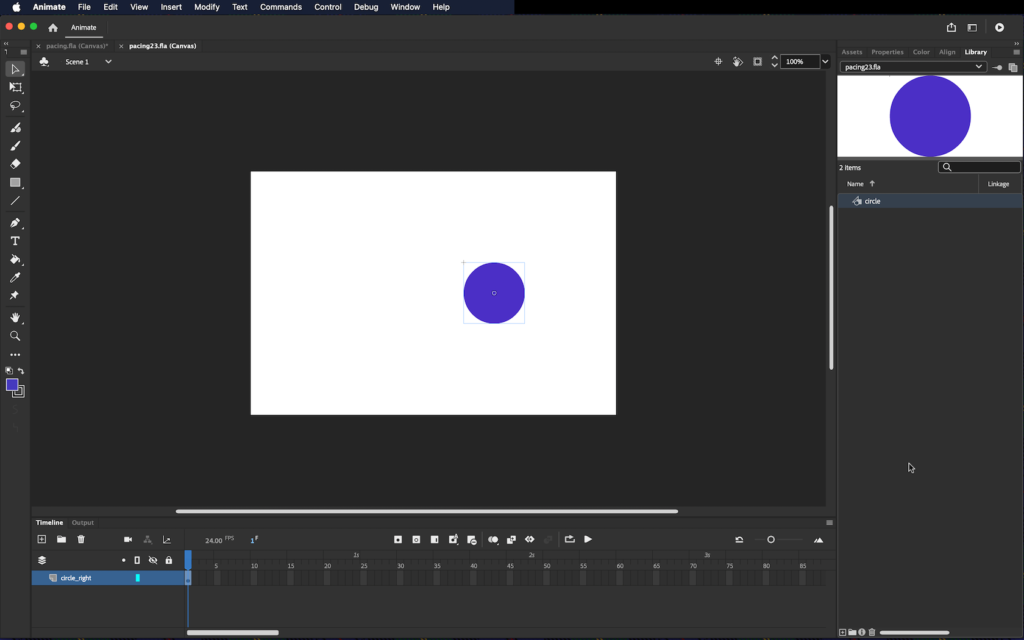
Click on the Library tab behind the Properties panel to see circle included in the Library as a Symbol.
Tip: If the Library panel is not open, click Window > Library. All panels are accessible from the Window Menu.
Look on the Canvas and notice the attributes of the Symbol. The circle has a blue square around it and there is no option to reshape the circle when you mouse over its edge.
Instances of symbols
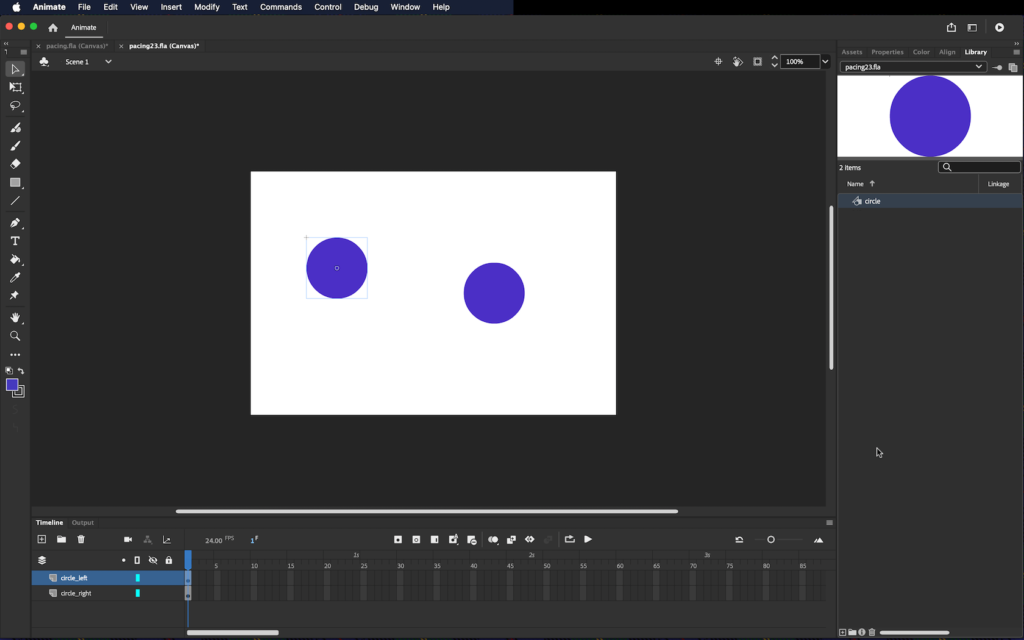
We can store a Symbol in the Library so that it is always available to use on the Canvas. The circle that is on the stage is called an instance of the Symbol. Instances can be modified independently from the saved symbol. We can delete the circle from the stage and make another instance by dragging the symbol out of the Library onto the Canvas. We can also have several instances on the Canvas at the same time and animate them without changing the original symbol in the Library window.
Add a new layer to the Timeline called circle_left.
Create a new instance of the circle by dragging the Symbol from the Library to the left side of the Canvas.
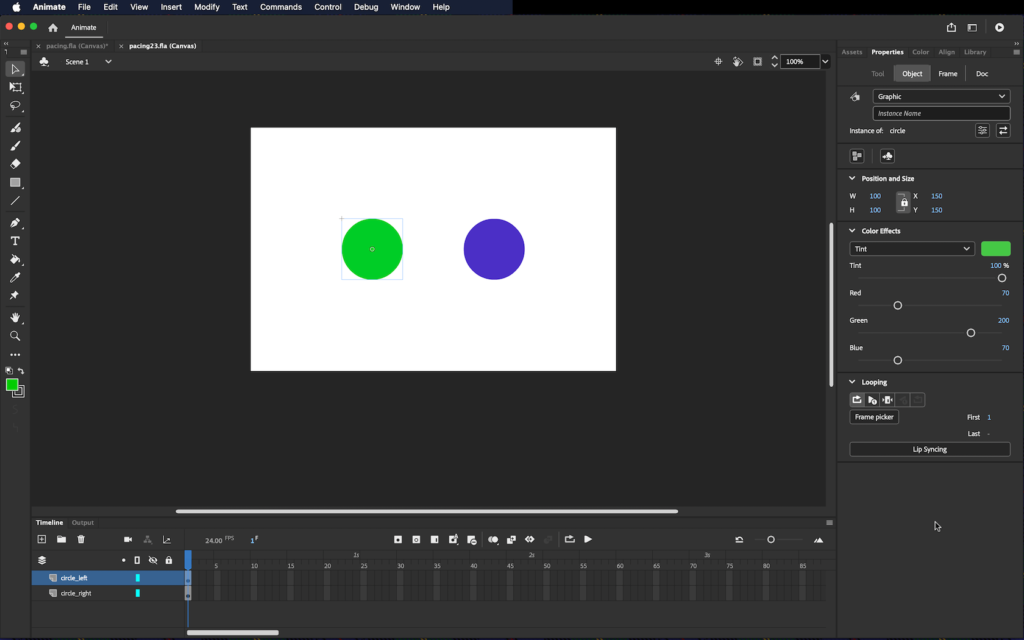
Change the color of the new instance on the Canvas. If you change the color of the circle by double-clicking on it and filling the shape, you will change the color of the symbol so that every time it is used it will be the newly selected color. Instead, to change the color of the instance only once, use the Color Effect portion of the Properties panel. Select the left circle with the Selection tool then choose Tint from the Style menu beneath Color Effect. Modify the Tint, Red, Green, and Blue values. Our values were 100%, r70, g200, b70, but you can make any modification. While in the Properties tab, use the Position and Size values to change the origin: X to 150 and Y to 150.
Classic Tween
The word “tween” derives from “in between.” Classic Tweens are used to animate properties of Symbols without changing their shapes. They create frame-by-frame animation for properties, such as changing the position, scale, color, or opacity of a symbol over time. Instead of having to draw sixty frames of one circle moving across the Canvas, you can position the circle in one area of the Stage in Frame 1, in a different location or even off the Stage in Frame 60, and allow the computer to draw all of the frames between 1 and 60 so that the circle appears to move.
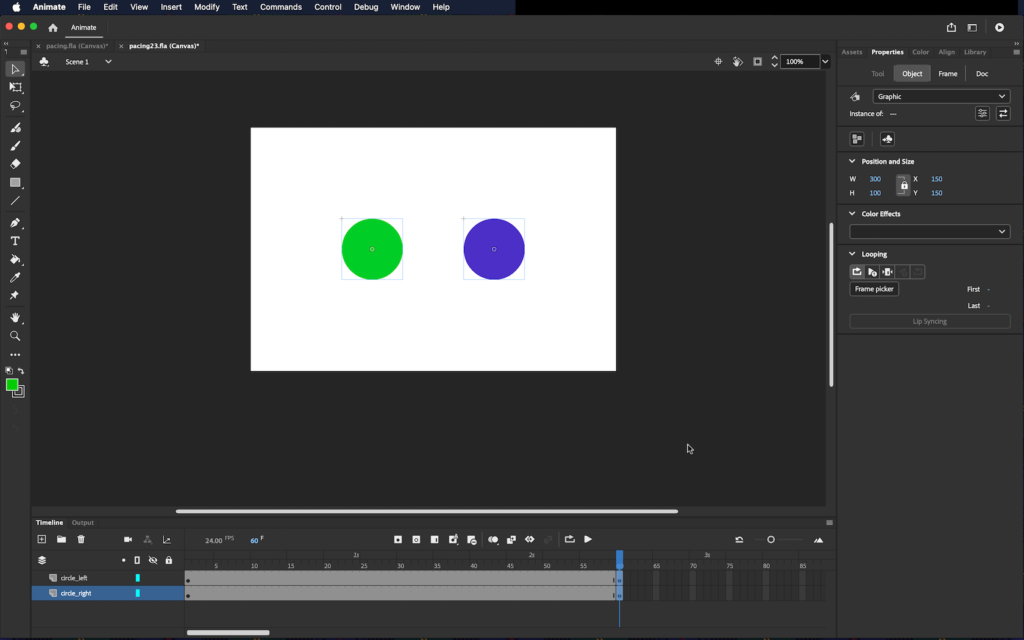
Insert a new keyframe (like we did in the previous exercise) at Frame 60 in the Timeline on both of the layers.
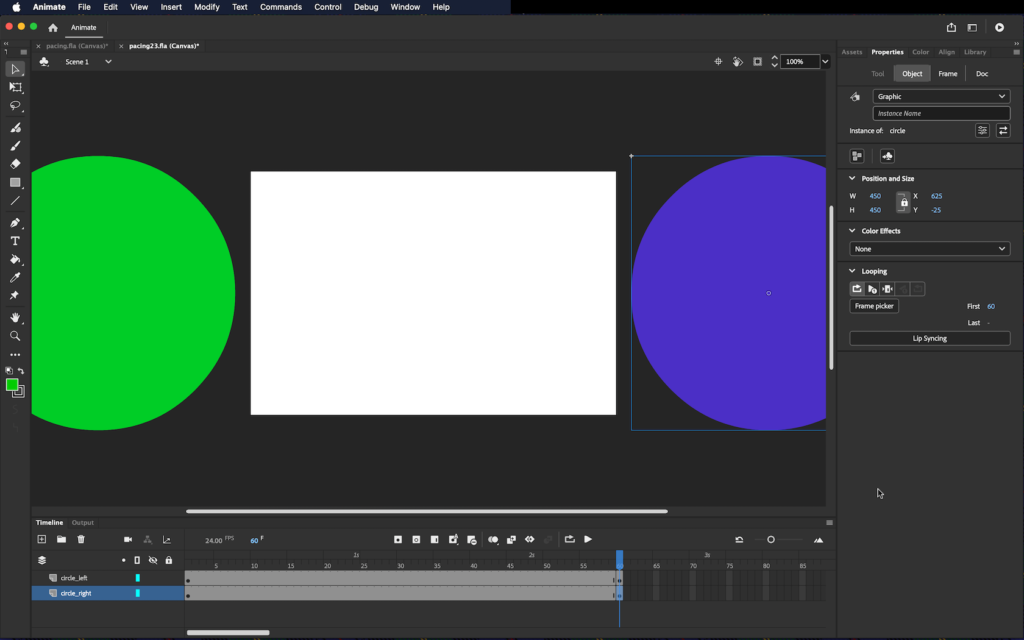
Now start with either of the two layers. Click on alternating keyframes at frame 60 to make either active. Scale the instance of the circle so it is larger than the stage using the Free Transform or Scale tool. Hold Shift while transforming. In the Properties tab Position and Size values, make W and H 450. X and Y should be -25 and -25 for the left circle, and 175 and -25 for the right circle. Move the large circles off the stage — move the left circle to the left and the right circle to the right. Position and Size values for the left circle X and Y should be -475 and -25, while for the right 625 and -25.
You should be able to toggle between Frame 1 and Frame 60 to see that you have two small circles on either side of the stage on Frame 1 and two large circles positioned off the stage at Frame 60.
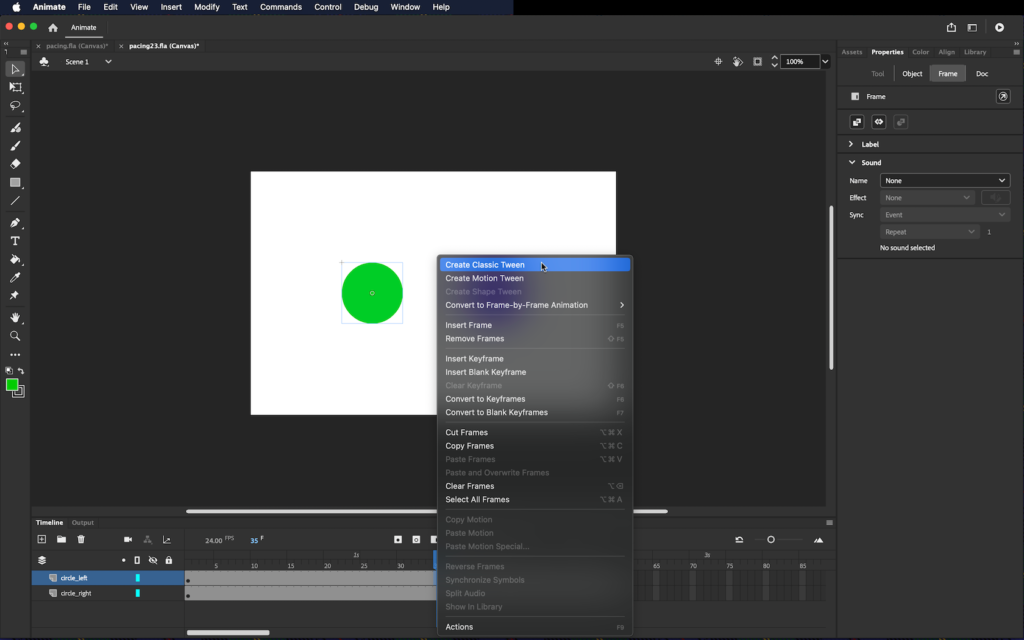
Adding a Classic Tween
Add a Classic Tween between frames 1 and 60 on each layer, one at a time. Position the mouse over any frame between 1 and 60 on one of the layers and use the contextual menu (Control-click or Right-click) to choose Classic Tween. Repeat this on the second layer. Choose Play from the the Control Menu. Now the circles move off the Canvas. The circles increase in size, but the shapes remain intact.
Creating a fade
We can use Classic Tweens to change the transparency of a Symbol, as this type of modification does not result in a change to the shape of the instance on the Stage. Alpha in Animate means transparency, much like an alpha mask controls transparency surrounding an image. We will modify the alpha values on Frame 60 of each layer, one at a time. Adding a keyframe for alpha on Frame 60 is the cinematic equivalent of fading out.
Start with one layer. With the Selection tool, click on Frame 60 in the Timeline then click on the instance of the symbol on the Stage. Change the alpha value of the circle instance to 0% by choosing Alpha from the Style pull-down menu in the Properties panel.

Note: Remember, the Properties panel displays property information for whatever is active. So if you click on a frame, you can see and edit properties for that frame. If you click on a Symbol on the Canvas, you can see and edit properties for the instance.
Repeat this process for the other layer. Then Test the movie and watch the frames fade out over time.
Animating the Symbol
Symbols can also be animations with independent timelines. For example, a circular symbol could morph between an oval and a circle in its Symbol Timeline. Then, the animated symbol could move across the Canvas in the Document Timeline. The pace of the moving symbol across the Canvas is determined by the number of frames used in the Document Timeline, while the pace of the morph between the oval and the circle is determined by the Symbol Timeline.
Creating a Movie Clip Symbol
Find the icons at the lower left of the Library tab. The one at the far left creates a New Symbol.
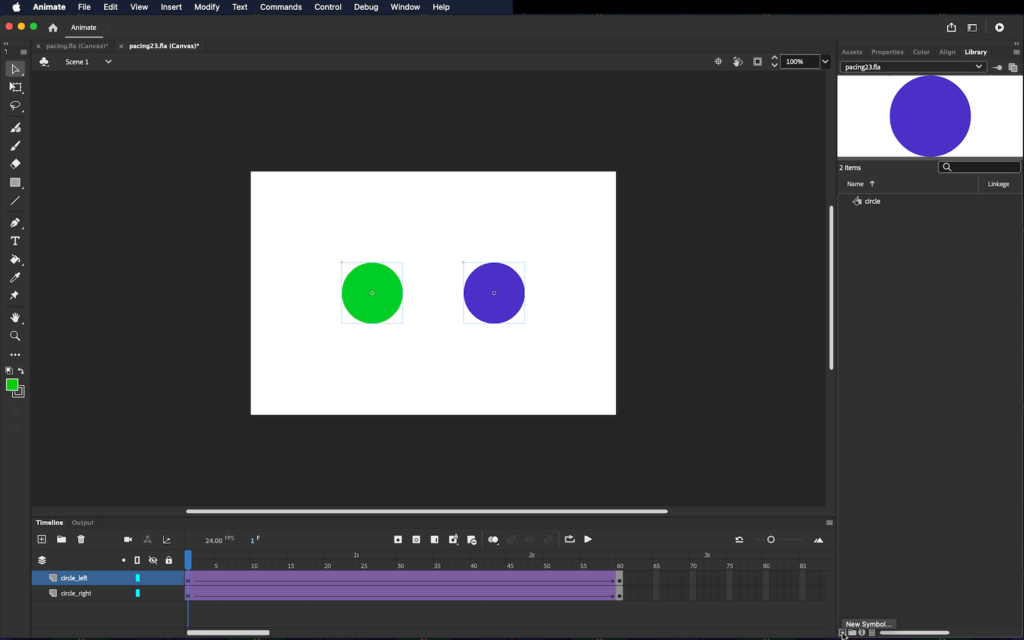
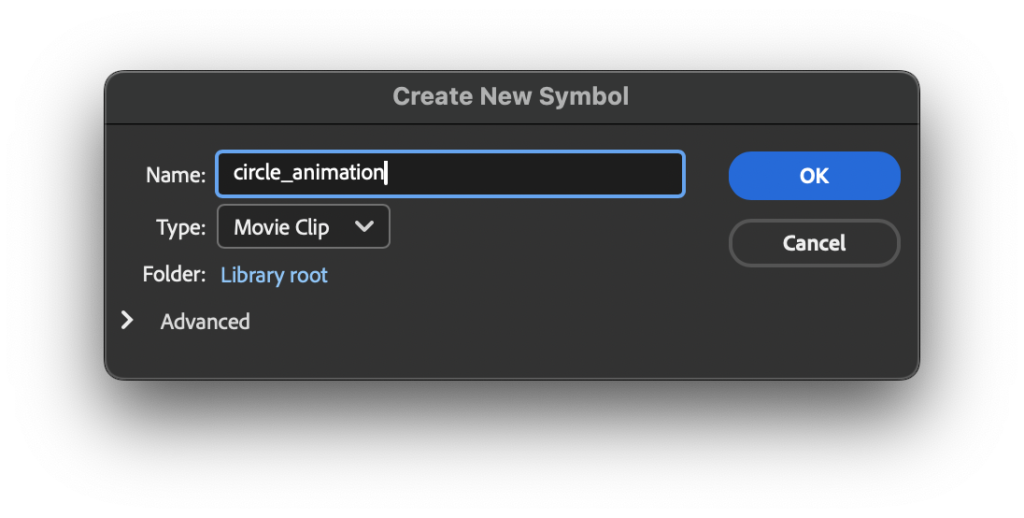
Using the New Symbol icon, create a new Movie Clip Symbol, and call it circle_animation.
Double-click on the symbol in the Library and it will open in Symbol editing mode. This mode allows you to edit the Symbol. Any edits made here will affect all instances of the Symbol.
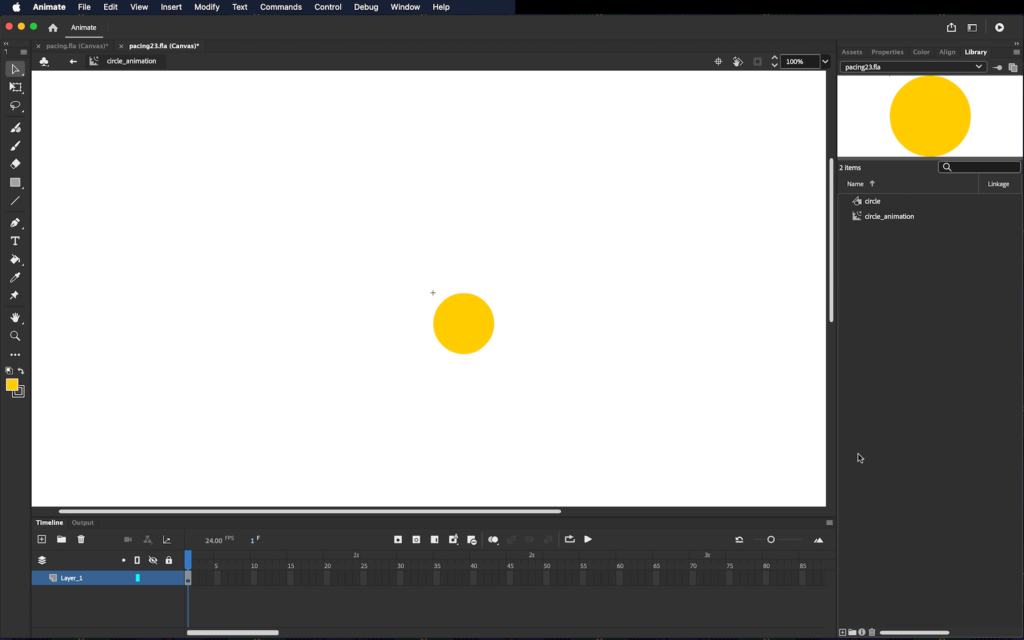
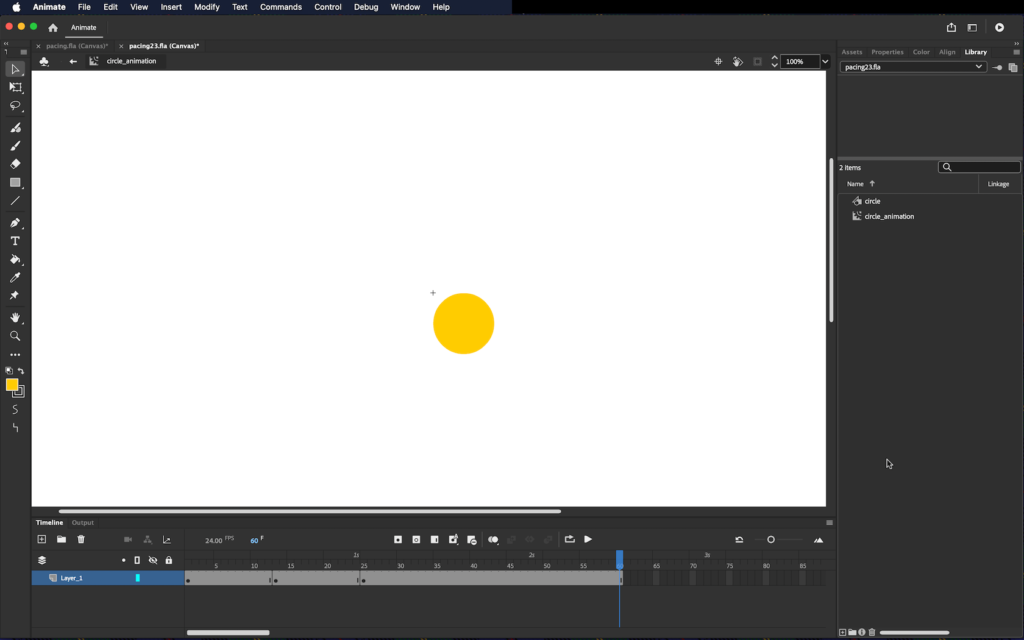
Note: For the next 5 steps, where you see the yellow shape, we are working in the circle_animation Movie Clip Timeline.
Use the Oval tool to draw a 100 px circle at an origin of 0 for both X and Y (see Properties tab) on the Canvas in Frame 1 of the Timeline with any fill color — we used yellow — and no stroke applied.
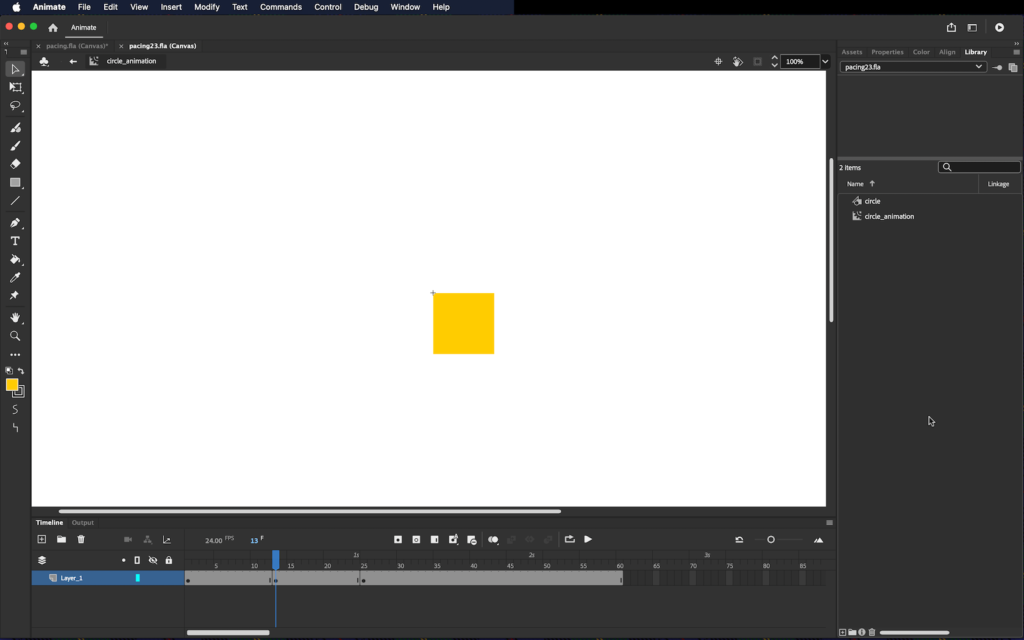
Insert keyframes in the Timeline on Frames 13 and 25, and make sure the whole timeline runs to Frame 60.
Select keyframe 13 and delete the circle from the Canvas. Checking size and position in Properties tab, draw a 100 px square at the same X Y origin using the Rectangle tool. Now you have a square in keyframe 13 where you used to have a circle.
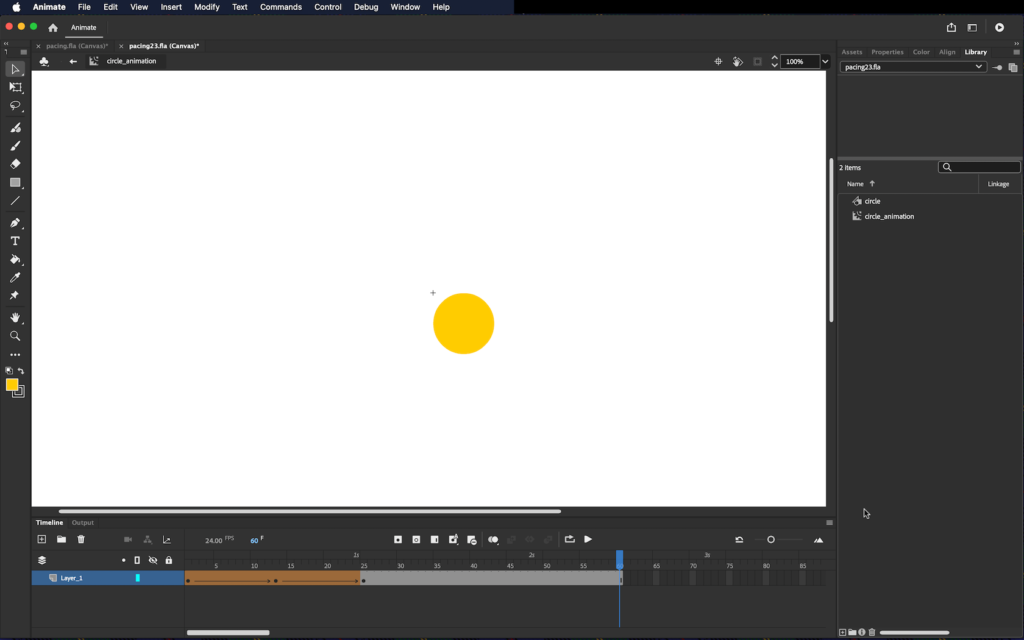
Control-click or Right-click on a frame in between keyframes 1 and 13 to select Create Shape Tween from the contextual menu.
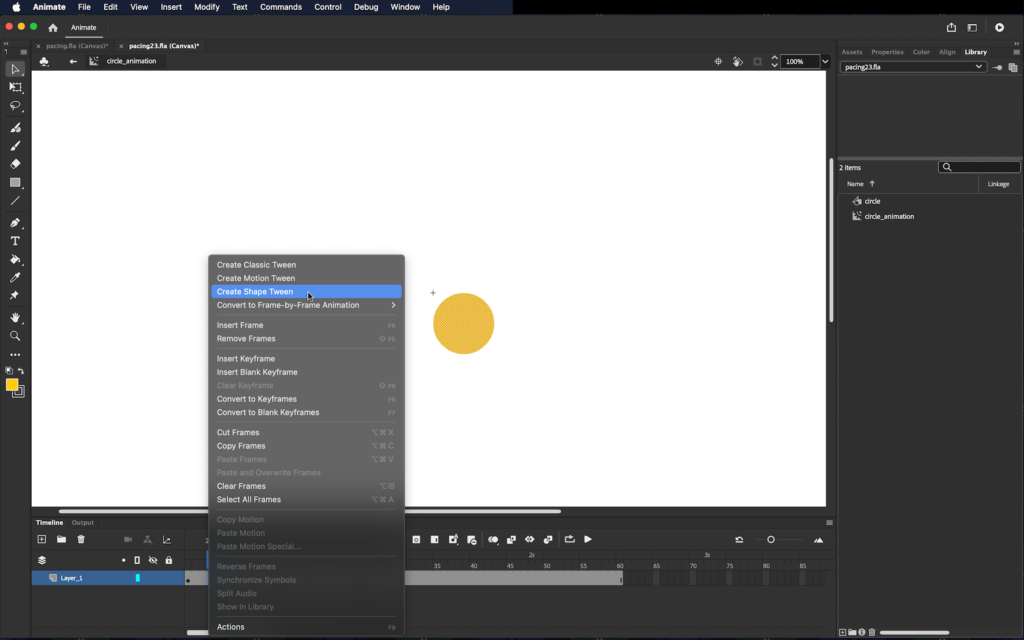
Control-click or right-click on a frame in between keyframes 13 and 25 and select Create Shape Tween from the contextual menu again. You can see the results of the shape tween by “scrubbing” over the timeline, or dragging the playback head from Frame 1 to Frame 25.
Exit the Movie Clip Timeline and return to the Scene timeline using the back button in the top left area of the Canvas.
Swapping
Now we will trade the circles on the Canvas for the movie clip animation we just created. Select the left circle, and in the Properties panel, click on the icon for Swap Symbol, a double arrow inside a square.
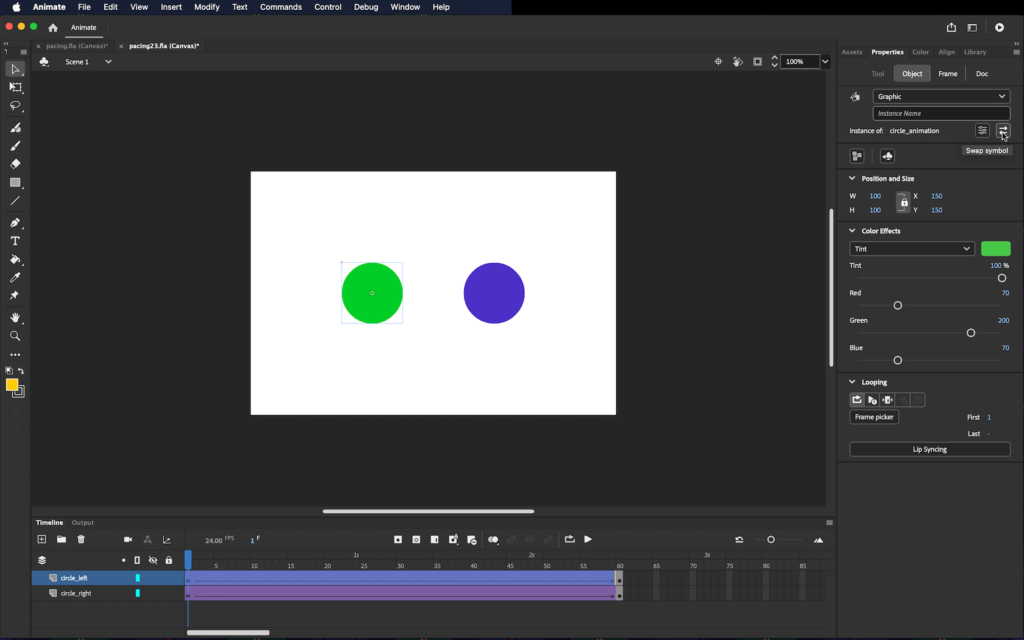
Choose circle_animation, and click OK. Notice that the Tint effect you placed on the instance is still active when the symbol is swapped. You should see a green circle on the Stage, and when you scrub the Timeline, you’ll see it transition to yellow as it also fades to transparent.

Next, swap the right circle on the stage for the movie clip animation. Because we applied no color effects to the right circle, it changes to the yellow of the Movie Clip. But we did apply an Alpha fade, so that does apply to the Movie Clip
The moral: Edits made to an instance will not affect its symbol, while edits made to a symbol will affect all instances of that symbol.
Test your movie. You will see that the both the Symbol and the scene animate according to different timelines. The Movie Clip symbol is an animation loop of a square turning into a circle and back again. The animation on the stage itself has a tween that makes the symbol move out of the frame and increase in size.
Publish
Upon completion of the exercise, upload your .html/.js pair to a unique folder in your server. Link the .html file to your webpage and embed in your blog.
The final file will look like this:
Note: if you’re looking at the iframe content on a mobile device, rotate your screen horizontally. Eventually, you’ll be able to create responsive content, but these beginner-level exercises are fixed-size.