Motion implied through modeling
Extrusions are shapes moving through space
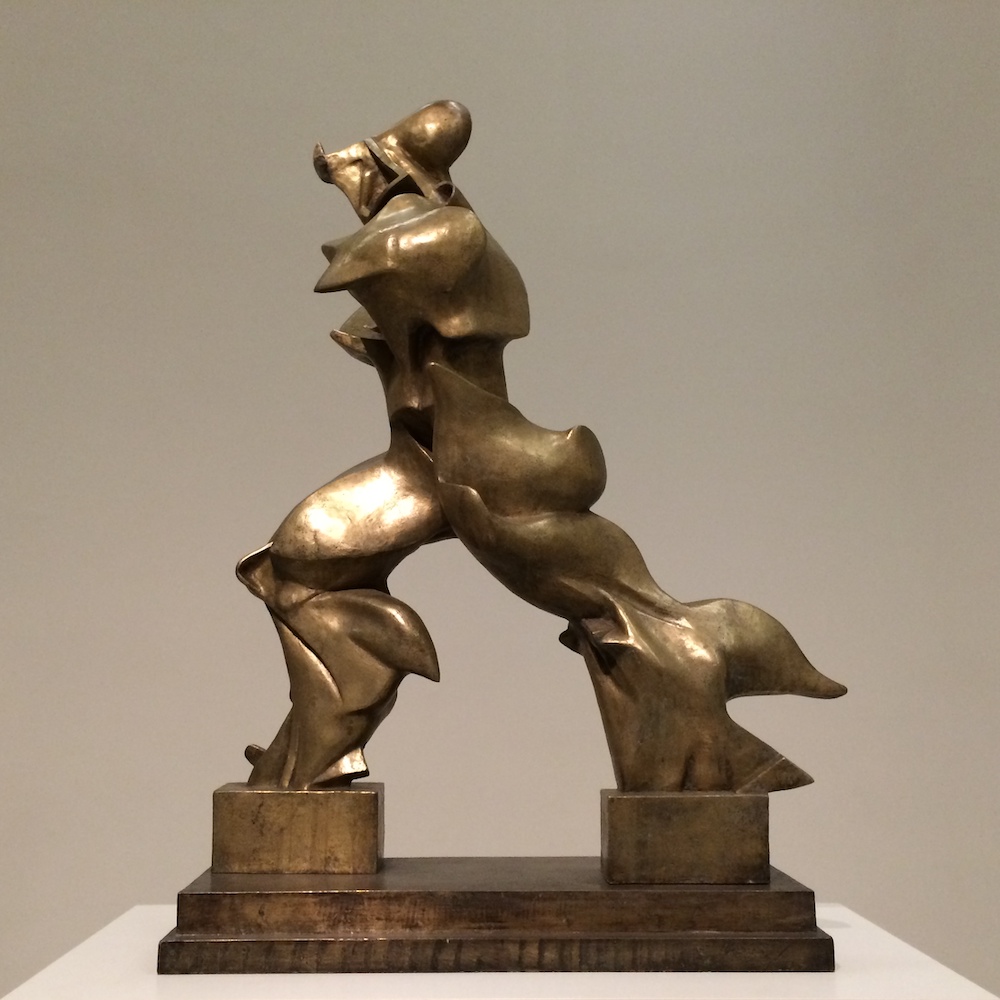
Just over a century ago, the Italian Futurists were among the first artists to attempt a genuine expression of time and motion in art that was not dependent on the “freeze frame” approach typical of painting and sculpture since the Renaissance. In Unique Forms of Continuity in Space, Umberto Boccioni declares the intention not to show the figure, but the displacement of space as the body moves confidently forward. The “continuity” is the motion of the form itself.
We can see that kind of “continuity” if we visualize a Fusion 360 Sketch form — a 2D object — moving through space, leaving a volume in its wake. This implied motion is generated through a series of parametric modeling techniques known as Extrude, Revolve, Sweep, and Loft. Though we’ve worked with them before, we take an advanced, deeper dive in this exercise.
In the model below, find just a sample of four variations exploring the range of formal possibilities inherent in translating, rotating, and scaling a form through space. The objects below document the implied motion of the sketch.
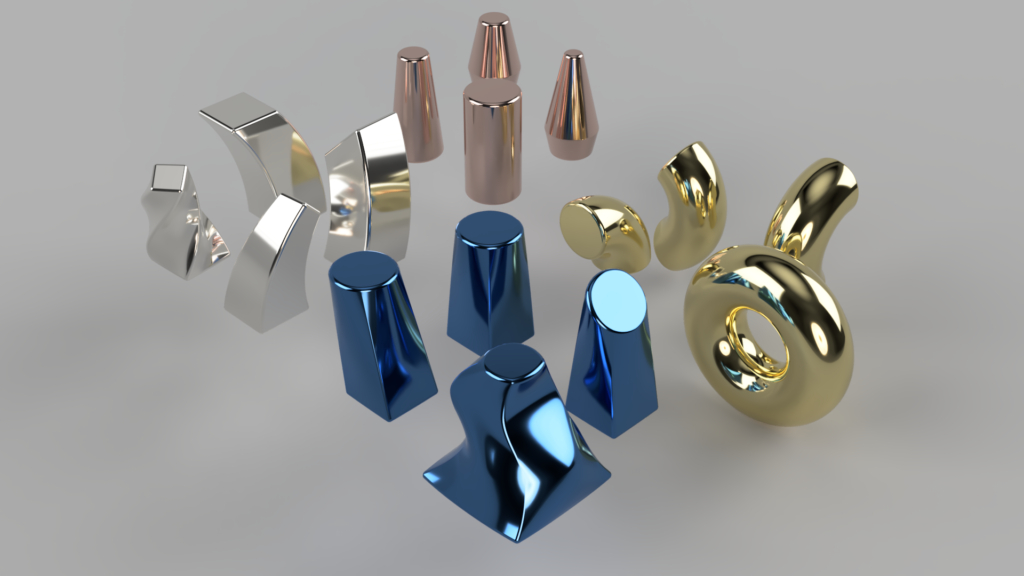
Right, in Gold: Revolves
Left, in Silver: Sweeps
Below, in Anodized Aluminum: Lofts
Model by the author
Extrude
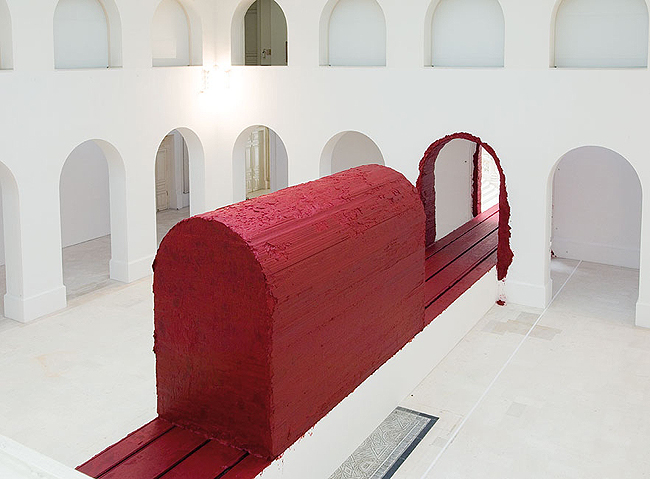
The act of extrusion implies a linear motion of a shape through space, or the pushing of a mass through it to conform to its contours. In Anish Kapoor’s Svyambh, we see a massive amount of pigmented wax pushed along rails through one of the archways, the architecture of the space becoming the generator of the form of the work. Traces of the act of extrusion, and the forces at play, are evident in the marks at the surface of the archway, which functions like our Sketch in Fusion 360. The work moves almost imperceptibly along the tracks, becoming a time-based, performative motion work, not simply a static sculpture. Visit this link to watch the form travel in a video »
Our Extrude forms can be a “simple” development of a shape. They can also taper larger or smaller than the original sketch generator. We explore just 4 of the many combinations below.
Workflows
The generator in all instances is a simple Sketch circle, which can be seen in the Browser>Sketch folder as ExtrusionX.
Rear: Extrude with Symmetric Offset
- Profile: 1 selected
- Start: Profile Plane
- Direction: Symmetric
- Extent: Distance
- Measurement: Half Length
- Distance: 1.5 in
- Taper Angle: -12.5 deg
- Operation: New Body
Right: Extrude with Offset Two Sides
- Profile: 1 selected
- Start: Offset Plane
- Offset: 1 in
- Direction: Two Sides
- Side 1
- Extent: Distance
- Distance: 2 in
- Taper Angle: -12.5 deg
- Side 2
- Extent: Distance
- Distance: 1 in
- Taper Angle: -12.5 deg
- Operation: New Body
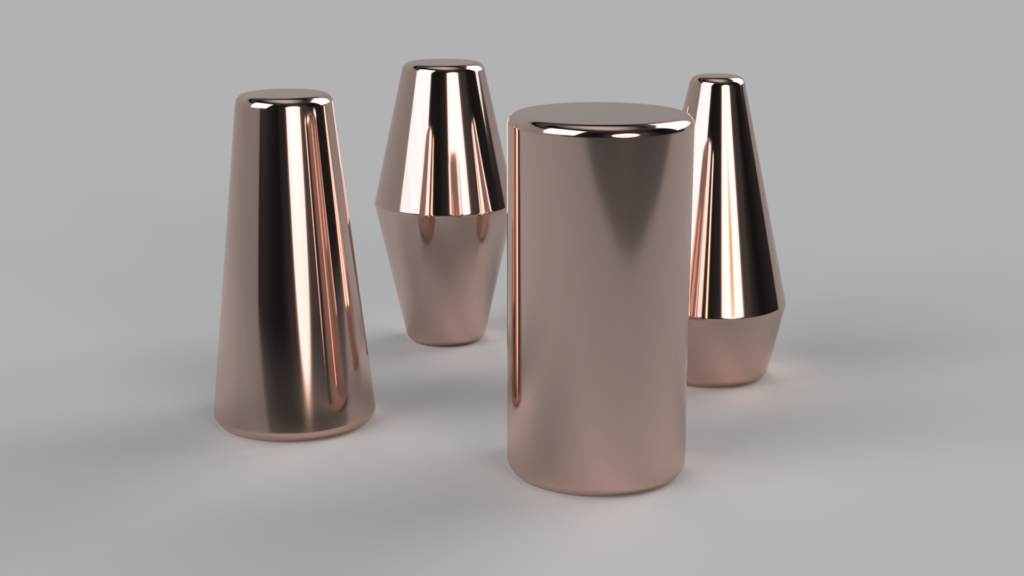
Left: Extrude with Taper
Right: Extrude with Offset and Taper
Front: Simple Extrude
Left: Simple Extrude with Taper
- Profile: 1 selected
- Start: Profile Plane
- Direction: One Side
- Extent: Distance
- Distance: 3 in
- Taper Angle: –12.5 deg
- Operation: New Body
Front: Simple Extrude
- Profile: 1 selected
- Start: Profile Plane
- Direction: One Side
- Extent: Distance
- Distance: 3 in
- Taper Angle: 0 deg
- Operation: New Body
Revolve
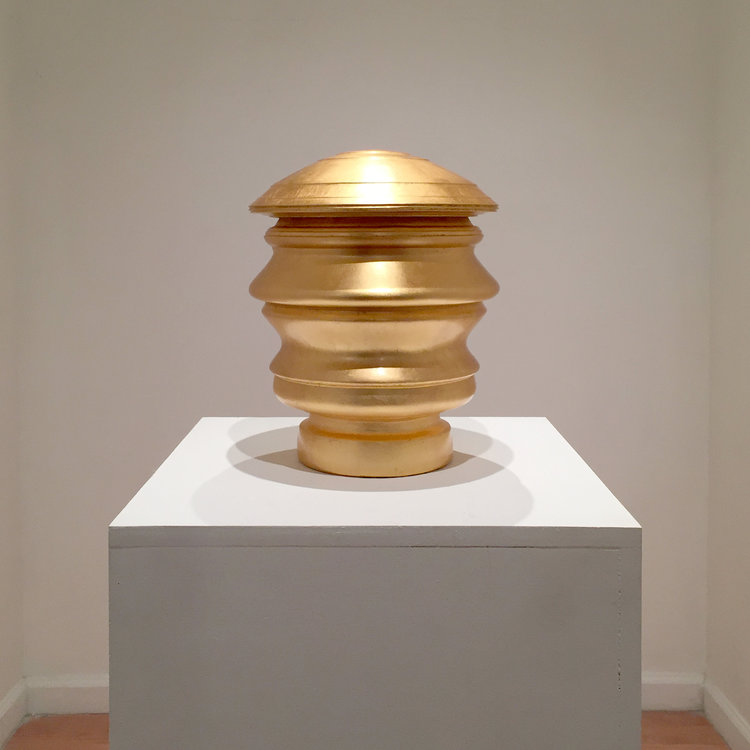
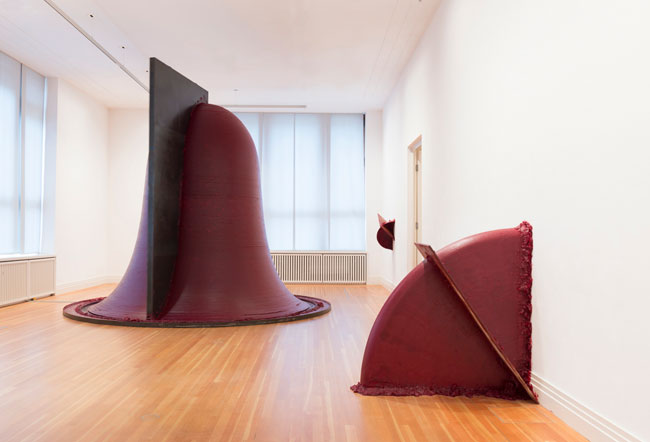
If to extrude implies linear motion, then to revolve implies rotation of a shape about a linear axis. Kapoor again illustrates this phenomenon, taken to a monumental scale, in his bell-shaped profile for Untitled, 2010. The giant steel profiles slowly rotate, developing the wax and pigment form. The steel functions as a Fusion 360 Sketch might behave under the influence of the Revolve command. See Kapoor’s revolve mechanism in action at this link.
Our Rotate forms can involve a full 360-degree rotation or a partial one. The Sketch can develop on either side of a plane to define specific angles in relation to it or can be performed symmetrically against the plane. These are described as a process in the examples seen below.
Workflows
The Profile in all instances is a simple Sketch circle, which can be seen in the Browser>Sketch folder as RevolveX. The Axis of rotation is supplied by a Sketch square, seen as a second line in the RevolveX sketch. One line is selected to create the axis.
Rear: Angle Revolve Two Sides
- Profile: 1 selected
- Axis: 1 selected (on the square)
- Type: Angle
- Angle: 90 deg
- Angle: 45 deg
- Direction: Two Sides
- Operation: New Body
Right: Full Revolve
- Profile: 1 selected
- Axis: 1 selected (on the square)
- Type: Full
- Operation: New Body
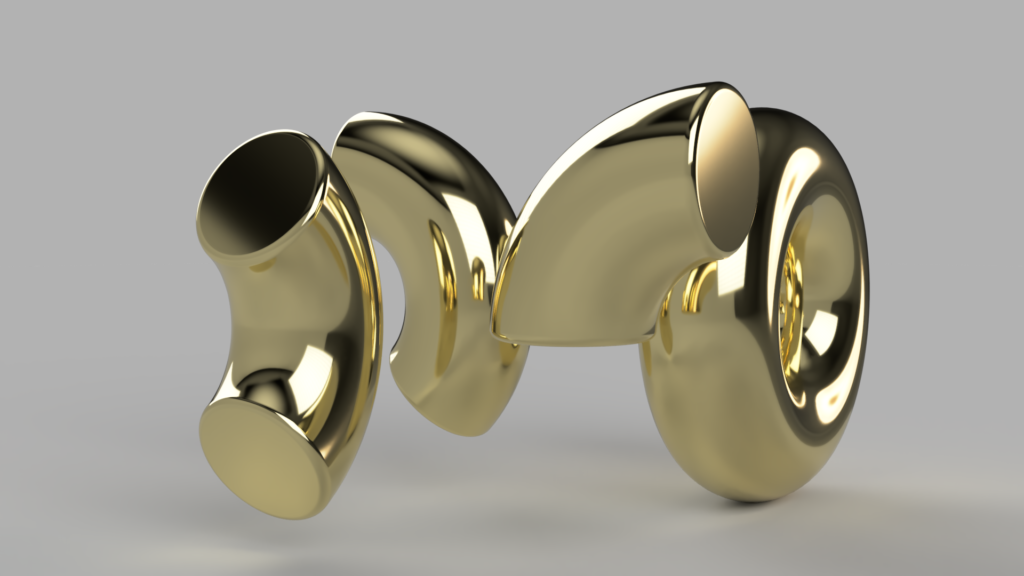
Left: Symmetry Revolve
Right: Full Revolve
Front: Angle Revolve
Left: Angle Revolve Symmetric
- Profile: 1 selected
- Axis: 1 selected (on the square)
- Type: Angle
- Angle: 45 deg
- Direction: Symmetric
- Operation: New Body
Front: Angle Revolve
- Profile: 1 selected
- Axis: 1 selected (on the square)
- Type: Angle
- Angle: 90 deg
- Direction: One Side
- Operation: New Body
Sweep
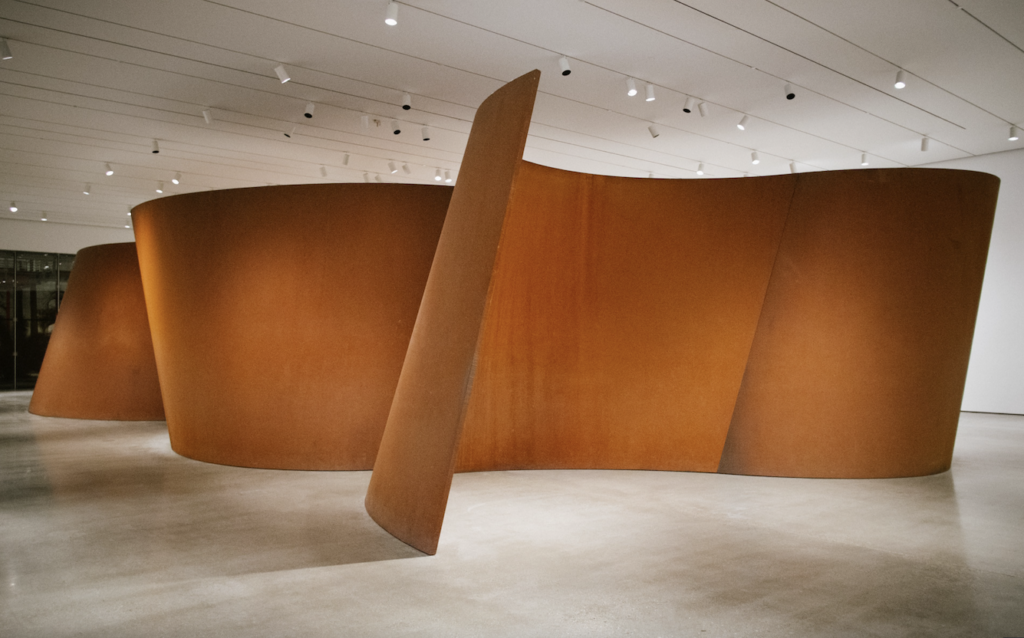
If extrude takes a shape in one direction, a sweep guides it along a sinuous, curving, and sometimes twisting roller-coaster of a path. Sculptor Richard Serra’s most monumental work, Band, takes a thin profile of steel on a journey that feels at one time like a delicate ribbon, at other times like the hull of a battleship that might have been born at the same shipyard where the sculpture was fabricated. The sheets simply rely on their massive weight to hold the work structurally together, like the stones of an arch. No evidence of fastening provides an even more uncanny sense of precariousness as one walks into the enormous negative space. Visit the LACMA website for more.
Our Sweep forms develop a simple square along a curving path keeping the form perpendicular to the path, parallel to the origin plane, tapering, or tapering with a twist below.
Workflows
The Profile in all instances is a simple Sketch square, which can be seen in the Browser>Sketch folder as SweepX. The Path is supplied by a curving vertical line, seen as a second element in the SweepX sketch.
Rear: Perpendicular Sweep
- Type: Single Path
- Profile: 1 selected
- Path: 1 selected
- ✓ Chain Selection
- Distance: 1 (= full path length)
- Taper Angle: 0 deg
- Twist Angle: 0 deg
- Orientation: Perpendicular
- Operation: New Body
Right: Perpendicular Sweep with Taper
- Type: Single Path
- Profile: 1 selected
- Path: 1 selected
- ✓ Chain Selection
- Distance: 1 (= full path length)
- Taper Angle: -6.25 deg
- Twist Angle: 0 deg
- Orientation: Perpendicular
- Operation: New Body
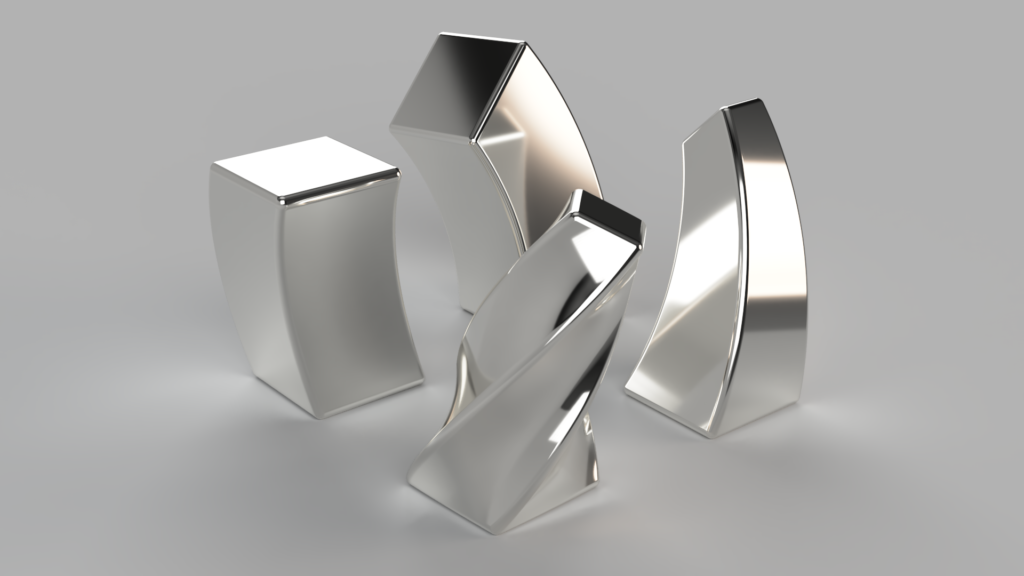
Left: Parallel Sweep
Right: Perpendicular Sweep with Taper
Front: Perpendicular Sweep with Taper and Twist
Left: Parallel Sweep
- Type: Single Path
- Profile: 1 selected
- Path: 1 selected
- ✓ Chain Selection
- Distance: 1 (= full path length)
- Orientation: Parallel
- Operation: New Body
Front: Perpendicular Sweep with Taper and Twist
- Type: Single Path
- Profile: 1 selected
- Path: 1 selected
- ✓ Chain Selection
- Distance: 1 (= full path length)
- Taper Angle: -6.25 deg
- Twist Angle: 135 deg
- Orientation: Perpendicular
- Operation: New Body
Loft
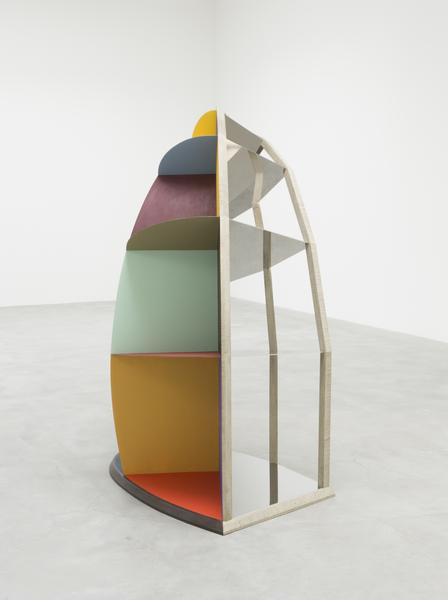
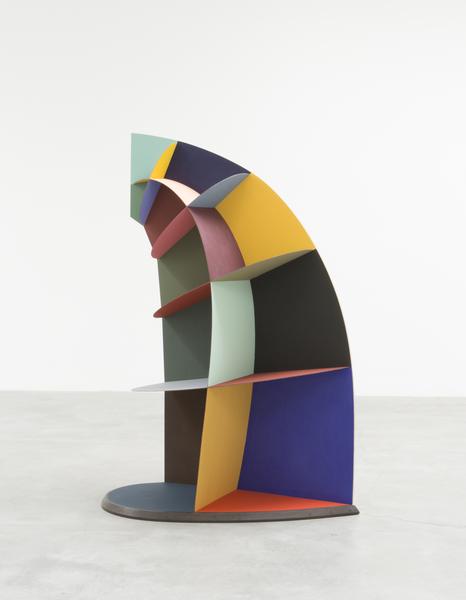
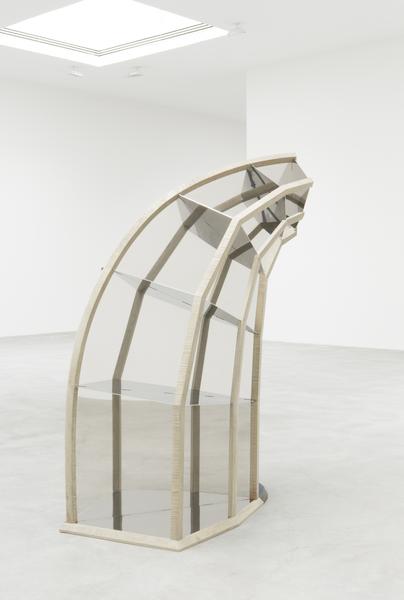
If a sweep takes the shape on an implied roller coaster of a journey, a loft changes the shape along the journey itself. Instead of a path, the Loft function in Fusion 360 relies on the orientation and alignment (or non-alignment) of a series of two or more planes to generate a highly complex form. In Faux Vitrine, sculptor Martin Puryear strips the mass away from a lofted form to reveal a strange, two-faced development created by a half-circle-half-square shape. The shape changes scale, orientation, and rotation, creating a fragment of a horn-like form. See more views and details at Matthew Marks Gallery, who represents Puryear.
Our Loft forms combine a simple circle and square sketch, sometimes parallel to each other, sometimes angled… sometimes stacked vertically, sometimes skewed. Our most complex form takes multiple, alternating squares and circles on a zig-zag bounce through space
Workflows
The Profiles in most cases are a simple Sketch square base and circle cap in our sample. These can be seen in the Browser > Sketch folder. The Path is supplied by a curving vertical line, seen as a second element in the sketch.
Notice that, except for the Loft with more than two Profiles, the workflow is identical. Changes in the Loft are not generated by parametric options in the operation, but rather by transforms of the Sketches themselves.
Rear: Loft organized skewed vertical and parallel
- Profiles:
- Profile 1 = square at base
- Profile 2 = circle at cap
- Rails: none
- ✓ Chain Selection
- ✓ Closed
- Tangent Edges: Merge
- Operation: New Body
Right: Loft organized vertically and parallel
- Profiles:
- Profile 1 = square at base
- Profile 2 = circle at cap
- Rails: none
- ✓ Chain Selection
- ✓ Closed
- Tangent Edges: Merge
- Operation: New Body
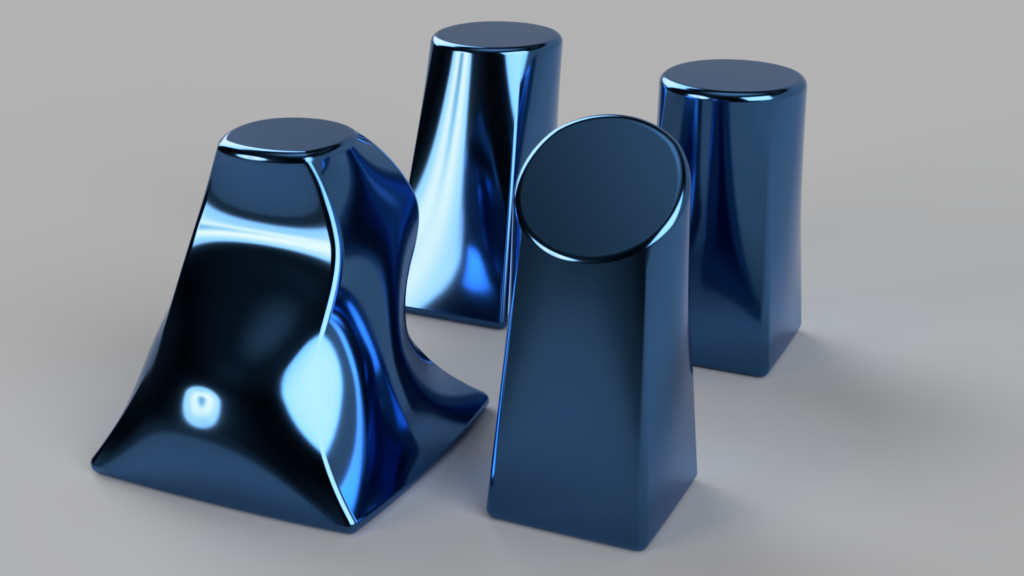
Left: Loft with alternating parallel squares and circles, organized vertically
Right: Loft with parallel square base and circular top, organized vertically
Front: Loft with square base and angled circular top, organized vertically
Left: Loft with alternating squares and circles
- Profiles:
- Profile 1 = square at base
- Profile 2 = circle near base
- Profile 3 = square under cap
- Profile 4 = circle at cap
- Rails: none
- ✓ Chain Selection
- ✓ Closed
- Tangent Edges: Merge
- Operation: New Body
Front: Loft organized vertically, angled top
- Profiles:
- Profile 1 = square at base
- Profile 2 = circle at cap
- Rails: none
- ✓ Chain Selection
- ✓ Closed
- Tangent Edges: Merge
- Operation: New Body
Your turn
Using the examples above for inspiration, create ONE of each — Extrude, Revolve, Sweep, and Loft — using Sketch profiles and paths of your choice. Analyze the Sketch structures in the sample model to help you generate your own.
Develop an advanced version of each operation, trying out parameters you have not yet experimented with. You can borrow the workflows from above, or invent your own through experimentation.
Don’t forget micro-beveling! In our sample, we’ve applied a generous ⅛ inch radius, in anticipation of the size of fillets needed in our final project, which uses a ¼ inch router bit to carve.
Create a high-resolution rendering (we recommend 1920 X 1080 pixels) to help illustrate your embedded model.
When complete, illustrate your exercise blog post for this exercise with the image and embedded model.
