

Interactivity

If you need a fresh copy of Pacing,
visit the exercise for a .zip file
Interactivity: creating a UI with Buttons and JavaScript
Interactivity is a much-ballyhooed concept of the late 20th and early 21st century. We walk around listening to streaming playlists while texting on our cell phones, drive according to directions from a satellite spoken to us live in a calm computerized voice, and are constantly reviewing our blogs, social media feeds, and email.
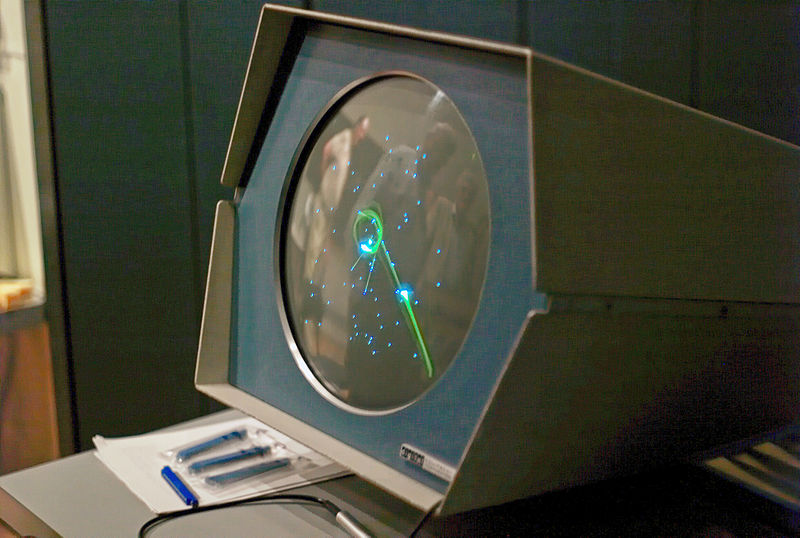
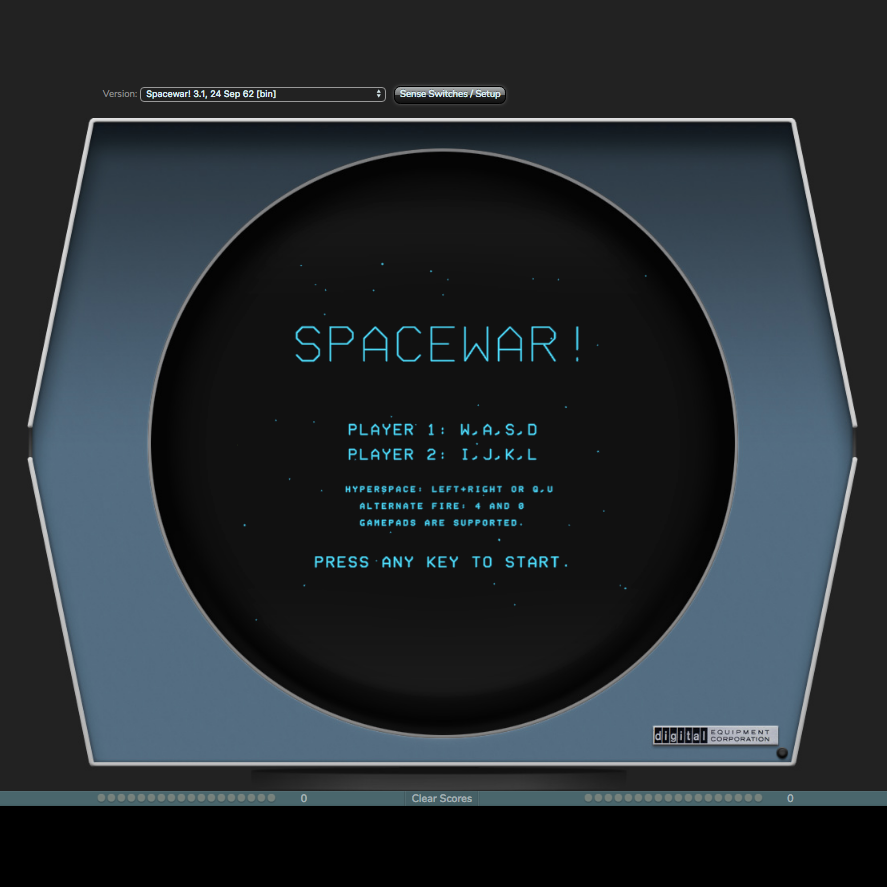
Spacewar, 1961, Martin Graetz, Stephen Russell, and Wayne Wiitanen, computer program for DEC PDP-1 computer.
Interactivity is not new. The archaeologist Alexander Marschak has argued that the caves at Lascaux was an interactive site; it was a place where people visited to leave reactive marks. From chess to basketball, mahjong to tennis, games are ancient interactive forms of entertainment, intellectual diversion, and fun.
In 1961, at the height of the Cold War US/Soviet space race, three MIT graduate students — Martin Graetz, Stephen Russell, and Wayne Wiitanen — programmed Spacewar, the first video game. In the game, two spaceships shoot at each other. The creators added moving stars and changing brightness, a technological feat at the time. If we break the game down into its core interactions, you and your opponent can turn your spaceship right or left, go forward, and shoot. Lastly, the program registers whether your ship has been hit by your opponent’s missile. This is pretty simple, but it forms the basis for much game based interactivity. Put simply: Move your avatar around and shoot things.
The exercise below develops a much simpler interactivity that doesn’t involve shooting, but it does become the basis for a lot of game logic. We’re basing this exercise on a copy of the file created for the previous exercise. If you do not have a version of that file, visit Pacing and download that .zip file.
Add a Background
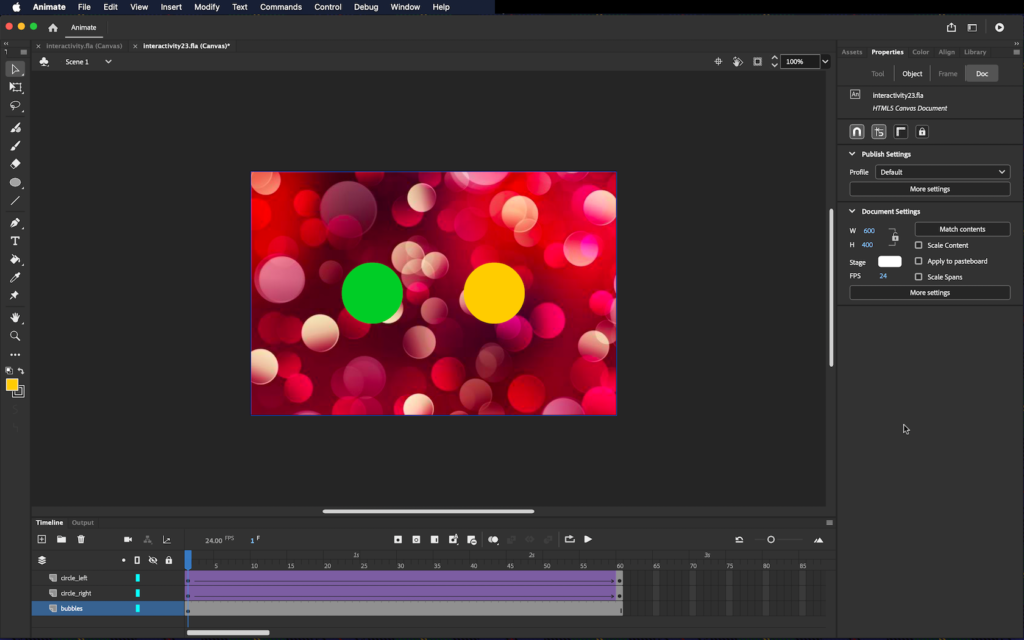
Just for fun, let’s place a bitmap image in the background, one that formally relates to the circular elements in the Pacing file.
The abstract bubble-themed wallpaper seen here is from 7 Themes. It was originally a large hi-res file, but we’ve cropped and resized it to 600 X 400 to fit our canvas.

Duplicate the final FLA file that you created in Pacing, or download and open our file from the wiki. Rename it to reflect that it is now the Interactivity exercise and open it.
Create a new layer and name it bubbles. Click-hold-and-drag it below the other two layers.
With this layer active, simply drag the image out of its folder and over the stage. You’ll see a + at the cursor, your indication that the file will import automatically. Release the cursor and watch the import dialog progress bar. The image is the same size as the canvas and should snap into place, but you could move it around with the Selection Tool. It behaves just like a placed image in Illustrator: a vector object containing a bitmap image.
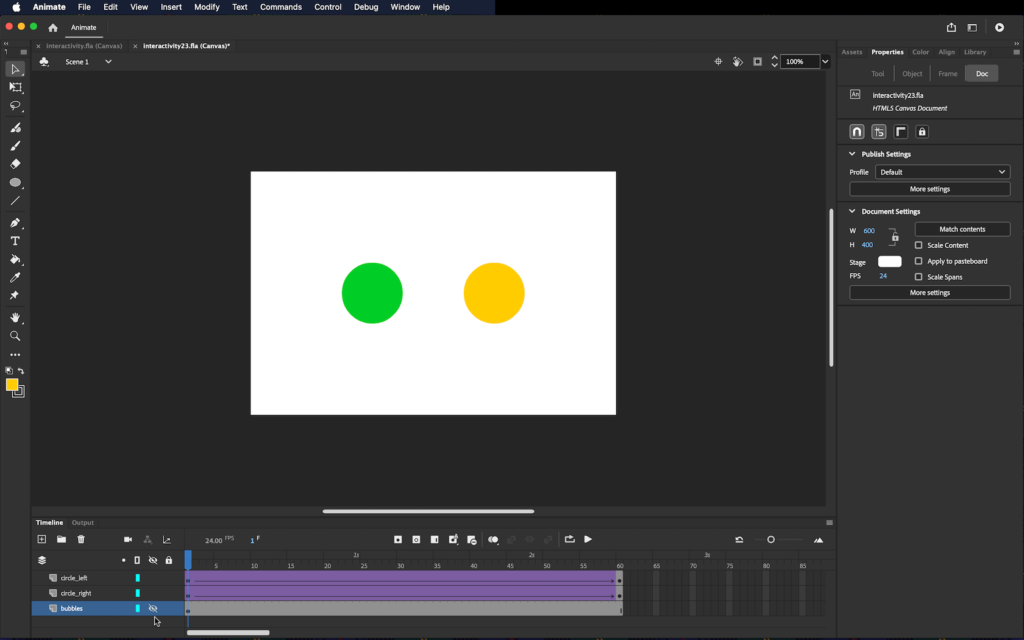
As with other programs, layers can be visible or invisible, locked or not. Here, until the final output, we will hide and lock the bubbles layer. Simply toggle the dot under the eyeball and padlock to the right of the layer name and you’re done.
Buttons
In this exercise, we are going to write code that starts and stops the animation we created in the last exercise. Before we can start and stop the Timeline with code, we need to create a user interface, in this case buttons, that the viewer will use to control the Timeline.
Insert a new Symbol and choose Button from the Type pull-down panel menu. Name it startStopBtn.
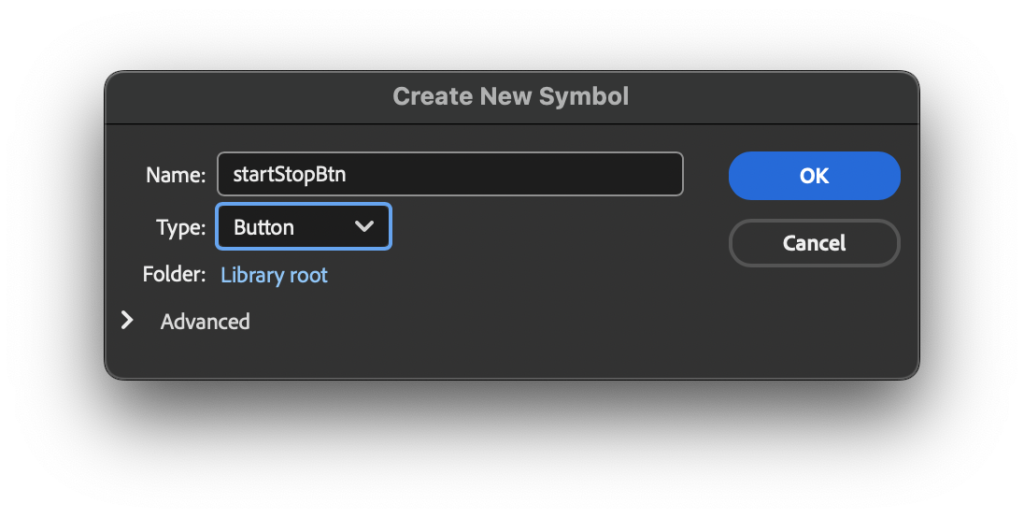
Note: The best practice for naming objects, buttons, and movie clips in Animate is to start with a lowercase letter, and capitalize all new words, known as camelBacking or camelCase. Button names should end with Btn. Movie Clip names should end with Mc. Ending with these suffixes allows the Animate code editor to auto-complete your code and the common convention makes it easier for others to understand your intentions.
The Button Timeline
Notice that the Button Symbol Timeline looks different than the symbol editor we encountered in Pacing. The Animate Timeline is adjusted for buttons. It has four frames corresponding to the four button states: Up, Over, Down, and Hit.
Button states
- Up is the normal button state. In the up state frame of the timeline, you should design what the button looks like when the user is not interacting with the button.
- Over is the mouse-over button state. In the over state frame of the timeline, you should design what the button looks like when the user mouses over the button. You can copy and paste the same button design from the up state to the over state if you do not want the button to change when the user mouses over the button. We should stress that only a cursor-based interface will recognize the over state. A mobile or touch-based interface won’t interpret it.
- Down is the mouse-down button state. In the down state frame of the timeline, you should design what the button looks like when a user clicks on it.
- Hit is not a button state. “Hit” is the area that you define to be the clickable part of the button. For example, if your button is the letter O, the Hit area should include the middle portion of the letter.
Note: The hit area of the letter O is one example of how players are different from readers. For a reader, the letter O is defined by a thin, circular line surrounding an oval of negative space. A reader ignores the negative space when reading the letter O, concentrating on the contour of the letter. A player clicks on the negative space. Although the outline defines the letter, the negative space has more mass. The player sees the O as being a target — a filled-in circle, rather than an empty circle. When designing interactive media the artist should consider how the player, not the reader, behaves with media elements.
Define the Button states
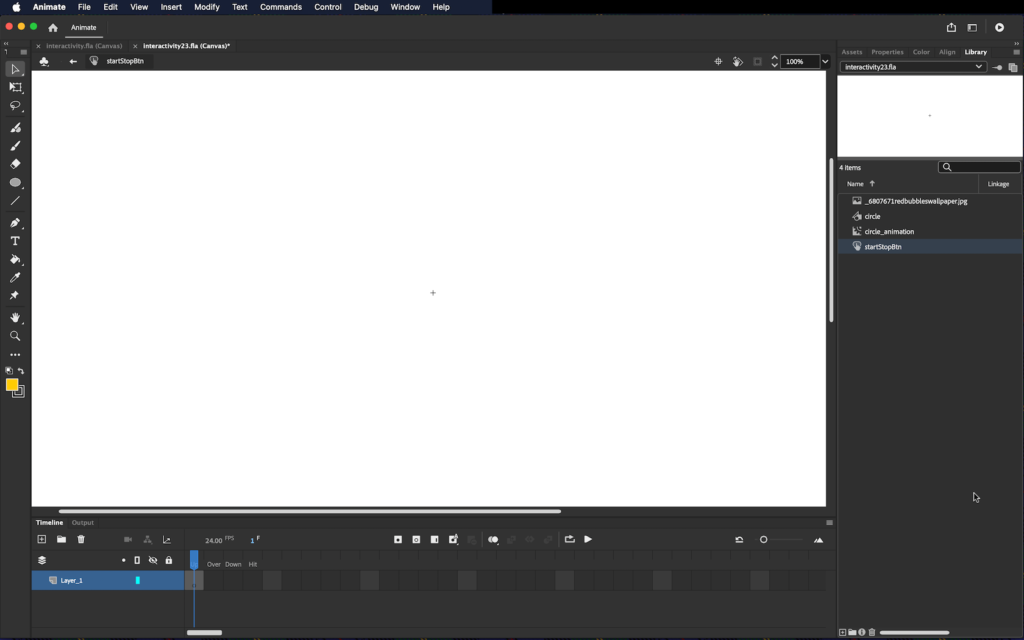
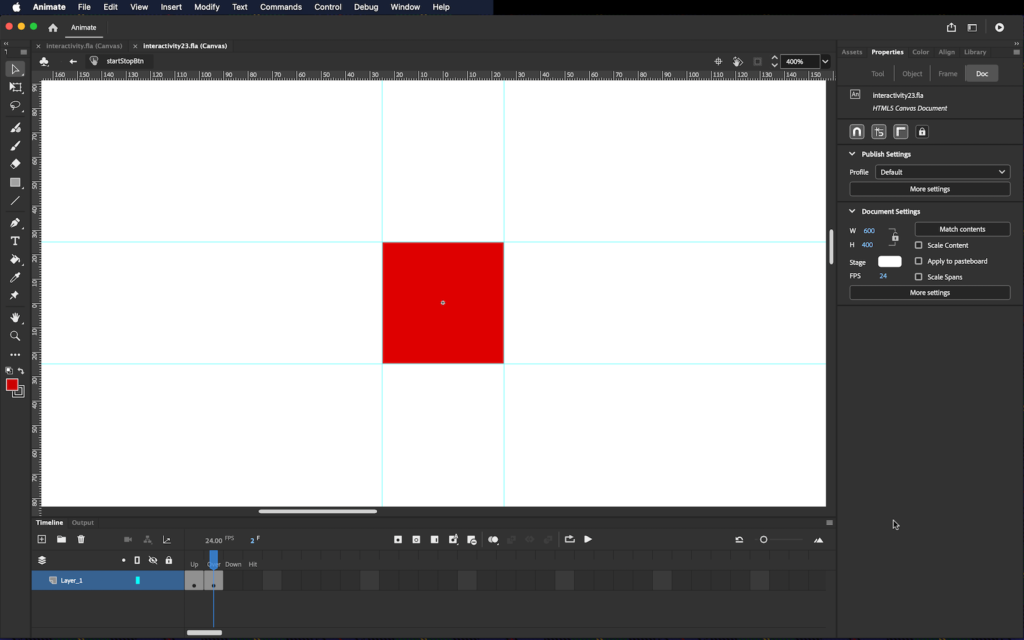
With the Playhead in the Up state, draw a 50 px diameter red circle using the Oval tool in the middle of the Symbol Editor Stage.
Open the Align panel from Window > Align. Check the To Stage box, then center align your button vertically and horizontally.
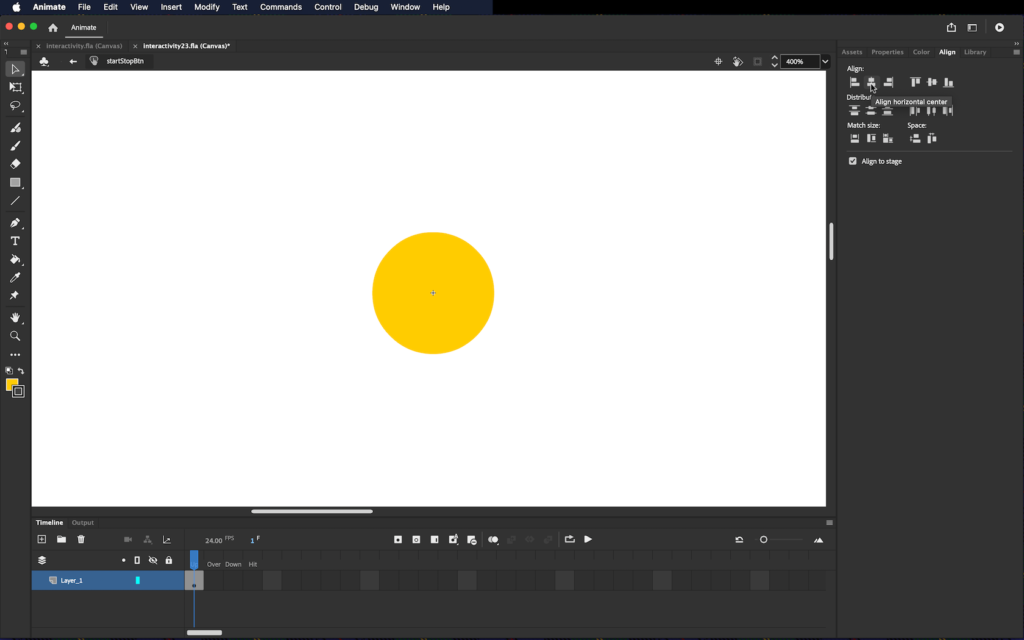
Change the color of the circle to red. Insert a keyframe in the Over frame of the button symbol editing timeline. Choose View > Rulers and pull guides around all four sides of the circle.
Modify the Over state button so it looks different from the Up state. We drew a square on top of the circle in the same color. The new shape is an obvious modification that we will expect to see when we test the buttons.
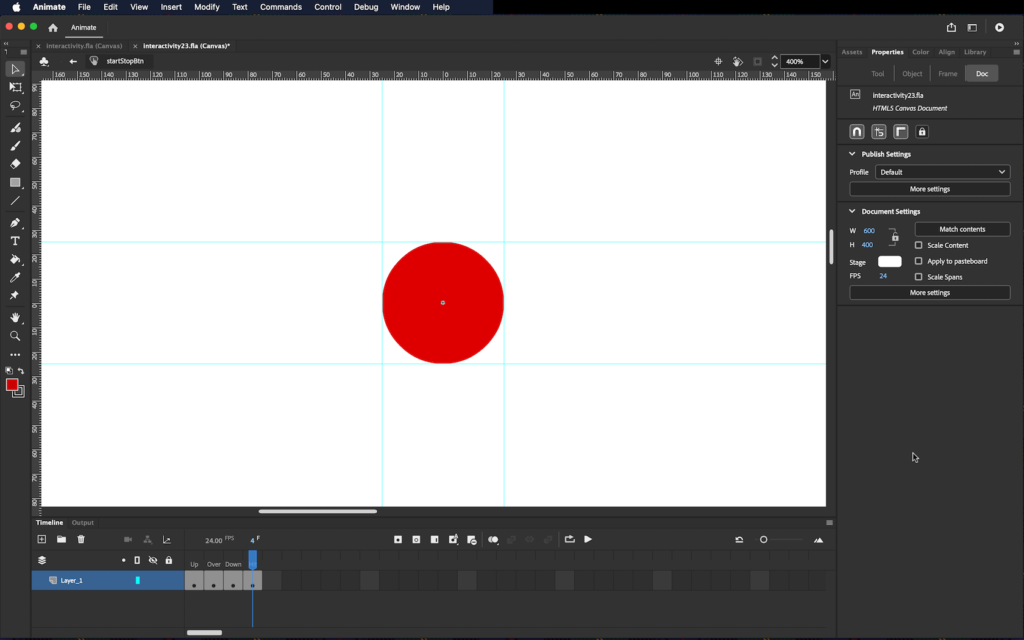
Insert a keyframe in the Down frame. Do not modify the shape. Our button will visually respond when the user mouses over it. It will not respond visually to mouse clicking because we are not changing this frame.
Insert another keyframe in the Hit frame. This defines the clickable area of the button. Set the Hit state to the same circle as you have in the Up button state by deleting the square (which was a result of adding a keyframe), then copying the red circle from the Up frame and using Edit > Paste in Place on the Hit frame (Command+Shift+V).
Add buttons to the Timeline
Return to the scene Timeline by clicking on the left arrow or the Scene 1 button near the top left of the Stage.
Create a new layer named stop_btn above the circles’ layers in the Timeline. Insert your button on the stage at frame 1 of the stop_btn layer. Position the button on top of the circle on the left side of the Stage.
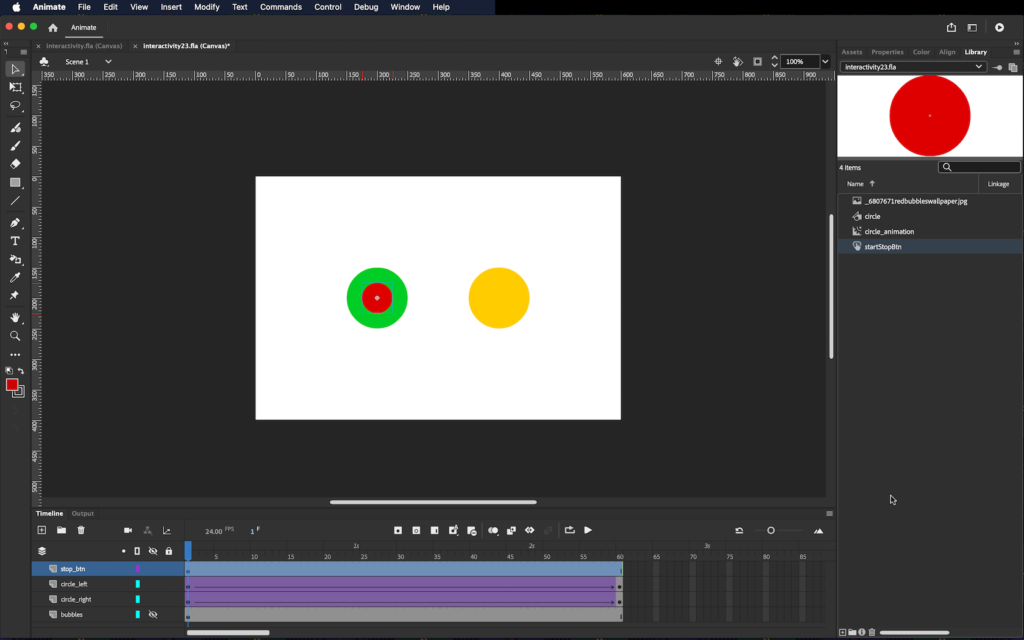
Create a new layer named go_btn in the timeline. Since buttons are symbols, you can add multiple instances of the button to the stage. Add another instance of the button in frame 1 of the go_btn layer on the right side of the Stage.
Click on the button on the stop layer. Name the first instance of the button stop_btn using the Instance Name field of the Properties panel. It is important to provide instance names!
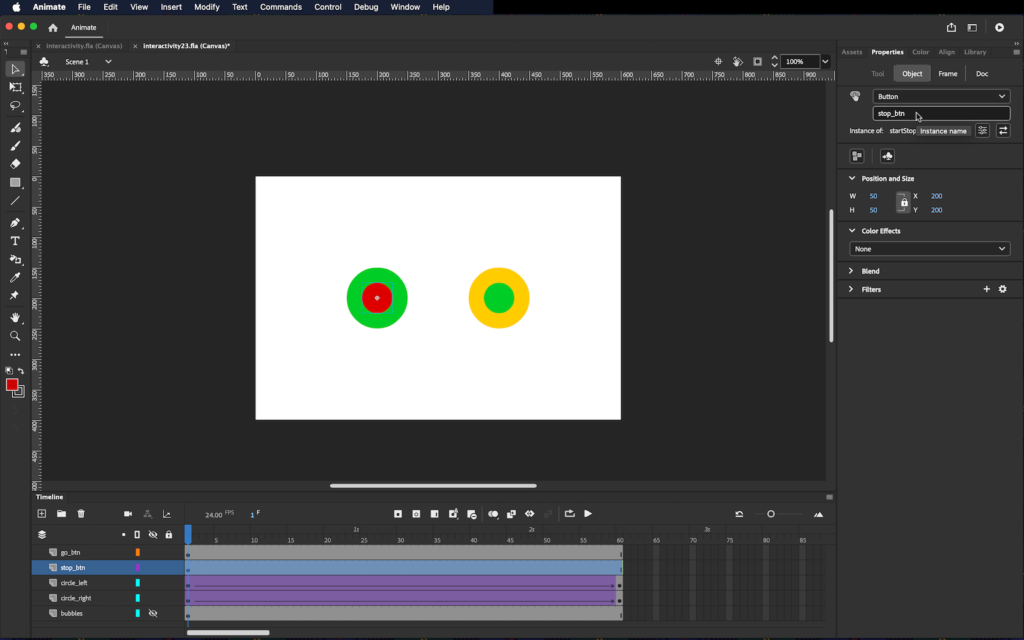
Name the instance of the button on the go layer go_btn. Now we have buttons on the left and right sides of the Canvas. The button on the left is going to stop the animation and the button on the right will start it.
Starting and stopping the Timeline
We will give the buttons some basic functionality by introducing two elements of the Animate interface: the Actions Panel and Code Snippets. Animate helps you build code from the ground up by providing several commonly used building blocks pre-written in JS syntax. Don’t be fooled: it can’t be comprehensive, and you’ll still need to write code! But this is a handy shortcut.
Create a new layer called actions in the Timeline. This is where the code that controls the buttons will be stored. It is conventional practice in Animate to make a separate layer for code so that you (and any collaborators) are easily able to find and modify the code.
The Actions window
Select frame 1 on the actions layer, and access the Actions window one of two ways: select from Menu: Window > Actions or, in the Properties tab, look for and click on the tiny, unlabeled circled arrow icon at the top right of the panel. This icon is circled in red in the screenshot — it’s hard to find but it’s a very fast shortcut!
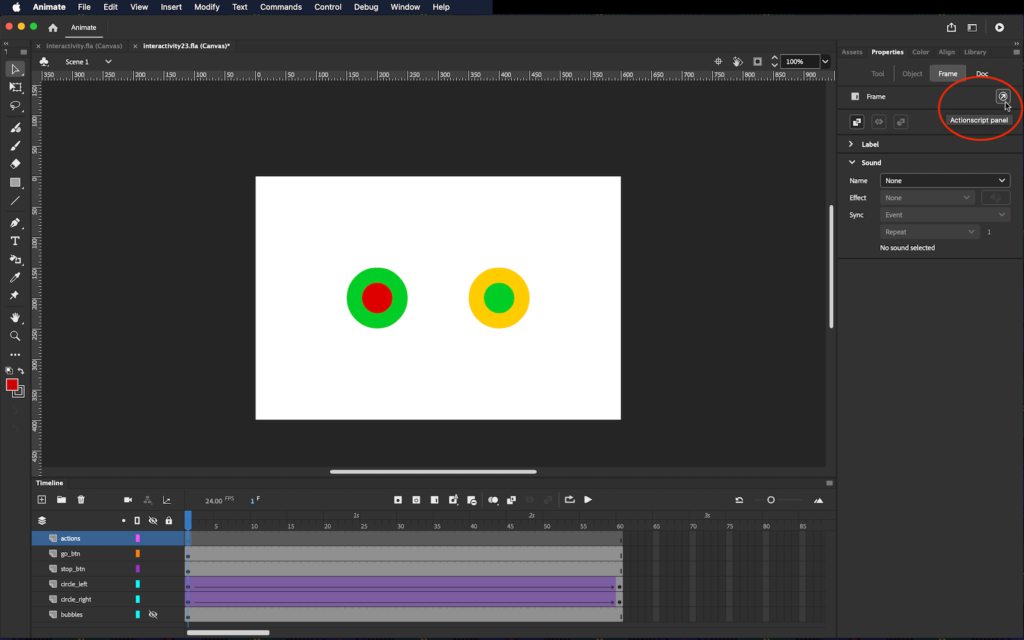
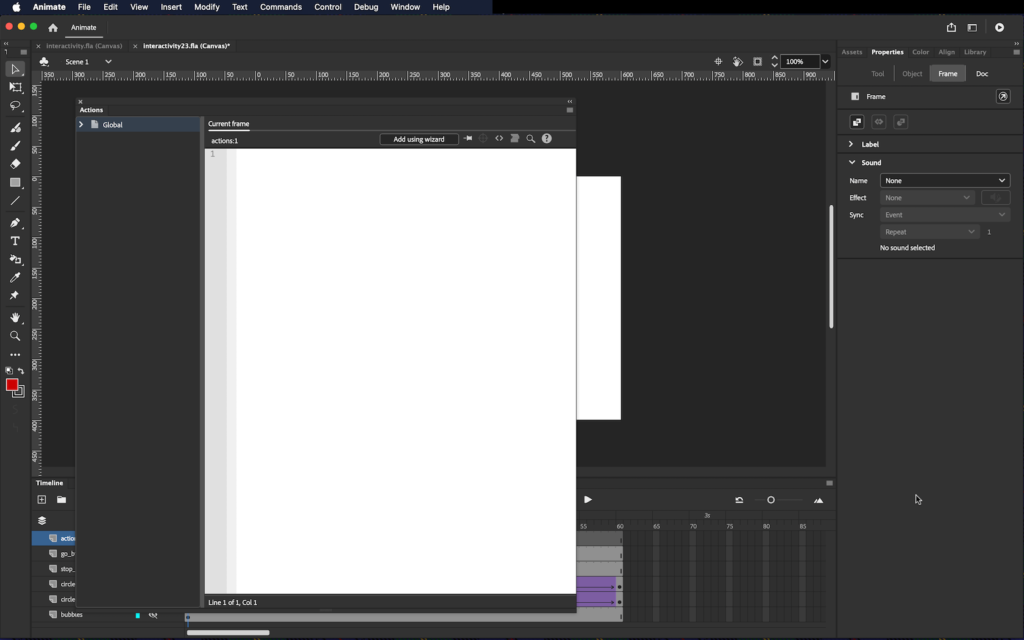
This opens a new window called Actions. While it can be docked in the UI, it’s advisable to leave this open as a separate window. A script can sometimes get long and complex and it’s difficult to read in a tiny, docked tab.
The Code Snippets window
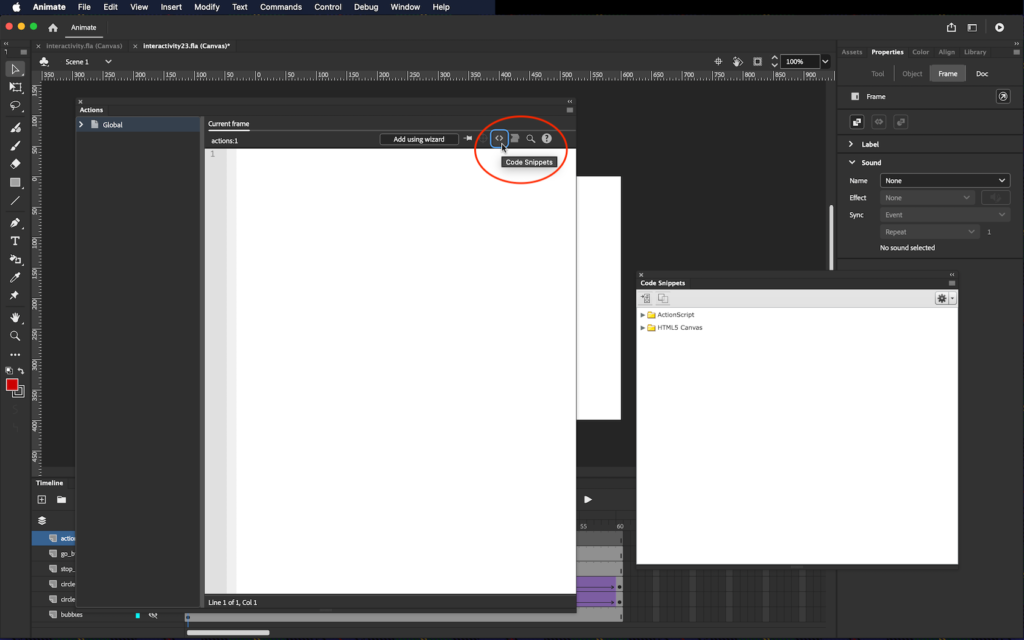
Next, open the Code Snippets window, either selecting from Menu: Window > Code Snippets or by clicking on the Code Snippets icon at the upper right of the Actions window. The icon is a pair of <> brackets (to my mind an illogical choice — the code is JS, not HTML, but whatever). Again, it’s a hard-to-find but useful shortcut, so it’s circled in red in the screenshot.
In Code Snippets, you’ll see a folder-like structure. Click on the HTML5 Canvas folder to open. Observe a folder called Timeline Navigation, and click to open it. You’ll observe Click to Go to Frame and Stop as one choice here.
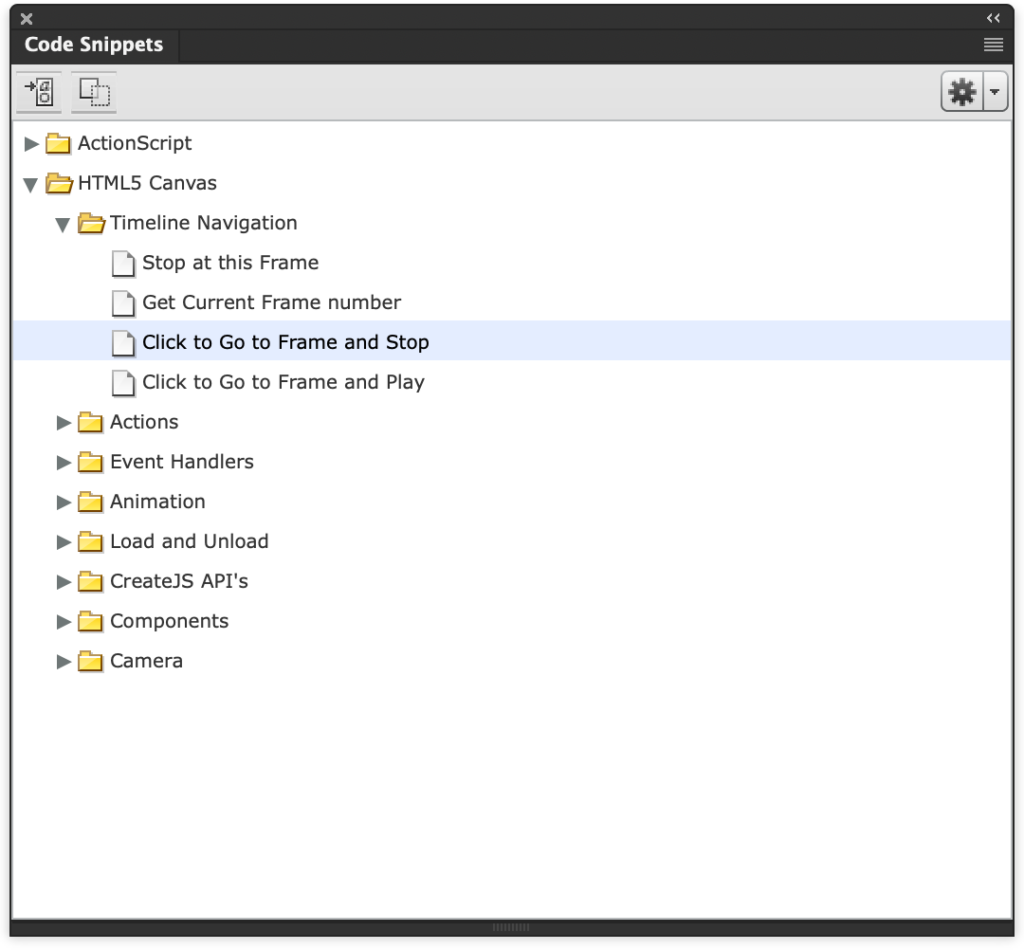
But before you select the code snippet, select your stop_btn (the left, red one). You may have to move and/or resize all the extra windows to select it. Then double-click on Click to Go to Frame and Stop and observe the code it writes in the Actions window.
Next, select the go_btn (your green one), and back in the Code Snippets window, under the Time Navigation folder, find and double-click on Click to Go to Frame and Play. Again, observe the code it writes in the Actions window.
The program has written a lot of code for you! You may need to resize the Actions window to read it all. There are two instances of the integer (5) in brackets. Change both instances to (0) so that the start and stop will happen on the first frame. Remember: numerical ordering starts with 0 in programming!
Save and Test the animation in a browser by clicking the buttons.
Analyzing the Code
Even if you’ve done your JavaScript tutorial, what nonsense this may appear to be! What does it all mean? It works, but it’s probably still a bit of a black box for you. Let’s take a moment to understand what the snippets mean.
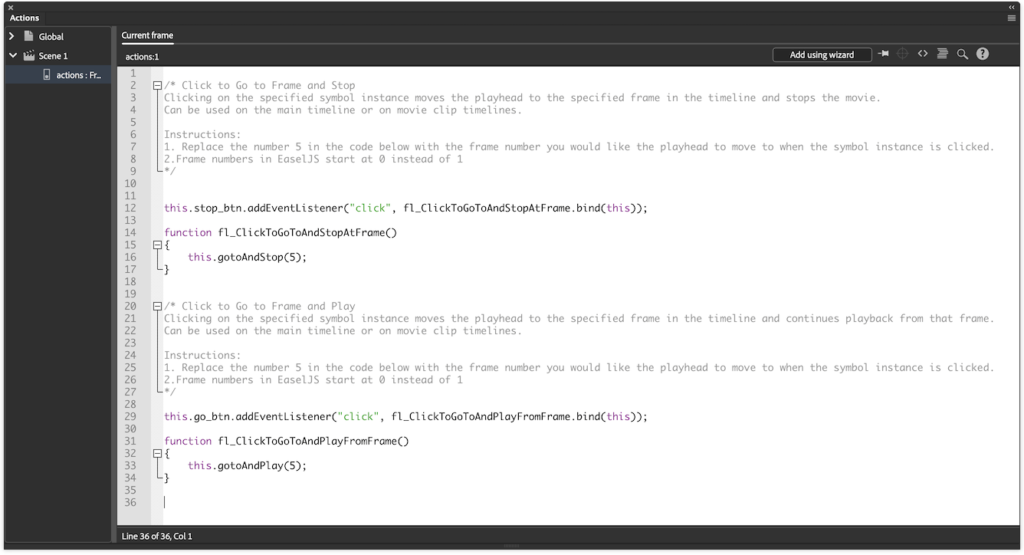
The code as written
/* Click to Go to Frame and Stop
Clicking on the specified symbol instance moves the playhead to the specified frame in the timeline and stops the movie.
Can be used on the main timeline or on movie clip timelines.
Instructions:
1. Replace the number 5 in the code below with the frame number you would like the playhead to move to when the symbol instance is clicked.
2.Frame numbers in EaselJS start at 0 instead of 1
*/

this.stop_btn.addEventListener("click", fl_ClickToGoToAndStopAtFrame.bind(this));

function fl_ClickToGoToAndStopAtFrame()
{
this.gotoAndStop(0);
}

/* Click to Go to Frame and Play
Clicking on the specified symbol instance moves the playhead to the specified frame in the timeline and continues playback from that frame.
Can be used on the main timeline or on movie clip timelines.
Instructions:
1. Replace the number 5 in the code below with the frame number you would like the playhead to move to when the symbol instance is clicked.
2.Frame numbers in EaselJS start at 0 instead of 1
*/

this.go_btn.addEventListener("click", fl_ClickToGoToAndPlayFromFrame.bind(this));

function fl_ClickToGoToAndPlayFromFrame()
{
this.gotoAndPlay(0);
}
First, notice the color-coding in the Actions window in Animate — not here in the wiki — which helps to make this gobbledygook somewhat more human-readable:
- Gray means comments in Animate. A typical Code Snippet provides spades full of these for instructional purposes. In CSS, the comment tag is /*yourContent*/ and functions parenthetically. In JS, the comment is // and functions per line. You’ll see both kinds of comments in the code snippets. Comments are not executed when the browser interprets the instructions. We will delete all the commented areas once we understand the instructions they provide.
- Purple in Animate denotes a keyword. Keywords in JS are terms like this or function that are reserved for the programming language and which you can’t use to name objects or functions.
- Green indicates a string in Animate. “String” is a programming term, meaning a type of data comprised of characters rather than numerical data.
Stripping out the comments
So, once we process and understand what the commented text is telling us, we can delete it and get the much more manageable:
this.stop_btn.addEventListener("click", fl_ClickToGoToAndStopAtFrame.bind(this));

function fl_ClickToGoToAndStopAtFrame()
{
this.gotoAndStop(0);
}

this.go_btn.addEventListener("click", fl_ClickToGoToAndPlayFromFrame.bind(this));

function fl_ClickToGoToAndPlayFromFrame()
{
this.gotoAndPlay(0);
}
There is a repeating pattern here, so let’s break it down further and look at only the first six lines. This is one actual, actionable code snippet.
this.stop_btn.addEventListener("click", fl_ClickToGoToAndStopAtFrame.bind(this));

function fl_ClickToGoToAndStopAtFrame()
{
this.gotoAndStop(0);
}
Before we analyze how the code works, notice some of the formatting principles at work. Some of this is machine functionality, and some of it is for human legibility, but you should follow all of these formatting rules:
- CAPITALIZATION MATTERS! addEventListener is not the same as addeventlistener. Capitalization is not just a style preference, it affects functionality. Only the properly capitalized code will work.
- Every line ends with a semicolon ; unless it precedes the curly braces { } which are often offset onto a new line for emphasis.
- Commands contained in curly braces are set on a new line and often indented for human legibility.
- Every time an opening parenthesis or curly brace is used, a closing parenthesis or curly brace must close the statement.
There are two parts to the code, with the first on Line 1, and the second on Lines 3-6.
Part 1: Event Listening
this.stop_btn.addEventListener(“click”, fl_ClickToGoToAndStopAtFrame.bind(this));
This code creates an “event listener” to “listen” for clicks (or, on a touch device, taps). Huh? Applying an event listener tells the browser to wait for some kind of user input to happen before allowing the code to respond. An event listener is a method; in programming, a method is like a verb. In this example, the event listener tells the browser to wait (or “listen”) for a mouse click on the button with the id stop_btn.
When the event listener “hears” an event (that is, when the browser detects a mouse click on the red button), it executes a function: the code snippet created called fl_ClickToGoToAndStopAtFrame. A function is code that defines what an action does and can be reused. What about the terms this and bind? “This” is a term that JS uses as a pronoun: just as we write “Sally is hungry so she cooks” instead of “Sally is hungry so Sally cooks,” the reserved term “this” is such a shortcut. “Bind” is a method of calling a function (that is, making a function happen) and setting the “this” value explicitly for a specific kind of event.
So, this.stop_btn.addEventListener in English would be something like: “Yo, Browser, make something happen when you detect someone doing something to the red button.”
Then, (“click”, fl_ClickToGoToAndStopAtFrame.bind(this)); means: “This something you need to detect is when someone CLICKS on the red button.”
If it sounds a bit sarcastic and like we’re talking to a toddler, that’s because the browser IS a kind of toddler. Computers simply don’t understand implied connections, metaphors, or nuance. We can easily understand “do something when someone clicks on the red button.” But computers are hyper-logical and can’t understand that second statement without someone explicitly telling it the first part.
Part 2: Calling a Function
function fl_ClickToGoToAndStopAtFrame()
{
this.gotoAndStop(0);
}
So far, the browser knows to do SOMETHING when the button is clicked, but you haven’t yet told it WHAT to do. The fl_ClickToGoToAndStopAtFrame() “calls” the function, and, in the curly braces right afterward, that WHAT is finally revealed. In this case, this.gotoAndStop(0); means to return to the first frame and stop the animation. So, in English: “Hey, Browser, I bet you’d love to know exactly what I want you to do when someone clicks on the red button. OK: I want you to stop playing the animation and bring it back to the very beginning again, and don’t start playing it again once you do!”
By the way: as far as the browser is concerned, the code could read on one single line, so what’s with all the spaces and line breaks? It gives the code some visual structure that helps humans read it.
So, now, your turn: take some time to read and interpret the code from Lines 8 through 13. How does the browser know how to make the animation start again?
Debugging
The instructions above should yield a working file in a browser window. However, mistakes are made more often than not, and debugging, the dark art of finding out what’s wrong with your code, should be considered an important part of your process. Don’t assume you won’t have to do it!
Test the movie and click on the stop and start buttons in the browser. If the buttons work, bravo! Otherwise, it’s time to debug.
At first, most of your bugs are going to be typos such as missing semicolons, misused lower or upper case, or similar characters. For instance, if you type play(O); instead of play(0); the green button won’t function. Of course “O” (the letter O) is a typographic mistake for the integer “0” (zero) — look at the computer keyboard and you can see this would be among the most common typos at the same time it’s one of the hardest to spot. Fix the typo, and the code will validate and play as expected.
A working file should look and behave something like this:
Note: if you’re looking at the iframe content on a mobile device, click here and rotate your screen horizontally.
Eventually, you’ll be able to create responsive content, but these beginner-level exercises are fixed-size.