

helloWorld

Say hello to the sample site
Hello World has become a tradition in programming: it’s the first program you write in a new language. First mentioned in a tutorial to the B programming language, it was popularized in a 1978 book introducing The C Programming Language, in a program that looked like this:
main() {
printf("hello, world\n");
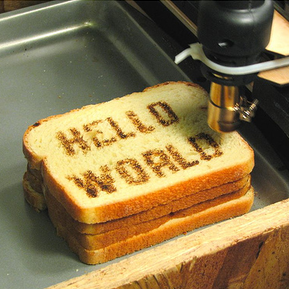
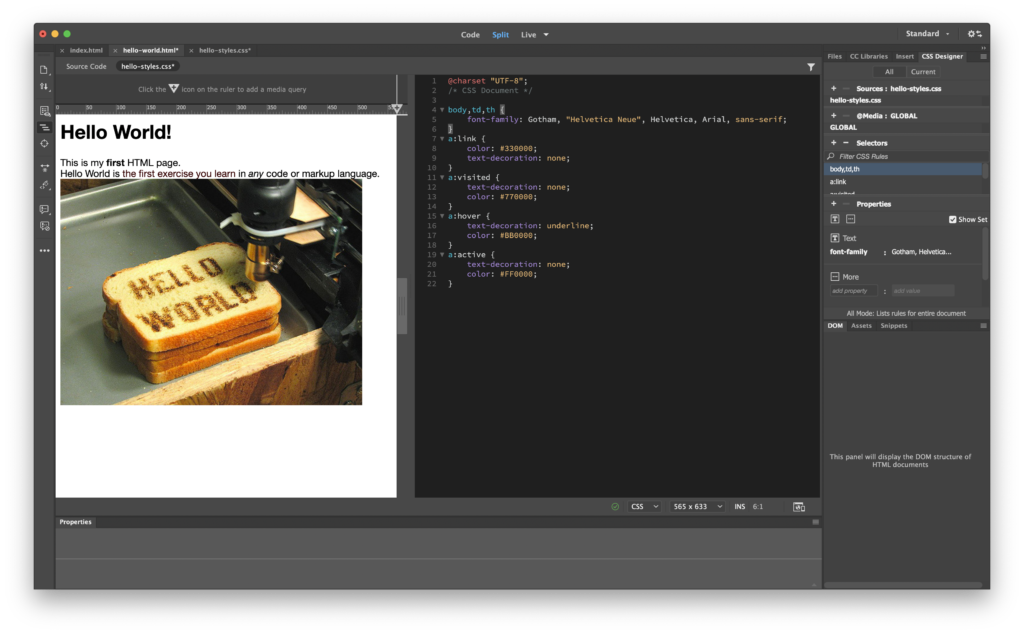
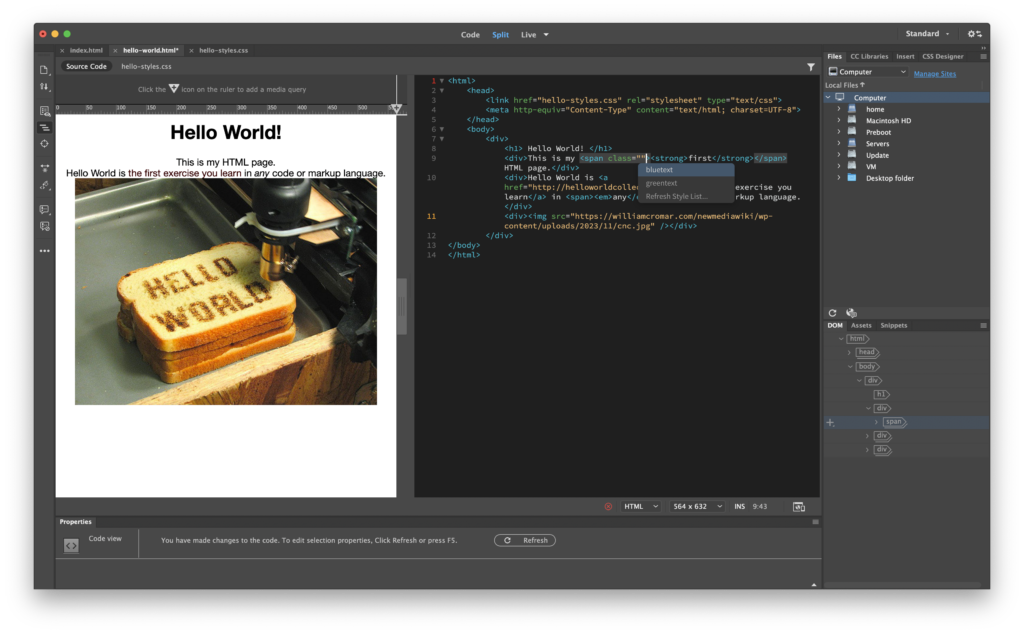
}Since Hello World has shown up in every programming language, we’ll honor the tradition in the site you’ll build in this exercise. Have a look at the sample site to say hello!
Hello World CNC toaster, from Wendell Oskay
Materiality of the web
We think of the web as an immaterial space, yet there is a materiality to the web. When architects use the term materiality, they refer to the concept driving the application of materials in the medium of a building. What are the materials of the web artist?
Code. Metaphor. Infrastructure.
In furniture design, certain surfaces — wood veneers, upholstery, plastic laminates — overlay others, becoming a kind of virtual material. A fabric imprinted with wood texture depends on our ability to conflate wood and cloth, as well as means of representation (photography and printing) to create it.
On the web, the overlay of real life (RL) through extended metaphor (buttons, galleries, sites, links, menus), combined with means of representation (screen, projection, dot matrix) operates on much the same principle.
All of that is hosted by a remote server (computers, fiber-optic cables, satellites, cell towers, modems). Unlike most traditional tactile media, the materiality of the web is largely hidden. This is not unlike architectural design, where structure, HVAC, wiring, plumbing, and other systems are mostly tucked inside a formal envelope that responds to a functional need. This might explain why a lot of people trained in architecture (like me) find a happy second career home in web design.
Metaphors of a page
The virtual world is largely built on metaphors relating it to tactile experience. We speak of web “pages” and push “buttons” with our “mice.” Icons represent institutions, activities, abstract concepts, and even emotional states.

Early example of emoji-like typographic designs. Illustration from British humor magazine Puck in 1881, from Wikimedia Commons
To better understand the role of metaphor, read the following:
- Using Metaphors in Web Design from tuts+ provides a brief overview of metaphors on the net.
- Emotion? Easy. Anyone who texts or emails is familiar with emoticons, the original text-based versions of which have been neatly referenced at PC.net. The idea of the emoticon has roots ranging from concrete poetry and works of visual humor, seen above, to the famous Smiley by Harvey Ball. Scott Fahlman is credited with the first use of a visual metaphor expressing emotion in an online message board.
- Various compilations of visual metaphor material exist on the web, including collections of buttons, icons, menus, and others to create a meaningful user interface (UI). Explore just a few here:
- Icon Archive has a collection of hundreds of image-based icons.
- Designmodo free web menu page allows the download of code for tabulated menus (think binder dividers with tabs).
- HTML.am creates easy code for lists, checkboxes, and radio buttons.
- Web Buttons Generator makes custom code for buttons.
What would the web look like without metaphor? Visit this link and you’ll see. We call this an unformatted directory. Looks a lot like a stripped-down folder window on your desktop, doesn’t it? Would you characterize this as a rich user experience (UX)?
Code has materiality
Code is language. Think of code as a material that hides its materiality. When you view a website, what you see is a seamless graphic interface with text, images, and links, but all online media is constructed from code. Code is a set of instructions. Open any page in a web browser and click on View > Page Source (or equivalent, depending on your browser) to see the code used to create that page. This code tells the browser how to render the media elements into a seamless interface. We create web pages using the Hypertext Markup Language (HTML). We write the code so that the browser, which is called a client, can display the interface we create. In this title, we will explore the basics of this code.
Breaking the rules
We usually program a website to hide the presence of code in a seamless graphic façade, but experimental artists often revel in exposing it. The artist group Jodi (Joan Heemskerk and Dirk Paesmans) works extensively with the materiality of code. In the early moments of the dot com boom, when corporations began to stake out an aesthetic and functional claim online, Jodi hosted a series of confrontational pages. Theirs responded to the corporate attempt to professionalize the aesthetics of online media and undermine the presence of code.
Wwwwww.jodi.org looks like random text in the browser, but if you view the source you can see a highly structured plan: a diagram of a nuclear bomb is made with the text of the source code.
Jodi threw a bomb at clean design and offered a reward to anyone aware of a web page’s material to view the source code. They took advantage of the phenomenon that, when code is displayed, it does not account for white space. “Forgetting” this basic principle allowed Jodi to make a brilliant visual and conceptual argument for breaking the rules. In the early years of the World Wide Web bandwidth was small and social media was not even a twinkle in Mark Zuckerberg’s eye. A large amount of communication took place on text-only listservs, chat rooms, multi-user dungeons (MUDs), and bulletin board servers (BBS). Pages had few images on them because they took too long to download. In the absence of high-resolution images, people found creative ways of drawing with text.
ASCII art
Drawings made by arranging the 128 characters that are part of the American Standard Code for Information Interchange are ASCII art. Loosely defined, we create ASCII art (pronounced ASK-ee) by using text, usually in the form of figurative drawings. The shapes and densities of the characters are treated purely as formal elements to construct line, form, and shading. As an example, Heath Bunting’s 1998 portrait of early net artist Natalie Bookchin can be seen on his website.
Hackers and painters
Paul Graham develops strong parallels and links between the world of the hacker (in the original sense of the term) and the world of the artist in his seminal essay Hackers and Painters. It’s a 20-minute read worth every minute.
Hello HTML
Your first hand-coded web page
With the materiality of code in mind, you will construct your first web page created from scratch. Before starting, we cannot stress enough that you must be aware of where your files are saved when you are working on projects that involve code. For this chapter, depending on where you are working:
- If you’re working on a personal machine, locate the root directory on the SFTP reference page as you assigned it. Dreamweaver will remember this root from the work you did on that page.
- If you’re working on a networked computer lab machine, create a folder on your desktop and name it something logical like www-local. Because this is a networked machine, you have to redefine the root every time you begin a design session. Visit SFTP for reference if needed.
Inside the root folder, create another folder called helloworld. Commit to saving everything that you make from or related to this chapter into the helloworld folder. Do not make any other sub-folders yet.
Open a text editing application, such as Text Mate. It’s a free download if you don’t have it on a personal machine. On a PC, use Note Pad. You’ll use it to start writing code from scratch.
Writing tags in a text editor
In HTML, a tag “marks up” the content of a file, giving instructions regarding the display of content to a browser application reading the document. In your new document, type the opening and closing HTML tags as seen adjacent.
<html>
</html>
Every tag must open and close, so they always come in pairs, with a slash used in the second one to close it. Tags act parenthetically, meaning tags will affect anything we insert between them. The HTML tag tells the browser that it is reading the Hyper Text Markup Language.
Position your cursor after the opening HTML tag. Hit Enter and press the Tab key. While it does not affect the display or functionality of the code, we use tabbing to add visible structure to the code so that it is human-readable. The browser ignores all white spaces and tabs, but code can get quite complex without negative space to help you visually navigate it.
Type in the opening and closing body tags. The web page will display all content we place inside the body tag.
<html>
   <body>

   </body>
</html>
Now, let’s add actual content. Inside the body tag, type Hello World!
<html>
   <body>
   Hello World!
   </body>
</html>
Save the file as index.html. The word index always means the home page of a website. Browsers are programmed to find and open any page named index. Make sure that you add .html to the end of the file name. The file extension is important. It communicates to the browser that this is a .html file.
Remember: When saving files for the web, do not use capital letters, spaces, or reserved characters like (! + @ & = ?) Only use a-z, 1-9, -, and _.
Viewing in a browser
Open a web browser (we used Chrome), click File > Open, and navigate to the index.html file. Notice that Hello World! is the only visible part of the code. However, you can display the code: go to View > Developer > View Source, or right-click in the browser window and select View Page Source in the contextual dropout menu. Wording and workflow may differ from browser to browser, but all modern browsers have this capability.
Hello Dreamweaver
We wrote the Hello World! code above using a text editing program. A text editor is the only application necessary for writing code. Code can be laborious when the content in the browser is more complicated than Hello World! Most artists and designers prefer to use a WYSIWYG (what you see is what you get, and pronounced “wizzywig”) application such as Dreamweaver to develop code. Dreamweaver can actually “write” the code for you, which makes creating the HTML file much easier—although it’s good to know how to write the code yourself. We’ll do both.
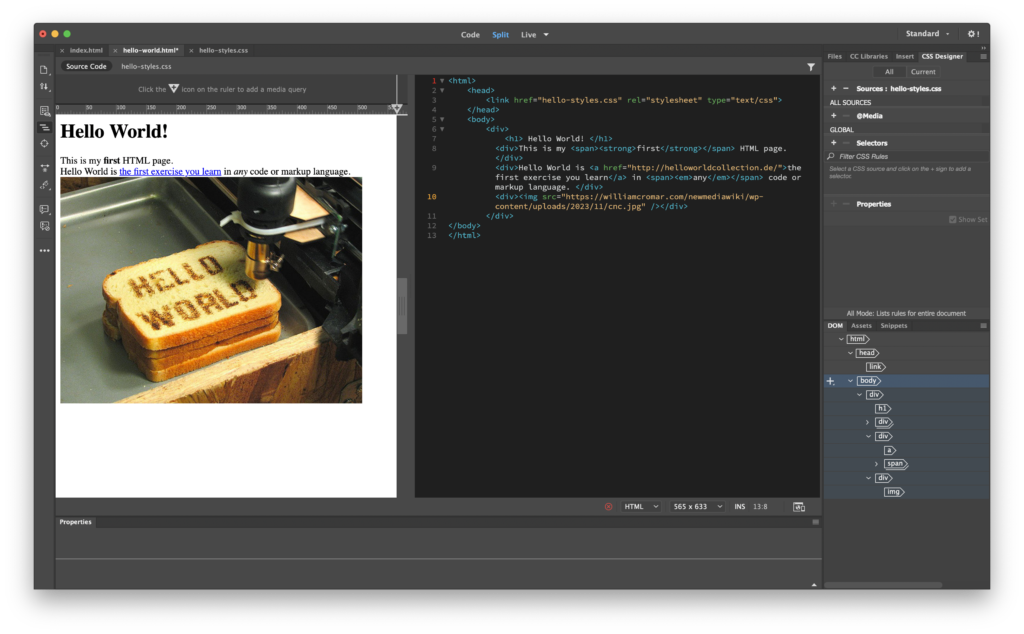
Setting up the Split View
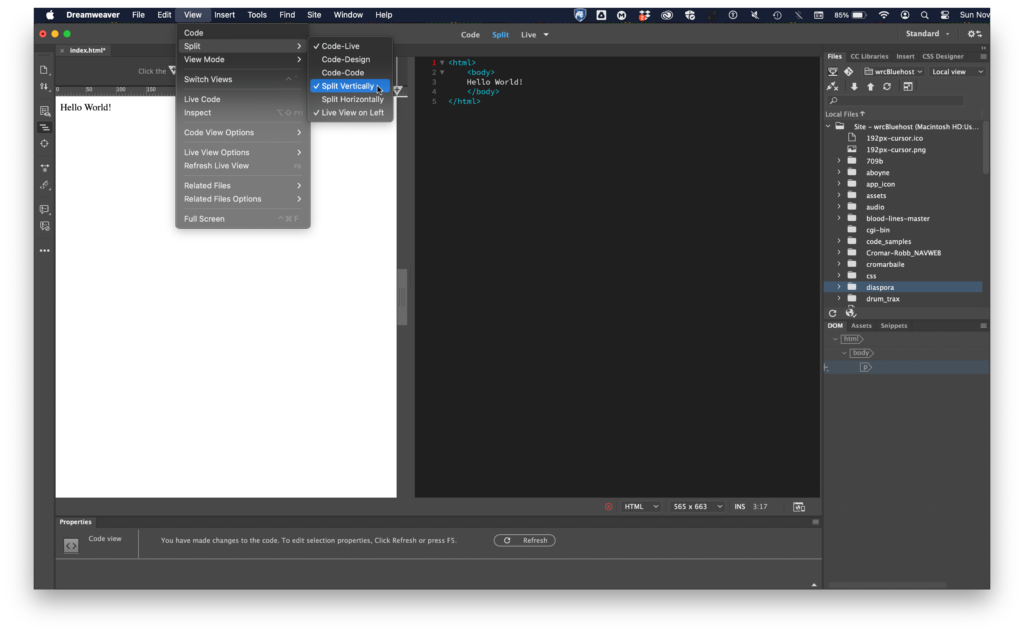
In this exercise, we will modify the file we just made. Open Dreamweaver from the Dock or Applications Folder. In Dreamweaver click File > Open and navigate to your index.html file. When it opens, in the upper center of the user interface (UI) select Split View. Split View displays both the code and the result of the code like a browser. Another way to think about this is that the code view is the instructions to the browser and the design view is the way the media looks in the browser. If the screen splits horizontally, it’s pretty terrible for writing code. You can switch it to a more useful vertical split by going to the menu View > Split > Split Vertically and selecting it.
In Split View, find Code on one side and Live on the other. You can toggle that side between Live or Design at the little dropout menu just above the split. Click on Code there, and we only see code. Note the color coding for your markup language. The tags are blue and the text is white.
Toggle Design and Live
Click on Design, and now we can only see the result of the code or a rough idea of what will be displayed in the browser. Toggle to Live, and this shows us a more accurate view of what can be seen in Webkit browsers like Chrome or Safari. Keep this toggled at Live, and select Split View. Notice that the split will contain either Design or Live depending on what’s toggled.
Dreamweaver is a WYSIWYG editor because you can change the code by using Dreamweaver pull-down menus and buttons in Design or Live View. It should rather be called a WYSIWYGMOTT, or What You See Is What You Get Most Of The Time. The Design and Live Views are about 95% accurate. Please don’t rely on them fully! When designing for the web, always view your work in an actual browser as you design. Most designers view their work in multiple browsers to see if their code adheres to cross-browser compatibility.
More HTML
Modifying a file
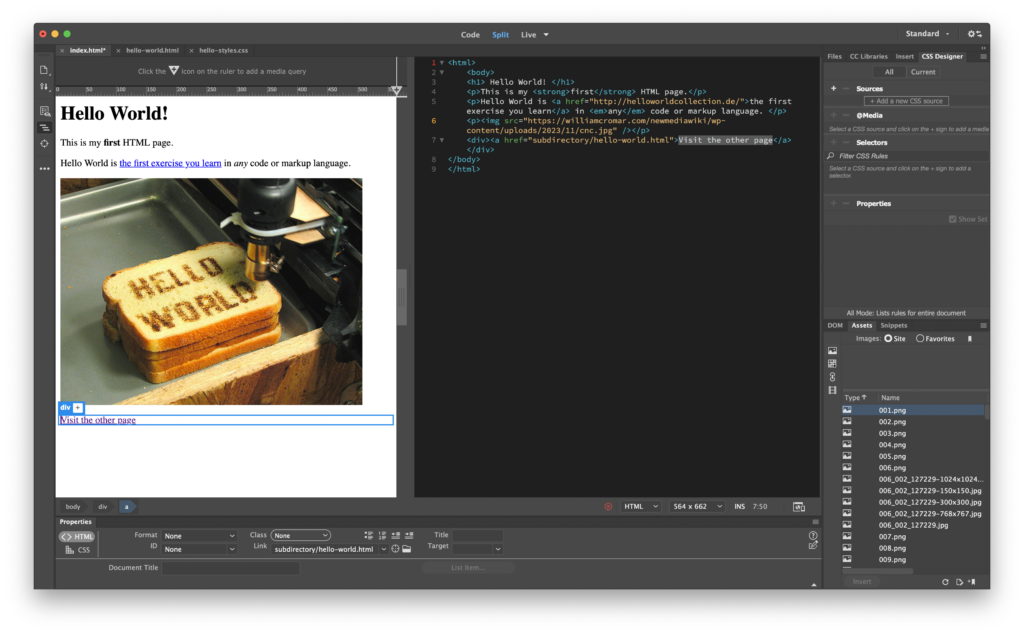
Back in Split View, in the Live View half, place your cursor at the end of the Hello World! text. Hit the return key and type This is my first HTML page or something similar. Save the document using File > Save. The home page of any website is always named index.html.
Note how Dreamweaver changes the code for you. A paragraph tag has been added to the code to account for the new paragraph we made by hitting the return key in Live View.
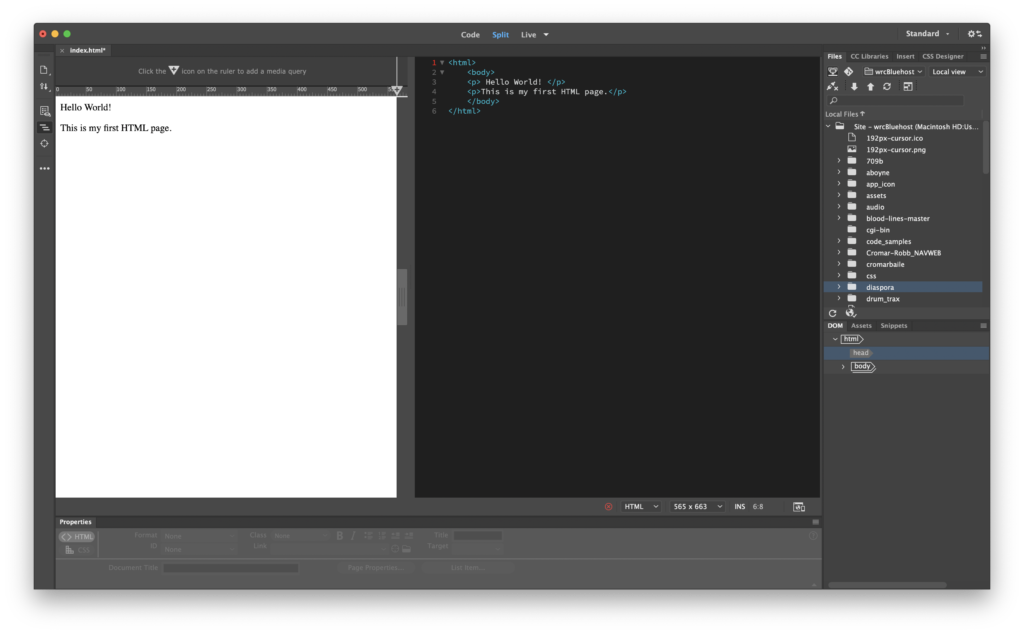
The paragraph tag — <p> </p> — is opened and closed around the new line of text. This is an example of nesting. Nesting occurs when an open and closed tag pair is set inside of another open and closed tag pair. The relationship between where each set opens and closes is important. We structure one fully inside the other so that they never overlap.
YES
<html><p></p></html>
NO
<html><p></html></p>
Go back to Dreamweaver and type a new paragraph in Live View:
Hello World is the first exercise you learn in any code or markup language.
Save the file and refresh the browser to see the new text displayed on the web page. The browser displays changes to the file when changes have been made to the original file (File > Save in Dreamweaver) and the browser is refreshed (Command+R in most browsers).
Adding hyperlink tags
Hyperlinks, often just called links, are a one-click route from one HTML file to another. Links are the simplest form of interactivity on the web.
Open a new web browser tab or window and search for “Hello World Collection” to find this link:
This site is a massive collection of “Hello World!” examples. Copy the link from the browser address bar and return to the index.html file in Dreamweaver.
Make sure the Properties Palette is available for the next step. If the Properties Palette is missing, select Window > Properties or Window > Workspace Layout > Default. Dock the Properties Palette at the base of the UI, under the split view, by dragging it over that area and observing a blue line.
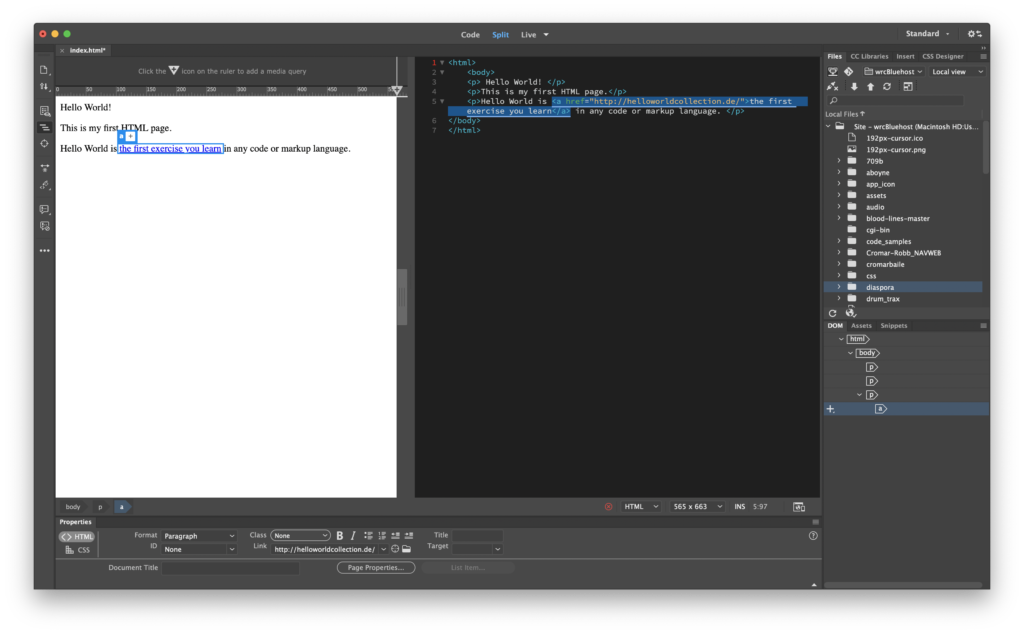
In Live View, select the text fragment the first exercise you learn by highlighting it with your mouse. Paste the link into the field labeled Link in the Properties Palette. Press the Return key and it will change the selected text from body copy to a hyperlink. This is important: save the file. Remember, without saving the file, viewing the refreshed page in the browser will be disappointing.
Go to the browser and refresh the index.html page. The link should function in the browser. Return to Dreamweaver and inspect the code:
Hello World is <a href="/http://helloworldcollection.de/">the first exercise you learn</a> in any code or markup language.The a stands for anchor. href is a property of the anchor tag, and tells the browser where the hypertext reference points. The value for that property is inserted after the equal sign =, and inside double-quotes " ". In this case, the value is the URL. The anchor tag is closed with a slash, or </a>. Notice that the anchor tag starts just before the word the and closes just after the word learn. This part of the sentence becomes the link.
Adding image tags
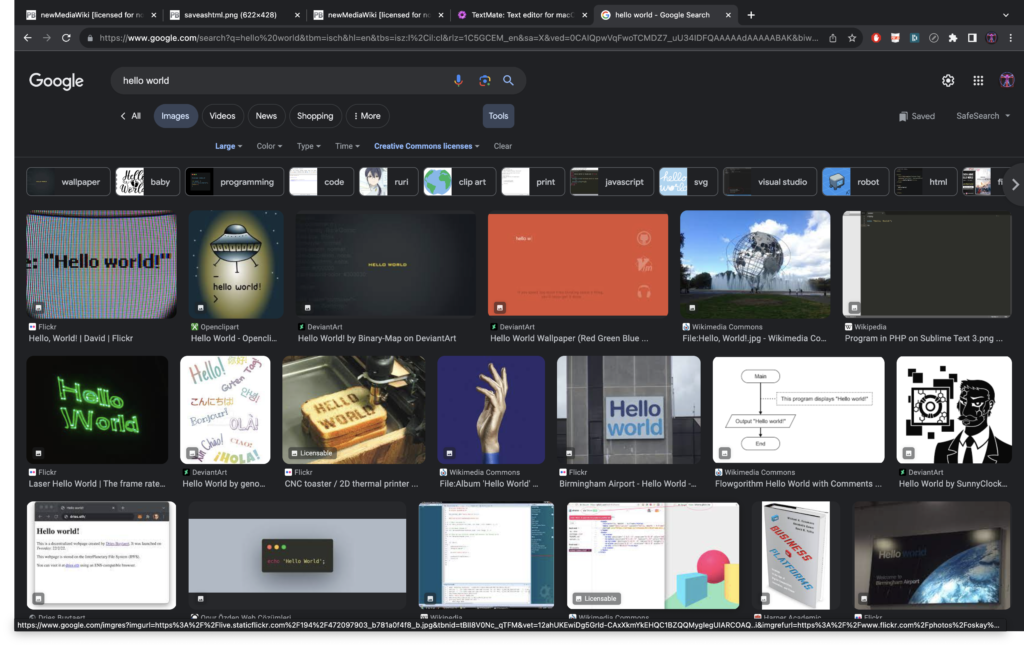
We will search for a Creative Commons-licensed image to work with. Open a browser window and consult a search engine for the term “Hello World” in an image search. Using Google, you can use Tools > Usage rights > Creative Commons licenses and Size > Large to narrow the search.
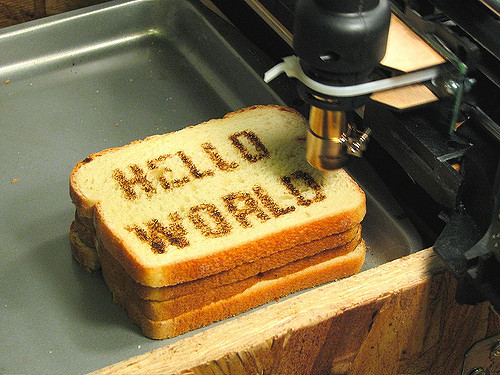
We love that image of the CNC machine with a blowtorch! It’s by Wendell Oskay, licensed for us to reuse with attribution, so we can download a medium size 500 pixel-wide image and use it.
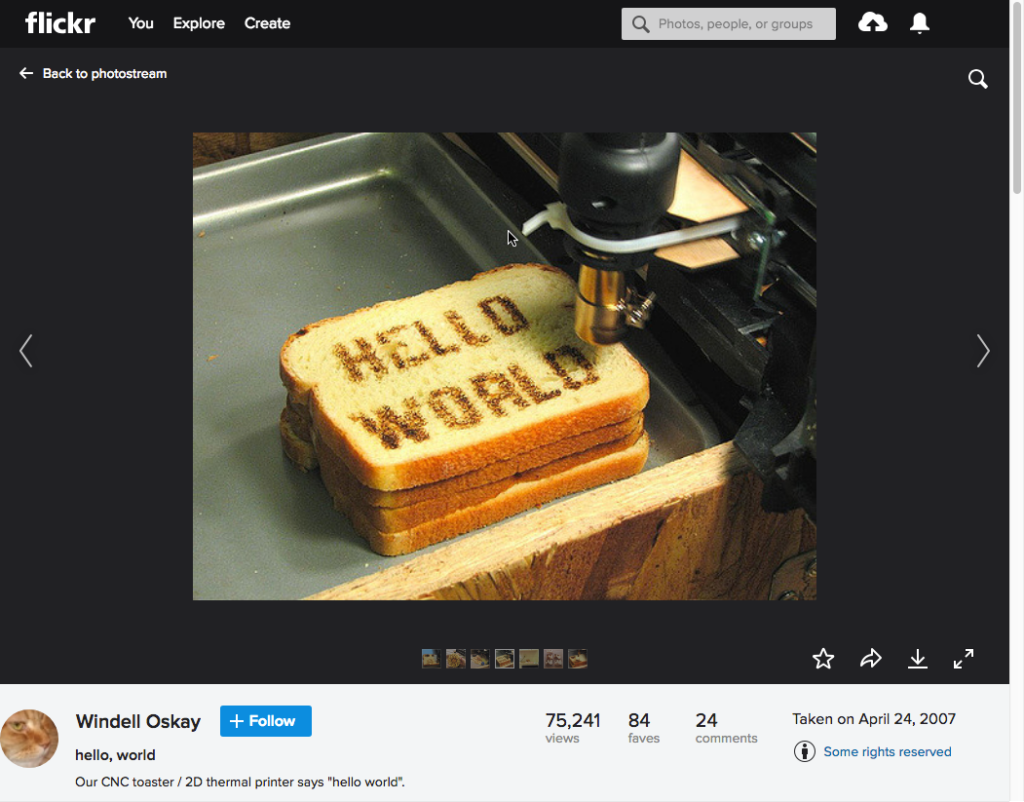
We renamed the file cnc.jpg, as seen below. If you’re on a desktop, you probably see it full-size.
Right-click on the image above and select Copy Image Address from the contextual dropout (in Chrome, but other browsers have similar capability). This copies the URL, the path to the location where the image file is saved on the server.
Back in Dreamweaver, type a new paragraph tag <p> </p> on a new line below your last text, but still inside the </body> close. Now add an image tag like this: <img src=“url” />. That /> at the end of the image tag is a shorthand signifying a closing tag. Replace "url" with the URL that you copied from the image above by pasting it in between the double quotes. The code will look like this:
<p><img src="https://williamcromar.com/newmediawiki/wp-content/uploads/2023/11/cnc.jpg" /></p>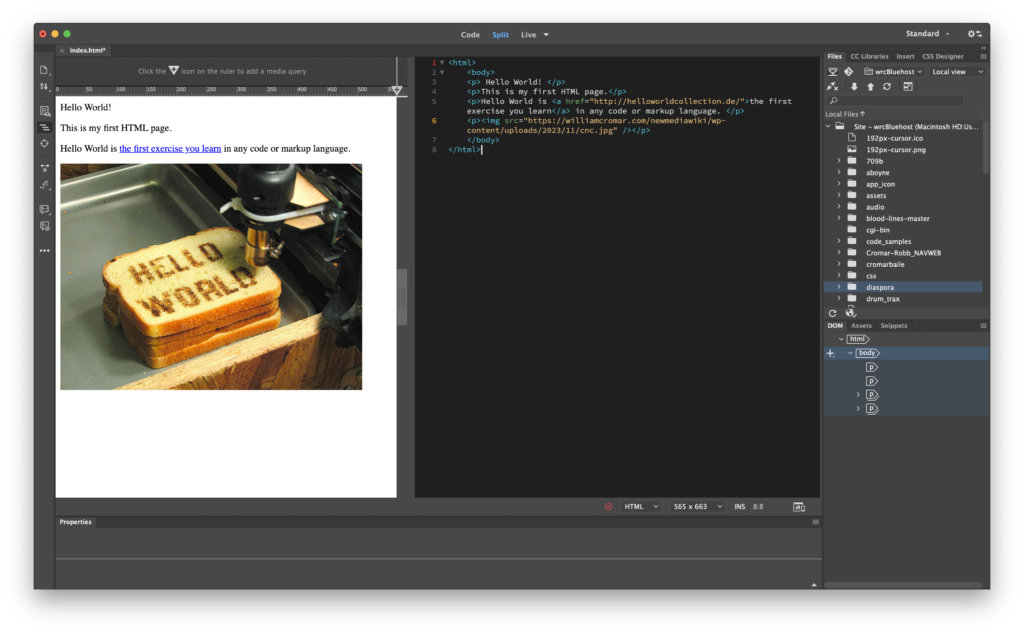
Save the file and refresh the page in your browser. The image appears on the page, with a paragraph break between it and the link text.
Creating structural emphasis for type
In Dreamweaver, you will use the interface to add formatting, and you will see the code that the browser sees. Thinking of the browser as a printer (and the web as the paper) can help us understand markup language. You will discover that it is not always the perfect simile, as user interaction varies from the printed page to the web browser. The media environment always affects the audience.
If you have created a document in Microsoft Word, you have used a markup language. The difference between working in Dreamweaver and Word is that you are aware that you are creating the markup language in the HTML code. In essence, selecting the type and using the B button in Word to create a bold style is a user interface within the program that informs the printer to markup the selected type. The printer reads the file sent by the program and formats the typography.
But don’t confuse formatting with styling! HTML is a structural language, not a styling language. Header tags — <h1> through <h6> — provide organization to a text, much like outlining a paper. Headers can even anchor a text: we use headers on this page to create a table of contents that allows quick navigation of a long scroll. Other structural tags include <strong> and <em>. These help with accessibility by allowing those who use screen readers to understand levels of importance in an author’s text. Browsers often interpret the strong tag by bolding type, and the em (short for emphasis) tag by italicizing.
Header tag
We’ll use the highest-level header tag — <h1> </h1> — to transform Hello World! into a headline. First, select the text. Then, insert the tag using the Properties Palette. Find the Format field and in the dropout menu there select Heading 1. The code will look like this:
<h1>Hello World!</h1>Strong and emphasis tags
Formatting type in Dreamweaver is like formatting type in other Adobe programs. Bold and italic formatting are one click away but notice how Dreamweaver adds the code to the HTML file.
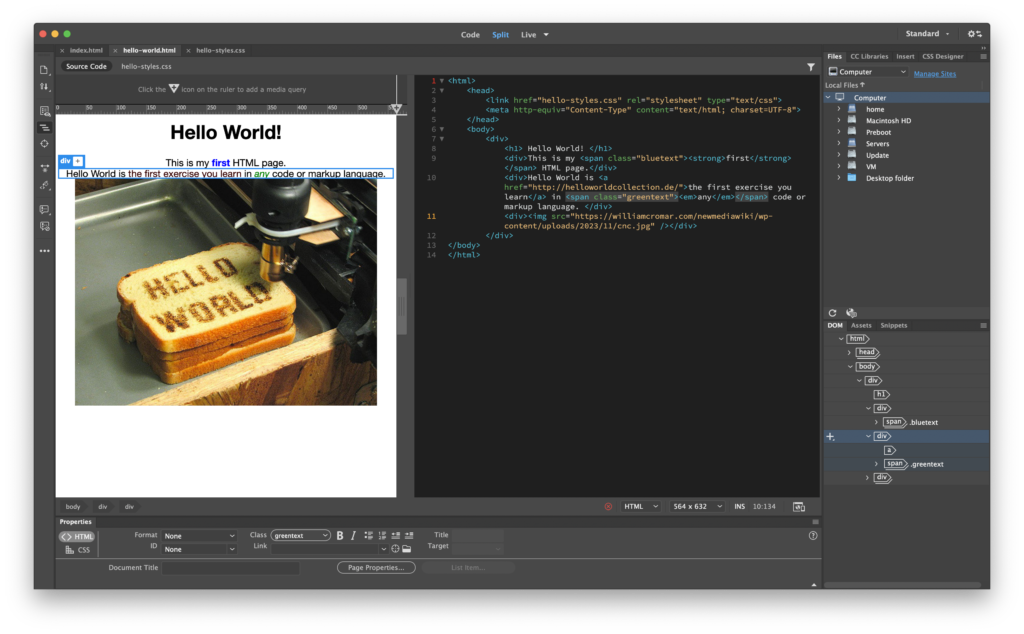
Click on Split View. Make the word first bold by selecting it and clicking the B button in the Properties Palette. Dreamweaver will surround the word with the strong tag — <strong> </strong>. Now select the word any and click the I button in the Properties Palette. Dreamweaver uses the emphasis tag — <em> </em> —to italicize the word. These look like this:
<strong>first</strong>
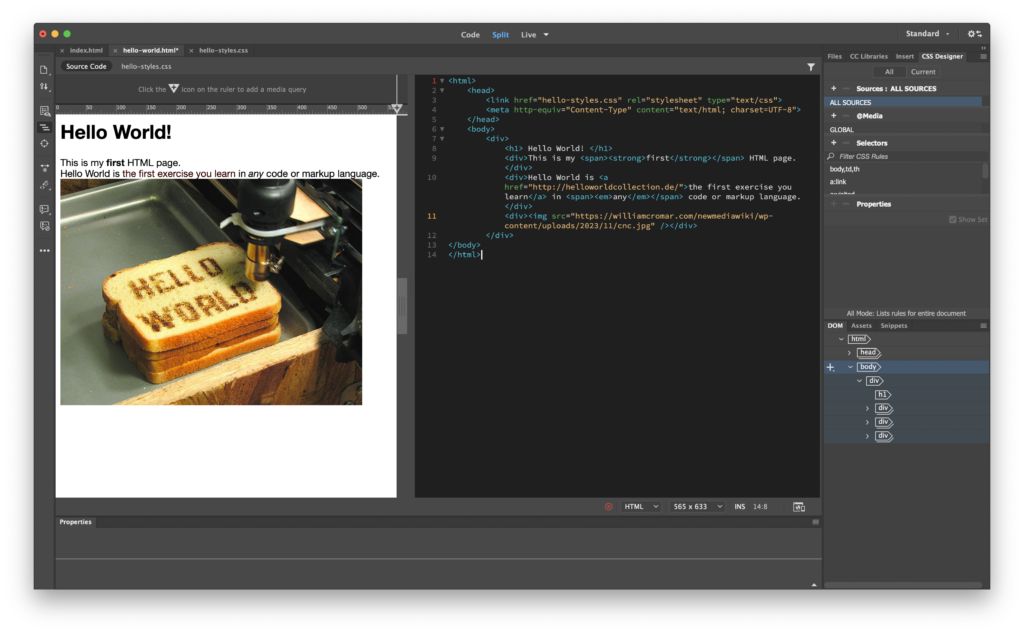
<em>any</em>The entire block of code should look like this now:
<html>
<body>
<h1> Hello World! </h1>
<p>This is my <strong>first</strong> HTML page.</p>
<p>Hello World is <a href="http://helloworldcollection.de/">the first exercise you learn</a> in <em>any</em> code or markup language. </p>
<p><img src="https://williamcromar.com/newmediawiki/wp-content/uploads/2023/11/cnc.jpg" /></p>
</body>
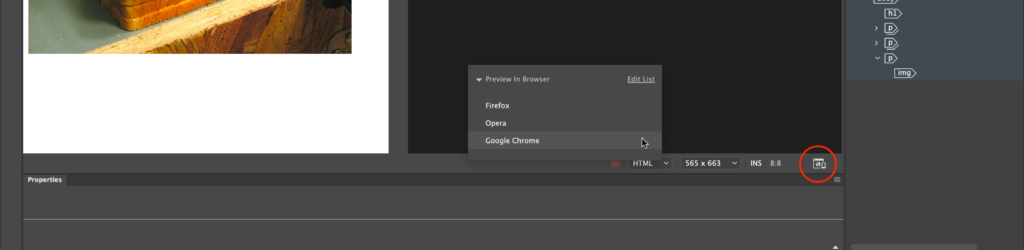
</html>To view the code in a browser, use the phone/desktop icon at the lower right of the code window. Click on it and it will open a dropout with available browsers to test. We’re choosing Chrome here:
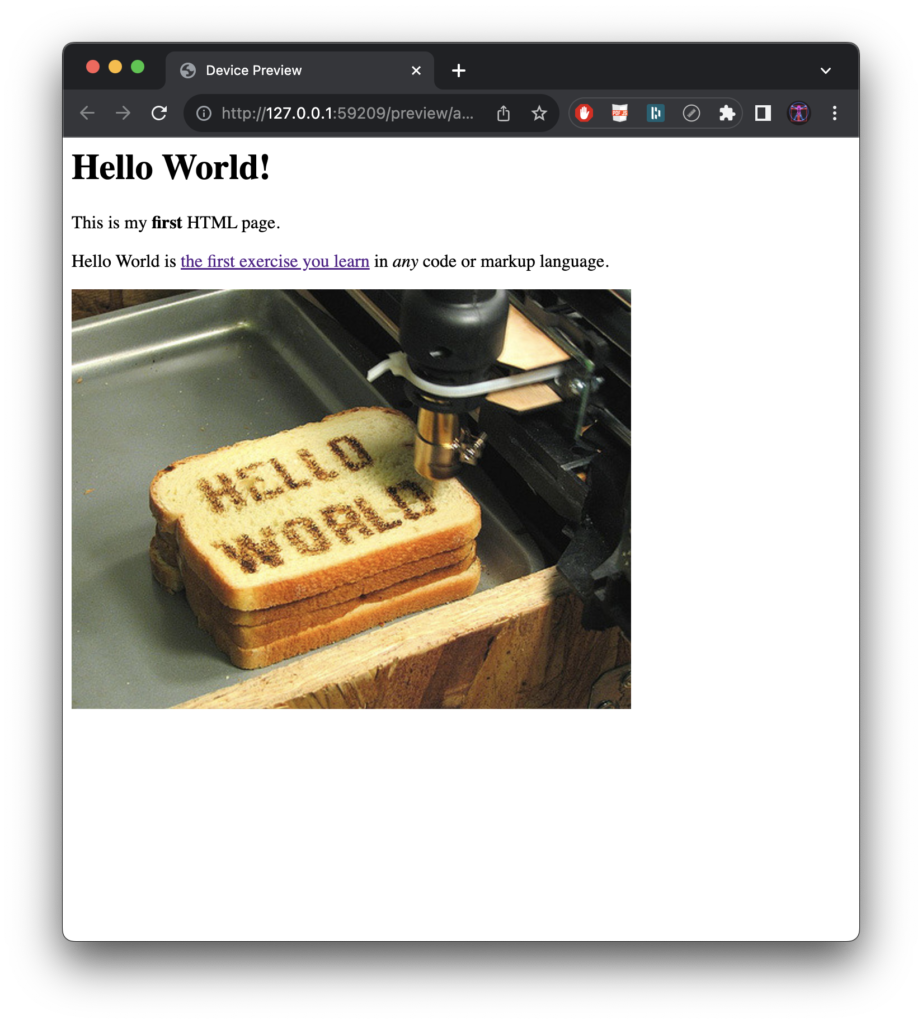
And it should look something like this:
Hello CSS
But it’s not much to look at, is it? As a markup language, HTML is solely preoccupied with creating structure. With only headers, strong, and em, combined with a few other structural formatting elements like lists, indents, and blockquotes, it is very limiting. If you want to communicate in a more visually compelling way, you need to add some <style> </style>!
Visit the sample site again, and this time take a deep look at the second page, linked out from the first page.
“Form follows function”
Before doing the exercises, visit this introduction to architect Louis Sullivan’s phrase “form follows function” used to demonstrate the Modernist invention of the bifurcation of form and content. Then visit A List Apart, an online magazine that was an early advocate of CSS. Note its high-level design with the more utilitarian, but equally functional, Craig’s List. Although not considered as much of a design by most, note how effectively the interface allows an audience to find and understand links. Finally, visit the website CSS Zen Garden to see visual variations on a common set of content — which do you like best and why?
So far, in playing with HTML, we left many aesthetic choices out of the exercises and focused on the tools for building code. We can achieve aesthetic goals through code! We need not leave aesthetics out of the conversation, in the spirit of Sullivan’s “form follows function.” Now we will focus on a key concept in web design: keeping the structural markup separate from the code that controls the aesthetics. In other words, we contain content separately from the style applied to it. There are a few reasons for keeping the two separated, namely:
- Code is displayed on different browsers, each with different styling information;
- For accessibility, there are web standards that rely on this separation;
- We can easily easily reuse or modify styles, making the coding effort more efficient.
Cascading style sheets
The separation between content and form is realized when an HTML page full of content is connected to a cascading style sheet (CSS) that applies aesthetics by treating the page stylistically. Why “cascading?” This describes how styling rules “cascade” down from several sources. CSS has an inherent sense of hierarchy in which styles applied with a higher priority can override rules of a lower priority.
So far we have modified page properties and placed links and images on the HTML page using Dreamweaver. The default font, font size, text color, and background color are all styles that we can modify, as well as the appearance of links such as color, underline, and rollover settings. Certain aesthetic options are limited on the web. For instance, for a web page to load a specific font, the font must be installed on the user’s computer. If the font is missing the browser will load a different font. Therefore, most web pages are designed using “system” or “web-safe” fonts (those installed on the computer at the time of purchase), including Helvetica, Arial, Times, Georgia, Verdana, Courier, and Geneva. Here we will begin to separate the content of the page from its formal properties using cascading style sheets (CSS).
For all your work in Dreamweaver for this exercise, choose the STANDARD workspace from the pull-down menu in the Application bar.
Three ways to apply styling
What are the different applications of styling to which we referred above? You can find CSS applied in three different ways, all of which are invoked by applying style one way or another:
Inline CSS
As the name implies, we apply inline CSS right alongside the element we are styling. For example:
The code looks like:
<p style="color: red; text-decoration: underline;">I am red.</ p>The browser presents:
I am red.
In this instance, style acts as an attribute modifying a tag. The attribute starts with style, followed by an equals sign — = — and then uses double quotes — "" — which contains the value of the attribute. A completed value ends with a semi-colon — ; — and you can pile on many values within one style attribute. Use inline CSS sparingly!
Internal CSS
If you have a style that you want to apply to multiple elements within an HTML document, but you are certain that style will not appear in other HTML documents in the website, you can place your CSS in a hidden part of the HTML document known as the <head>, a tag we’ll explore in the exercises below. Say you want to take the inline style created above and apply it to every <p> in one HTML document without having to rewrite it every time:
The code looks like this:
<head>
  <style>
    p {      color: red;      text-decoration: underline;
    }
  </ style>
</ head>
<body>
  <p>I am red.</ p>
  <p>I am red, too.</ p>
  <p>Wait, we're also underlined!</ p>
</ body>
The browser presents:
I am red.
I am red, too.
Wait, we’re also underlined!
In this format, we call the code a CSS rule.
It is characterized by the listing of a tag without the angle brackets, followed by a set of curly brackets — p { }. We place the values inside the curly brackets. But the big difference between this CSS rule and the inline equivalent is that the contents of each <p> will show up red and underlined. Where inline CSS is good for a specific case, internal CSS creates a more generally applicable rule.
External CSS
But what if you decide this style is something you’d like to use on every page of a website — and you have hundreds of pages on your site? It’s both inefficient and inflexible to have two lines of code in every HTML document. Instead, we create a CSS document, insert the rule there one time, then <link> it in the <head> every time we need it:
The code in the CSS file looks like this:
p {
  color: red;
  text-decoration: underline;
}
The code in the HTML file looks like this:
<head>
  <link href=”style.css” rel=”stylesheet” type=”text/css”>
</ head>
<body>
  <p>I am red.</ p>
  <p>I am red, too.</ p>
  <p>Wait, we're also underlined!</ p>
</ body>
In every HTML document linked to the CSS, the browser presents:
I am red.
I am red, too.
Wait, we’re also underlined!
The advantage of external CSS is clear: write the rule one time, and apply it across the whole site. Even better: change the rule one time, and it changes across the whole site! If internal CSS is general to a page, external CSS is general to an entire site.
But what if we don’t want all our <p> tags to be red and underlined? What if we want the flexibility to decide which ones do and which ones don’t carry the formatting, without reverting to clumsy inline CSS? Can we have our cake and eat it, too?
Selectors
We can modify specific tags by assigning them a class or an ID. These are known as selectors.
Classes
We use a class name to assign a style to any number or kind of HTML tags. Any word that is not reserved for use in code can be used to create a class, and its syntax is recognized by a period placed in front of that word: .class1, .anotherclass, .anythingyouwish… though it’s important to customize class names that make contextual sense and are not over-long.
Classes can be added using internal or external CSS. Here, we’ll add a class from an external sheet:
The code for a class looks like this:
.redtext {
  color: red;
  text-decoration: underline;
}
The code in the HTML file looks like this:
<head>
  <link href=”style.css” rel=”stylesheet” type=”text/css”>
</ head>
<body>
  <p class="redtext">I am red.</ p>
  <p>I could be red if I only had some class.</ p>
</ body>
The browser presents:
I am red.
I could be red if I only had some class.
IDs
An ID is much more specific. There can only be a single HTML element within a page that receives an ID. The convention adds a hashtag in front of a name: #id1, #anotherid, #whatever… again, being sensible with context and length.
Here, we’ll add an ID using internal CSS, though they can also show up on an external sheet:
The code for an ID looks like this:
<head>
  <style>
    #textred {      color: red;      text-decoration: underline;
    }
  </ style>
</ head>
<body>
  <p id="textred">I am red.</ p>
  <p>I can never be red unless I get a different ID than my buddy here.</ p>
</ body>
The browser presents:
I am red.
I can never be red unless I get a different ID than my buddy here.
In these super-simple examples, it’s not easy to see why you’d choose between a class and an ID, but there are distinctions that become clearer as your code becomes more complex:
- Use a class for:
- Anything you’d like to see happen in more than one place across several pages in a site.
- Anything you’d like to see happen to more than one kind of HTML tag. For example, our class
.redtextabove could be applied to a specific<p>or<h1>.
- Use an ID for:
- Anything you think will only happen one time on a specific page. For example, positional information using values for
width,height,top, orleftmay be relevant only to that page. - Any assignment of a script that affects interactive behavior — a phenomenon that we’ll cover in a future exercise.
- Anything you think will only happen one time on a specific page. For example, positional information using values for
Now our code is becoming more refined. But what if we want to apply a style only to a single word or character within a tag? That’s a high degree of specificity!
Divs and spans
Divs and spans are useful for assigning classes and IDs in varying degrees of specificity.
A <div> defines a division or a section in an HTML document. It’s a larger container of sorts, which can then be styled with CSS. A <div> can contain other <div> tags to create nested relationships. Browsers place a line break after a <div> similar to (but not the same as) <p>. As such, it is known as a block element.
A <span> is a solution to mark up a small portion of text inside a block element without creating a break. We often see <span> tags paired with inline CSS, though they can also be styled with a class or ID attribute.
Let’s try an external CSS class application:
The code in the CSS file looks like this:
.redtext {
  color: red;
  text-decoration: underline;
}
The code in the HTML file looks like this:
<head>
  <link href=”style.css” rel=”stylesheet” type=”text/css”>
</ head>
<body>
  <div class="redtext">I am red.</ div>
  <div>I could be totally <span class="redtext">red</ span> if I only had a little more class.</ div>
</ body>
The browser presents:
I am red.
I could be totally red if I only had a little more class.
Applying styles in Dreamweaver
Now that we know where CSS can go, and how selectors can be defined and applied to sections and portions of content, let’s take that knowledge to Dreamweaver.
Prepare the project for styles
First, we’re going to create a directory hierarchy. Create a folder in the helloworld folder that already contains our index.html file. Name that folder subdirectory. Copy the index.html file and place the copy in the subdirectory. Rename this file, calling it hello-world.html. Open it in Dreamweaver.
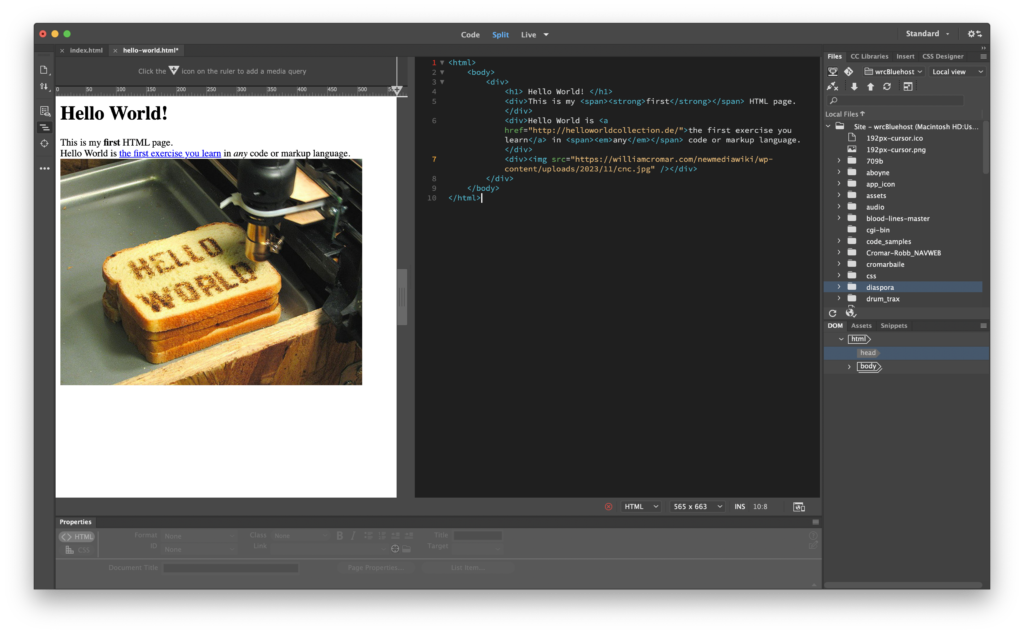
We’re going to create a block structure now, using the <div> tag as follows:
- Add a
<div>around the whole content, starting just before<h1>and ending with</div>just after the last</p>. It helps with legibility to keep those tags on their own lines as you see in the sample file. - Now change every
<p>to<div>and every</p>to</div>. Notice how the spacing changes in Live View. - Wrap the
<strong>and<em>tags with<span>tags. - Indent the lines as you see illustrated in the sample file.
Choosing CSS properties
We can now add some CSS properties to these block elements. There are hundreds of CSS properties, from accent-color to z-index! The best way to learn them is by using them over time, not trying to memorize them all. It’s like learning a foreign language: you build vocabulary by using vocabulary. Of course, like a language, it helps to have a dictionary handy, so use a CSS properties reference when you’re just starting. Examples include:
- MDN web docs CSS reference | Mozilla’s documentation of web languages and scripts is deeply respected in the development community because it’s comprehensive and respects W3C standards.
- cssreference.io | A visually oriented reference of many properties, with well-done illustrated and animated examples.
- W3Schools CSS Reference | W3Schools has a somewhat well-deserved bad rep in the development community. Their name implies affiliation with the W3C (they’re not), and their code samples don’t always conform to the standard. But: they have a nice sandbox feature that lets you test out code. If you are aware of the liabilities, that feature is very useful.
In the rules we’ll create below, we’ll use some simpler properties that we know will create interesting styles. Don’t worry if you feel slightly overwhelmed!
Create and link an external style sheet
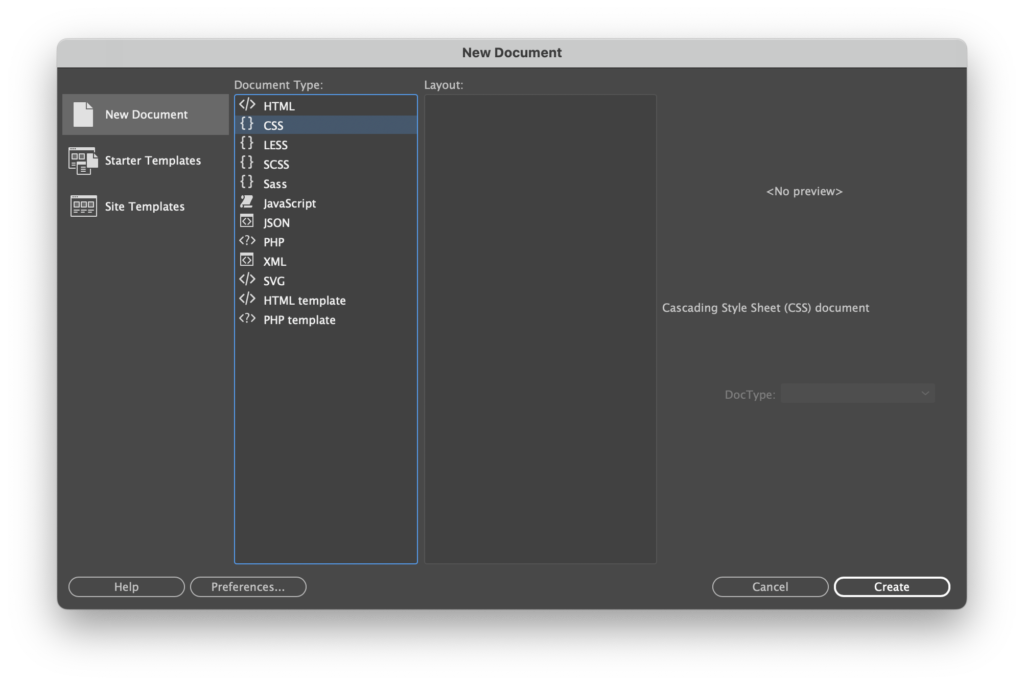
In the Dreamweaver menu, find File > New, and in the dialog box that opens, choose CSS then hit Create.
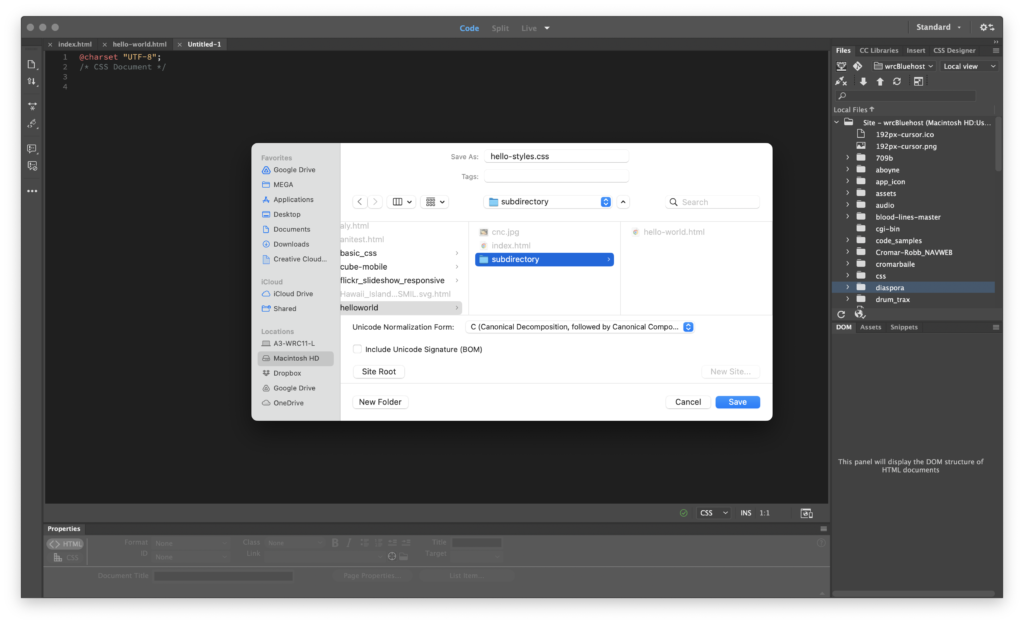
This creates a new .css file. Save it by naming it hello-styles.css and placing it in the subdirectory next to hello-world.html.
Now we link the CSS document to the HTML document. To do this, the HTML document needs a <head> tag. Open the tab for the HTML document and add <head> </head> between <html> and <body>.
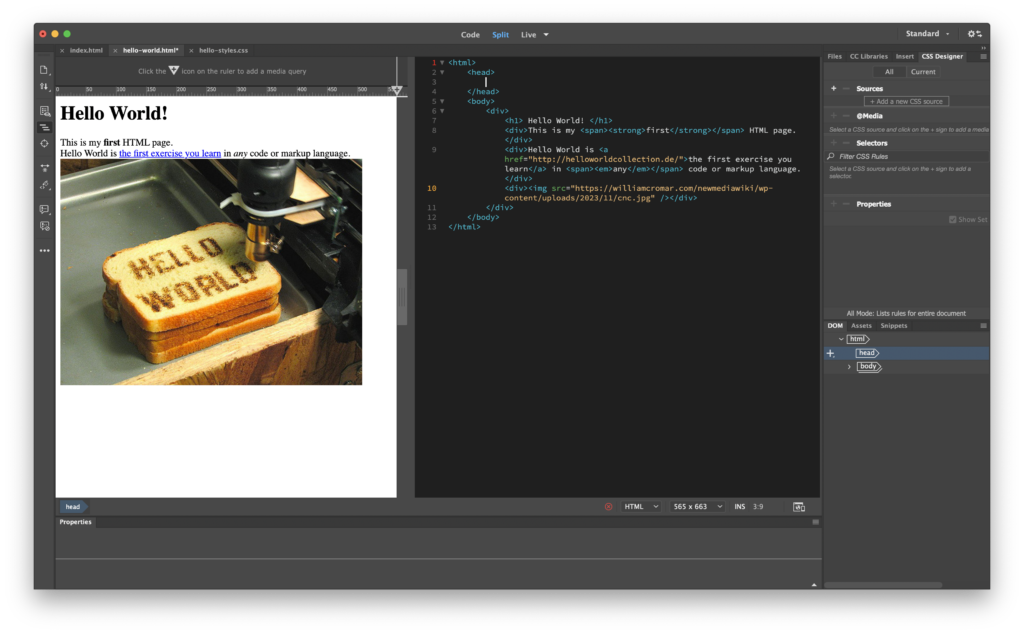
Activate the Properties Palette by placing the cursor somewhere in the content. In the palette, find Class and click None to open a dropout menu. Choose Attach Style Sheet… here.

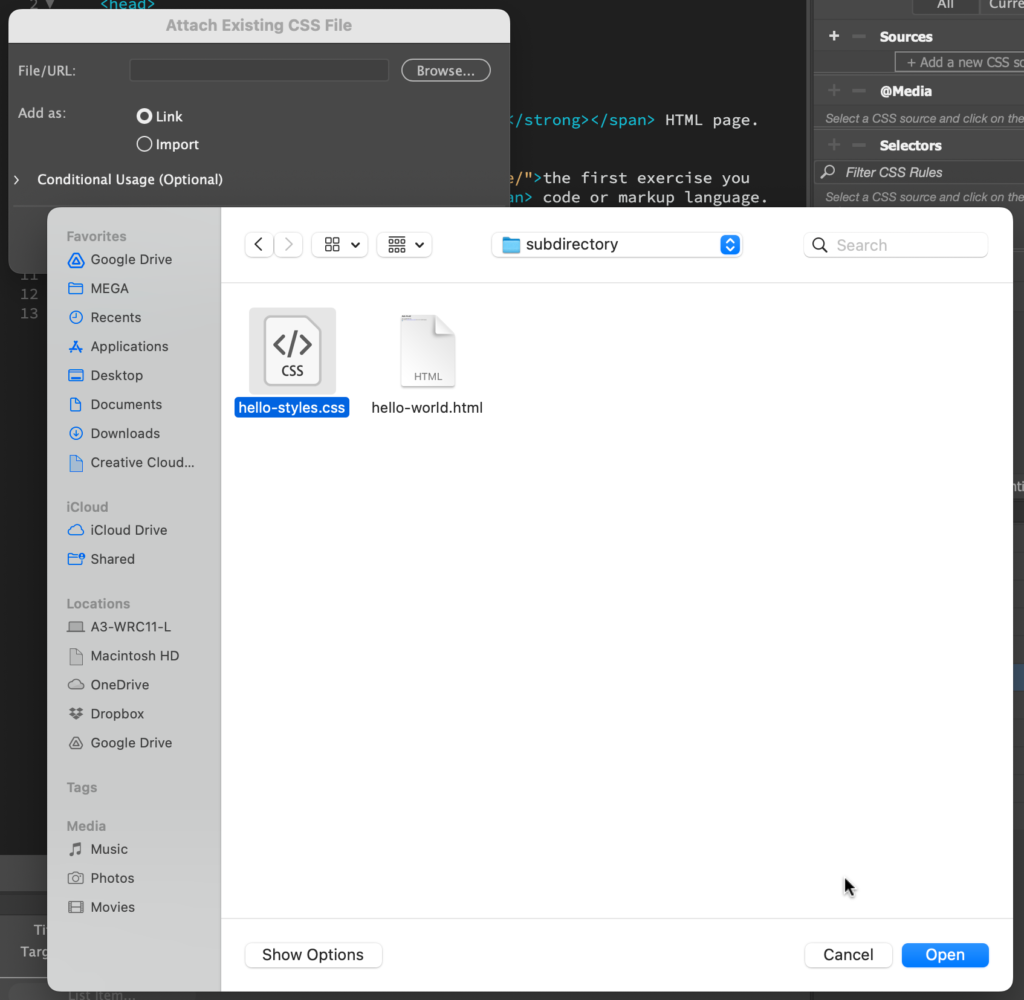
This action will open a dialog box. Select the Link radio button, then hit the Browse… button and navigate to the hello-styles.css file in the second dialog box that opens. Select it and hit Open. After the navigation dialog disappears, select OK in the first dialog box.
Observe the code Dreamweaver writes for you here. It contains an href with the file name in the double quotes, along with other properties that help the browser understand what kind of file this is:
<link href="hello-styles.css" rel="stylesheet" type="text/css">For legibility, indent the lines of code as you see in the sample file.
Create CSS Page Properties
Now that we have a linked CSS document, we can fill it with style!
Let’s start with declaring fonts. This is a bit tedious to code by hand, so Dreamweaver has a fairly easy UI for handling this. Activate the Properties Palette by placing the cursor somewhere in the content. In the palette, find the Page Properties button and this opens a dialog box.
Under Appearance (CSS), find Page font: and in the first field, click to open a dropout menu. There are lots of font groupings here. Each one is called a font-family, which consists of a set of fonts that share similar visual properties plus a generic fallback. Here, we choose Gotham, Helvetica Neue, Helvetica, Arial, sans-serif as the value.
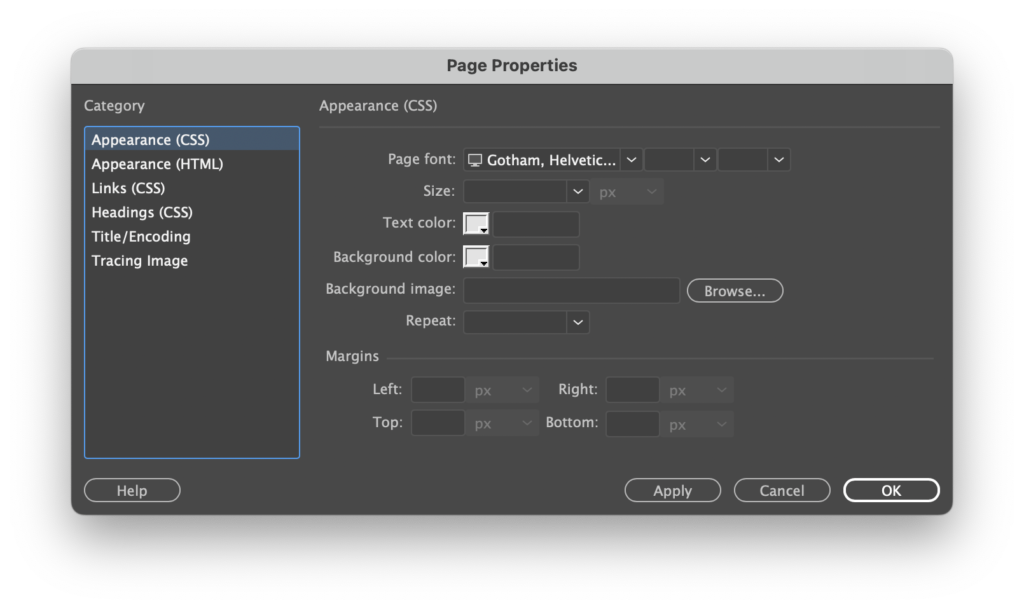
A browser will see Gotham first, and attempt to find it in the client machine’s library. If it doesn’t see that, it will look for the next one on the list. If none are present, it will display the client’s default fallback.
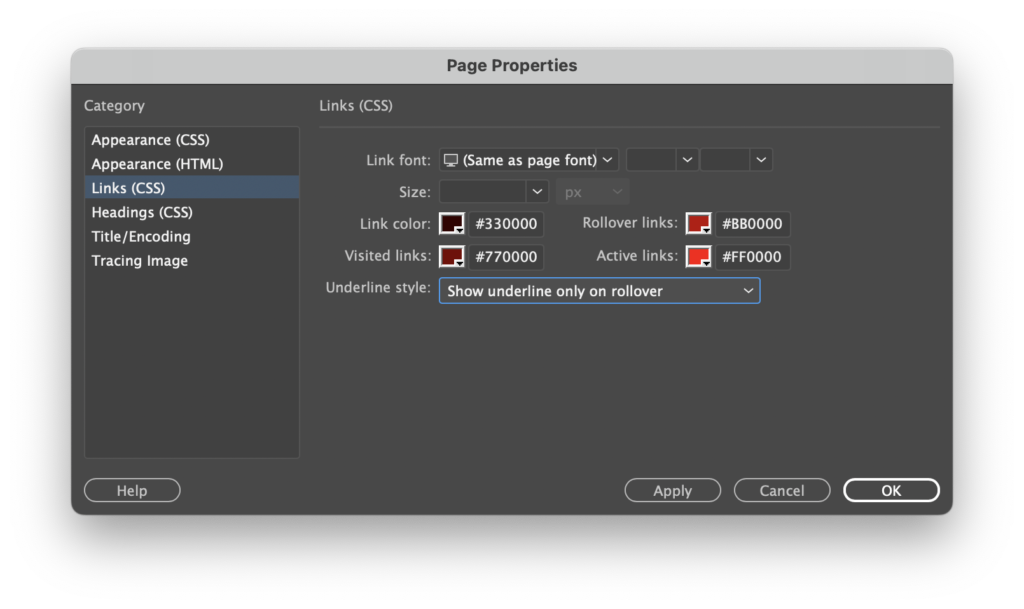
We’ll continue using this dialog box to style Links (CSS). Link styling is particularly laborious to do by hand, so this is a welcome relief. For Link font: we choose the same font as the page font, and for the various states of links, we set various shades of red. For the Underline style: we set it to Show underline only on rollover from among the choices in the dropout menu.
Notice the welcome changes in Live View, but observe where Dreamweaver writes the code: in the head of the HTML document. We don’t want it there! We need to copy it over to the CSS document.
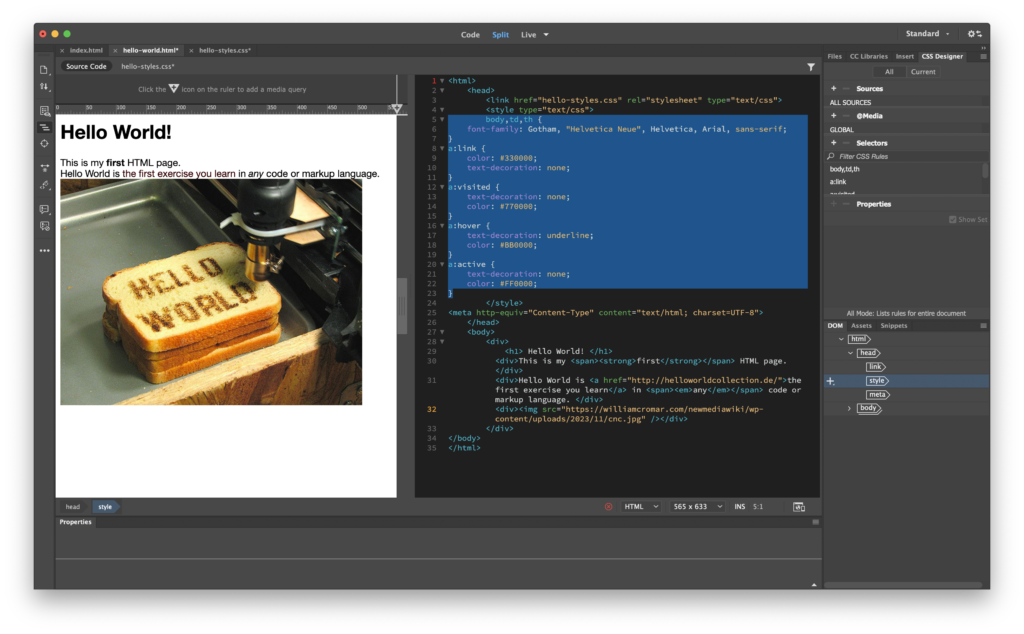
Moving the CSS to the external sheet
Notice how you can now toggle back and forth between HTML (the Source Code tab) and CSS (the hello-world.css tab) in the code window but keep the Live view split open. This is super useful for our window switch! Under the Source Code tab, select and copy everything inside (but not including) the <style> tags. Now choose the CSS tab, and paste it into the CSS document. Return to the Source Code tab and delete everything from <style> to </style> out of the HTML <head>. However: keep the <meta> tag and its properties and values, which Dreamweaver created when it generated the font-family code. These help the browser more about your file and how to interpret it.
For legibility, indent the <meta> tag, and clean up any other indents, in the manner we observe in the sample file.
Create a new Dreamweaver rule
Though some people (like me) prefer hand-coding styles, they can be created, modified, and deleted using the CSS Designer panel. I find it a bit slow and clunky, but many designers swear by it. The CSS Designer panel should be open to the right of the workspace by default. If it isn’t, choose Window > CSS Designer. You can redefine a default HTML tag or create a new class or ID.
Double-click the CSS Designer tab if needed to expand the panel, and click on Properties. The style for the font-family property that we just made is saved in this panel. Clicking the font-family property opens the settings applied to that rule. We use this panel to create or modify styles.
Place your cursor anywhere inside the body declaration. You’ll see CSS Designer’s @Media tab change to @Media: GLOBAL. Create a new style using the plus sign beside Selectors (it’s right under GLOBAL). This opens a small form field under Selectors. Define a rule for the tag. A CSS rule is made of two parts, a selector and a declaration. The selector names the part of the HTML document that will be affected by the style. The declaration tells the HTML code how the selector is affected by the rule. Our new rule will center text. Name the selector .center (including the period!) and click away to apply.
Centering the text
Give the new rule values for the declaration using the Properties appear below .center. We simply start typing in the empty add property box, and code suggestions populate a pop-up option list. As properties are added, the add value box is activated and, again, pop-up options open as you start to type. We formatted our .center with text-align: center and observe the results in Live View.
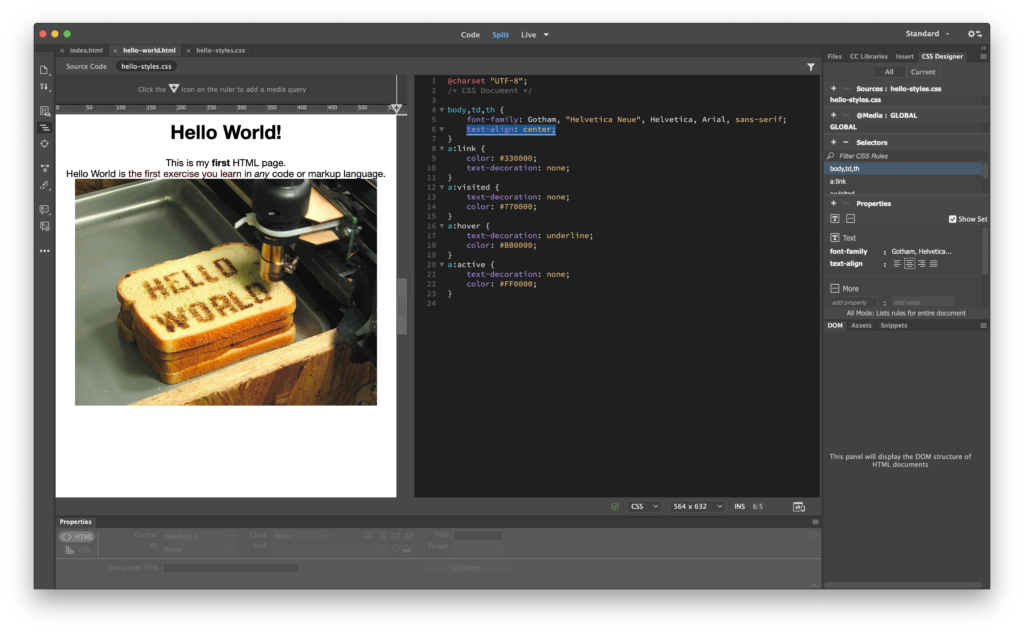
Observe where Dreamweaver inserts the new property: it’s in the CSS this time! Review how the CSS Designer palette expresses the same property. If you like using it, keep doing so. If not, code by hand as you see in the sample — though you do kind of need to know what you’re up to!
Create a style by hand
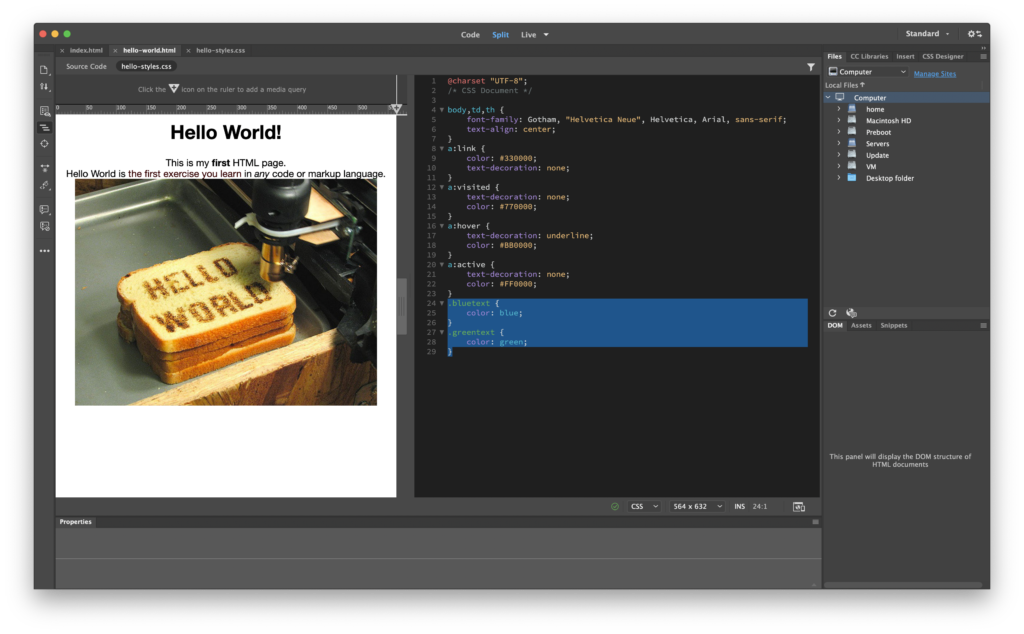
Tools like Page Properties and the CSS Designer are great when they’re time-savers. But sometimes old-fashioned hand-coding is faster and less cumbersome. Time and experience will tell you when each method has its place. So, for the experience of doing so, let’s add a couple of classes by hand. We’ll generate a class .bluetext and a class .greentext in the CSS, then we’ll apply them to the <span> tags we created earlier.
The code will look like this:
.bluetext {
	color: blue;
}
.greentext {
	color: green;
}
Now, find the first <span> and add the syntax for calling a class — class="" — inside the tag. You may notice Dreamweaver will offer an autofill option here, which is why it’s nice to always define the class first. Choose bluetext from the options, or type bluetext, making sure you don’t include the period here:
Do the same for the next <span>, this time adding the greentext class. Observe the changes in Live View:
Creating links between pages
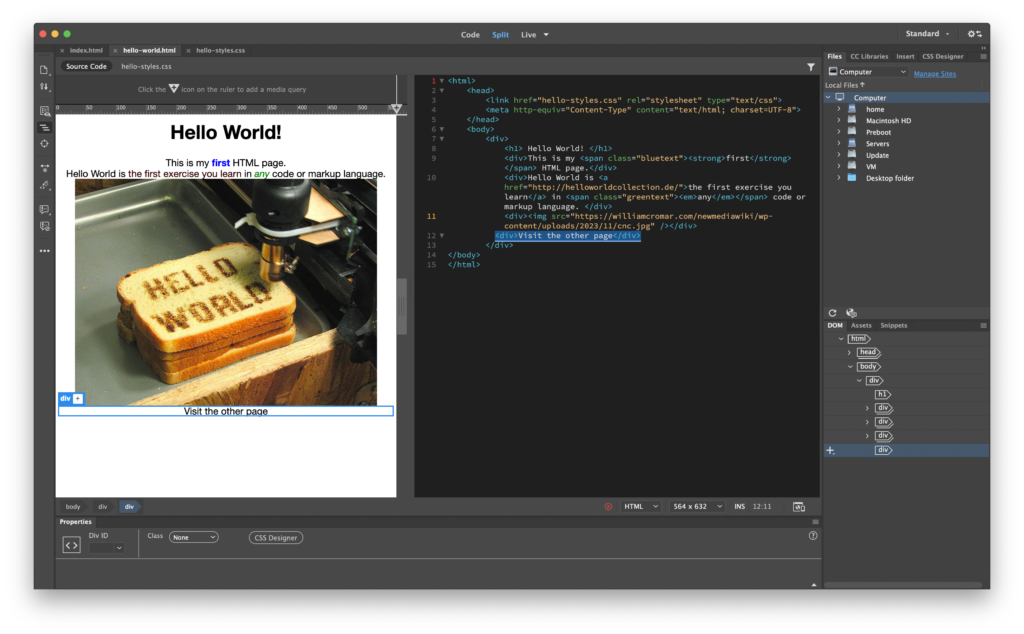
As a finale to our styling journey, we’ll add some text to create links between the index.html and hello-world.html pages. Write the following in a new <div> under the image on each page:
Visit the other page
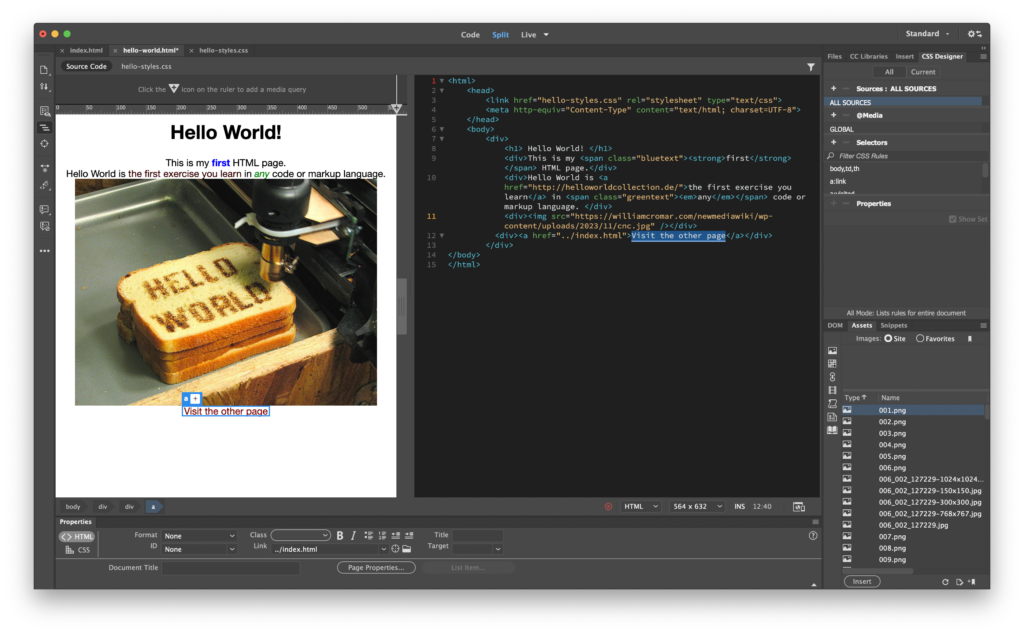
Start in the hello-world.html file. Highlight the Visit the other page text, and in the Properties Palette, find the folder icon to the right of the Link field and click on it to open a navigation dialog box. Use this to find and select the index.html file, then click Open.

Observe the anchor link Dreamweaver creates. It has a funny syntax: that .../ you see before index.html tells the browser to link the file by looking in the directory containing the subdirectory that hello-world.html calls home.
Now go to the index.html file, and repeat the link process, this time pointing to hello-world.html.
This time, the link is expressed as subdirectory/hello-world.html, which tells the browser to first look inside the subdirectory folder to then find and link the file.
Congratulations! We’ve completed our basic HTML and CSS exploration. Test the results in the browser: it should look something like the sample site.
Clients and Servers
We post web pages to the internet through a server. Downloads from the web are loaded from the same server. A server is a computer with software installed on it that allows it to send and receive requests in the form of code. A client is a computer running software, such as a web browser, that sends requests to the server. When you click a link on the web, your computer sends a request to the server through the web browser and the server returns the requested web page.
MTAA’s Simple Net Art Diagram, seen above, was made as a gesture to define net art. These artists interpreted the idea of transmission as the art itself. In other words, the art was not interpreted as necessarily residing in the code or the aesthetic results of the code. The art happens in the space between the two computers. For MTAA, what is important is the transfer of information. In hilarious response, Abe Linkoln published his Complex Net Art Diagram. This crazy drawing suggests that as we transmit information, it morphs, remixes, and otherwise bounces around until completely transformed simply by the fact of being on the web.
In this exercise, we’ll post our Hello World! site to a web server.
Defining a site
In Dreamweaver, open your Hello World! index.html page if it’s not already up.
If you are developing on a personal machine, you’ve already defined your site using the instructions in the SFTP title.
If you’re developing on a networked machine, you need to define the site with every working session. Click on the link to SFTP and open the instructions in a new window. Return to this window and continue with the instructions below the link once you complete the protocols, which are particular to the institution where I teach (you may need to consult with your local IT folks or commercial host to follow your own protocols).
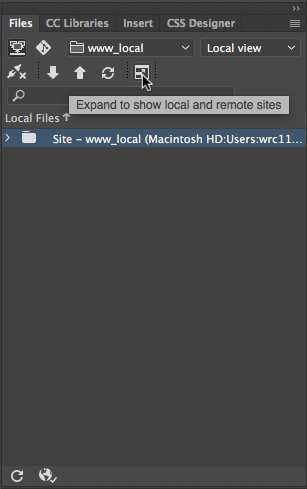
Once you’ve completed this and entered the server via SFTP, look in the Files Palette to view the root folder for the site you just defined. Click on the button at the right to expand the view to see both the local (files on your hard drive) and remote (files on the server) sites.
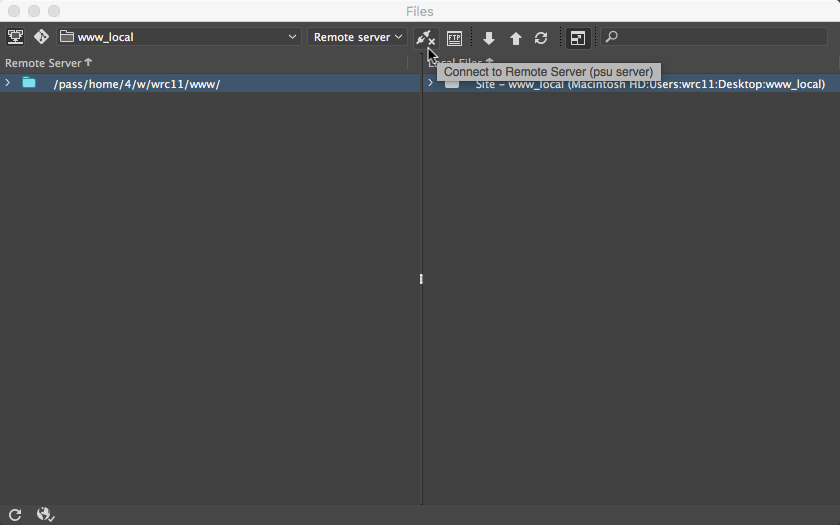
If you entered the log-in information when you defined the site, you can click on the Connect to remote server button. This will access the server. If you do not have a domain name, this button will return an error message. Click the button to collapse the view so that you are only viewing the local files. If you have access to a server, uploading files is as easy as dragging the files from within a folder on the local side of this palette to a folder (called a directory) on the remote side.
Uploading the site to the server
We’re going live!
Expand the Files Palette if needed, and select the Connect to remote server icon if you need to re-establish the link to your server. You should see the icon change to a plug with a checkmark, and you should see your Remote Server window on the left side of the dialog populate with your server. Expand the Remote Server root directory on the first line, and you’ll see the templated site you uploaded with Filezilla from our In the Cloud reference. That may include a folder for assets, one for images, an index.html page, and a LICENSE.txt file. Leave these untouched.
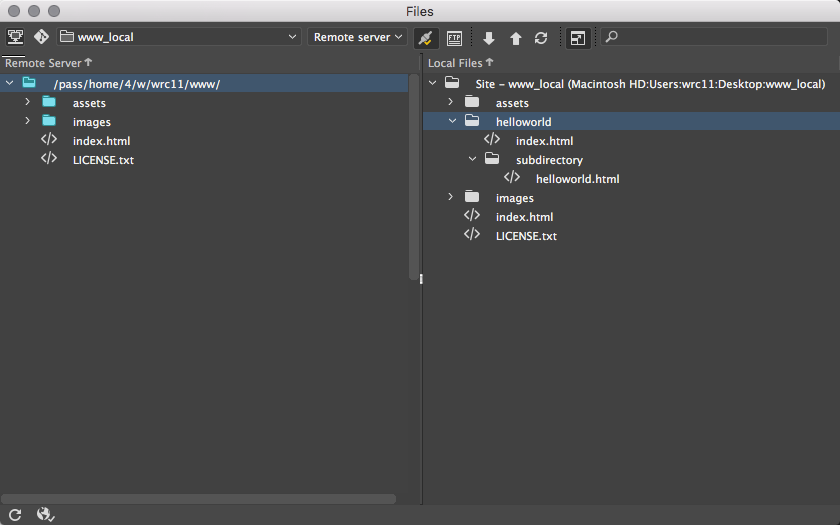
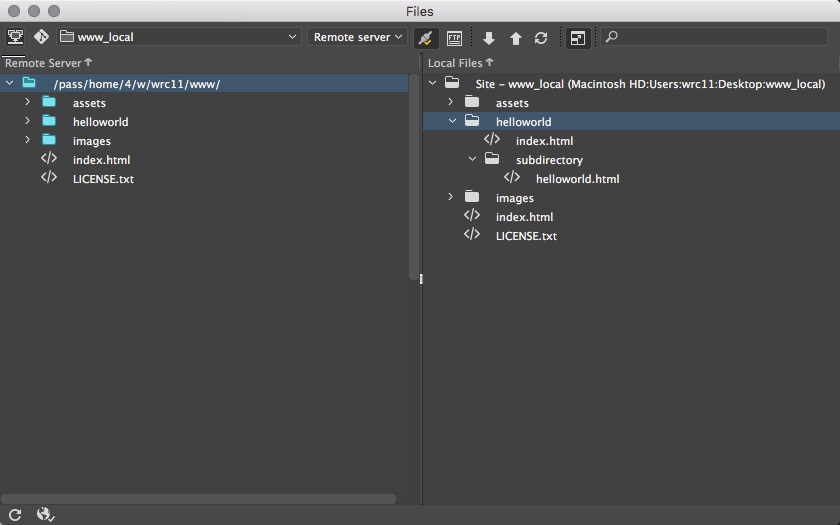
In the Local Files window to the right of the dialog, locate the helloworld directory in your local root directory. Click, hold, and drag the helloworld directory icon over the Remote Server root directory icon — both look like folders — and you see a flurry of activity in a popup window as the files and directories copy over. Being a small site, this will not take long. When complete, you’ll see the new helloworld directory in the Remote Server window.
Go visit your site on the web by typing in the URL in a browser. You’re live!