Booleans
To see the project folder, you must be a student with a valid email registered as a “project member.” If you are not a student in my studio, you can still view the models below.
Surrealism through Boolean operations
You’ve made several 3D models so far. You’ve created:
- A bike seat, in your video tutorials, learning sculpting model techniques
- In our Line to Plane project, we created a Nine Square Grid
- We created a Topological Transformation through slicing
- The Mesh Mods exercise introduced us to working with a scanner and cleaning a mesh
- Mesh Mods also asked us to modify that mesh in a surreal way
For this exercise, we won’t be creating a new model from scratch. Instead, we’ll learn how to collage a new model from existing ones by working with Boolean operations.
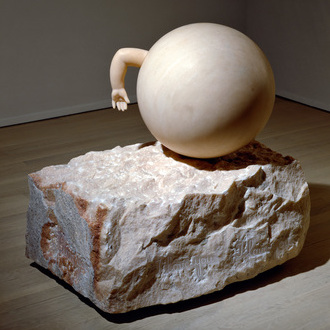
The goal of this manipulation is to create ONE: your choice out of several Surreal sculptural forms below. Louise Bourgeois’ work at left demonstrates an uncanny sense of figurative entrapment by combining a lifelike arm emerging out of an abstract, egg-like sphere. The smoothness of this odd creature creates a contrast with the craggy base, the whole being sculpted through subtraction out of marble. If we were to model this form digitally, we might turn to Boolean operations to create it.
Booleans revisited
Boolean operations are named for George Boole, a mathematician and logician who developed rules for combination logic that have applications in fields ranging from algebra to set theory to 3D modeling. At right is a study of Boolean operations in modeling from Antti Lehtinen at Knol.
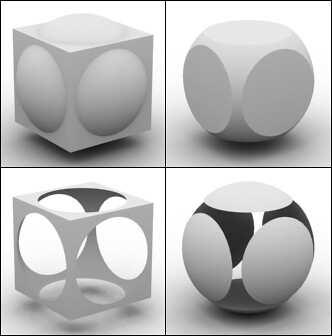
Boolean operations make complex combinations out of simpler forms. There are three Boolean functions in modeling:
- Union (also known as Join), a combination equivalent to a logical both/and state (this and that)
- Intersection, a combination equivalent to a logical or state (this or that)
- Subtraction (also known as Cut or Difference), equivalent to a logical not state (this, not that)
These three functions generate four outcomes, depending on the order of the Subtraction function. Clockwise from top left:
- Union of cube and sphere (total volume belonging to cube or sphere together)
- Intersection of cube and sphere (volume belonging exclusively to both cube and sphere)
- Subtraction of sphere from cube (volume belonging to sphere but not cube)
- Subtraction of cube from sphere (volume belonging to cube but not sphere)
If we were to identify the Boolean operation that could generate the arm-sphere complex in the Bourgeois sculpture above, we might conclude it was created through a Union.
Booleans: Meshmixer vs Fusion 360
Booleans can be created in both Meshmixer and Fusion 360. In Meshmixer, selecting two objects in the Object Browser automatically brings up the Edit menu with Boolean Union, Boolean Intersection, and Boolean Difference in the dropout list. These are so easy to do they don’t merit a workflow outline, and it’s fun just to get in and play with them on your own. However, it’s good to know that the order of selection in the Object Browser determines which side of a Boolean Difference mesh gets preserved.

So if Booleans are so easy in Meshmixer, why bother in Fusion 360, where we know it will be more time-consuming?
For starters, Meshmixer is a mesh editor, not a modeling program, and many of the functions you might want to perform on a post-Boolean solid are not available there. But perhaps the biggest argument in favor of Fusion 360, despite its baffling hierarchies, is the quality it delivers when creating complex polygon Booleans. In Meshmixer, we often see a baffling loss of fidelity at the edges of the Boolean, due to mesh complexity. Fusion handles this algorithmically in a manner that does not create unexpectedly ragged edges at the Boolean joint. It’s not to say you can’t get clean Boolean results in Meshmixer—it’s simply to say the results in complex mesh forms or high poly counts will disappoint more often than not.
We just have to get used to how Fusion 360 labels Booleans. Unlike almost every other modeling program out there (including Meshmixer), it doesn’t use the common nomenclature. Instead, Fusion calls Boolean functions Combine.
Using Fusion 360 Combine functions
Open and log into Fusion 360, and open your Data Panel to see the list of Projects (which, remember, are analogous to folders on your hard drive). If you are used to conventional strategies for combining meshes among 2 or more model files, such as importing and exporting, copying and pasting, or referencing, Fusion 360 will come across as counter-intuitive. That’s because it’s a cloud-based program in which you don’t have access to normal local drive-based functionality. That said, it is easy, but certainly not intuitive.
Let’s review the several ways this can be performed.
Importing and converting a mesh
The first step imports a mesh object from your hard drive into a new Fusion 360 file:
- In the Design workspace and Solid toolbar, look for Insert > Insert Mesh. This opens a navigation window where you search for and open the mesh file, which is typically an OBJ or STL file. Note: Fusion 360 will choke on a mesh larger than 10,000 faces, so use Meshmixer to reduce the mesh beforehand if needed.
- Be mindful of units in the Insert Mesh dialog box, choosing inches or millimeters to suit, for example.
- Rotate and/or move the inserted mesh to suit and hit OK. Notice the mesh is a funny pink, and note its name. This is not an editable thing yet! But Save the file with a name at this point.
- Click the Mesh tab in the toolbar.
- Select the mesh body and click OK. This converts the un-editable mesh into an editable Solid.
- If this gives you trouble, follow the workflow at this link.
“Copying” from another Fusion 360 file
It is possible to open one Fusion 360 file, select a Body from the Browser, and copy it. Don’t be confused by the presence of the Move/Copy option in the dropout menu. Look down a bit farther and you’ll see Copy.
Open a new Fusion 360 file, and it’s easy to Paste that Body into it. You can add fillets, shell a body, scale, and all the ordinary Modify functions in the Solid toolbar. However, you’ll never get access to the “Edit Feature” functions that allow you to enter the Form workspace and move vertices, edges, and faces. You are ONLY privileged to do this in the original file, no matter what.
Making an external reference
Externally referenced files are great if you update a model and you want that update reflected in a model your mesh is “copied” to. This can save time but it gets tricky to remember what exists and where without good file naming protocols. To create an external reference, don’t copy the “normal” way:
- In an existing Project, look for an existing model. Right-click on the file listed in the Project panel (NOT the model in the viewport) and in the dropdown select Copy. In the dialog box that opens, navigate to the Project where your new file is and copy the file to it by pressing the Copy button in the dialog.
- Open your new file. In the Project panel, Right-click on the model file you copied from the first step, and in the dropdown select Insert into Current Design. This effectively copies the contents of that file into the active file.
- Notice the chain icon next to the name of the new Browser folder created in the last step. This indicates the external reference.
- RtClick on the name and in the dropdown select Break Link if you no longer need the reference. This will allow you to edit this body without having to do so in an external reference.
Bringing two meshes into one file
Repeat the workflow above with a second external reference, and you have brought two meshes from two different files into one new file. Break the links, and you can start to play around with the Combine functions.
Move the body or bodies in the new design so they intersect if they don’t already. Find a logical but surreal relationship between the bodies. Move and rotate, but also Modify > Scale if necessary.
In the case study illustrated here, we wanted to create a surreal state for a common teapot. What to add? We chose the shoe sample you may remember from the Topological Transformation project, modified here with a nice leather material.
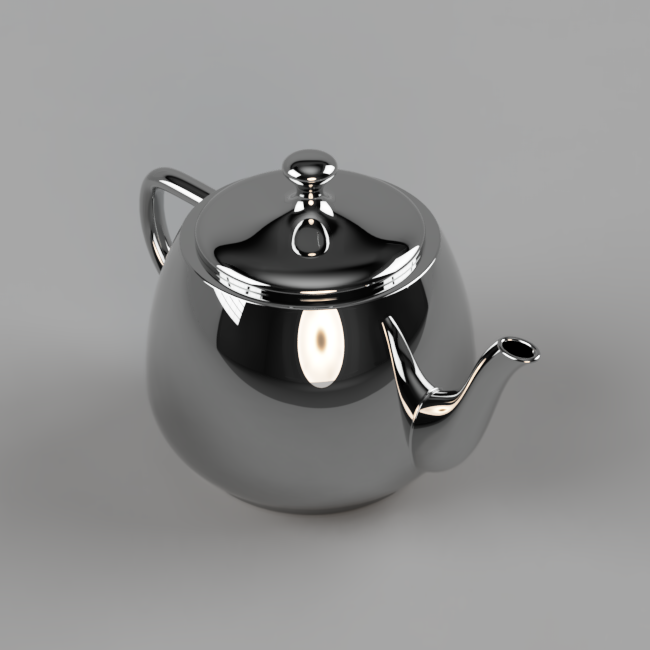
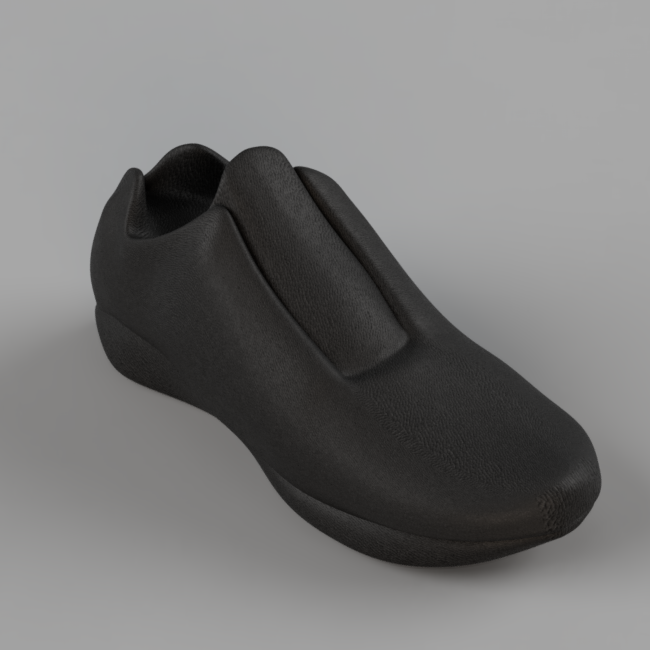
We decided to make a duplicate of the shoe file and mirror it to get a left and right shoe. Then, we insert both into the teapot design file. We angle the two shoes to look like a casual foot position, then scale and move the pot to look like the shoes emerge from the bottom. The results are seen here.
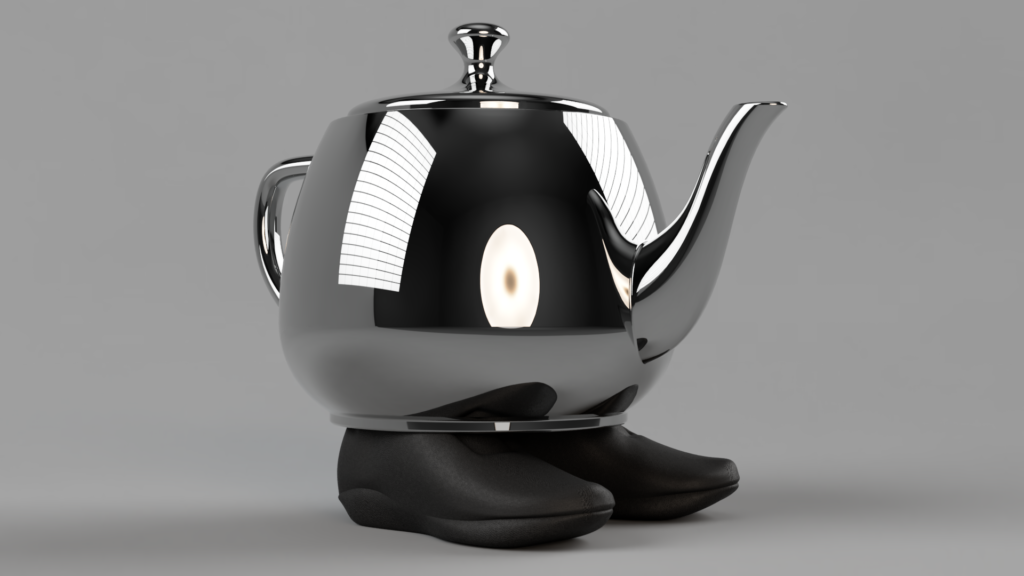
We use a Combine > Join to create a unified Body that will print as a watertight mesh. In the rendering, it still looks like separate objects because we applied unique materials to different faces of the solid. Visit the model link, though, and you’ll see how it’s structured.
Model by the author
Multiples of one mesh
Don’t have another file? Using one file and duplicating the body, then performing Booleans, is another sure route to Surrealism. Below is a demented double teapot, created by simply duplicating the teapot body, then rotating and moving into place, and performing a Combine > Join operation. Now we’re seeing double, and this is either a great way to pour two cups of tea at once or make a real mess. Not sure which.
Model by the author
Surreal case studies
Below are several examples of Boolean operations creating surreal juxtapositions. Take a look at each one, then choose ONE to try for practice before moving on to the final model for the project. In each of these exercises, we took a very high-poly mesh — the cleaned-up, watertight Stanford Bunny from Mesh Mods, clocking in at 7,000 faces — and placed it in a context with one or more simple Form-generated primitive solids.
Louise Bourgeois Bunny
Louise Bourgeois was an associate of the Surrealists earlier in her career, and she kept that sensibility as her career blossomed in the 1980s. Her sculptures are loaded with autobiographical expressionism.
Workflow:
- Import a mesh as per Importing and converting a mesh above. In this case, we picked the Stanford Bunny OBJ we cleaned up in Meshmixer for the Mesh Mods exercise.
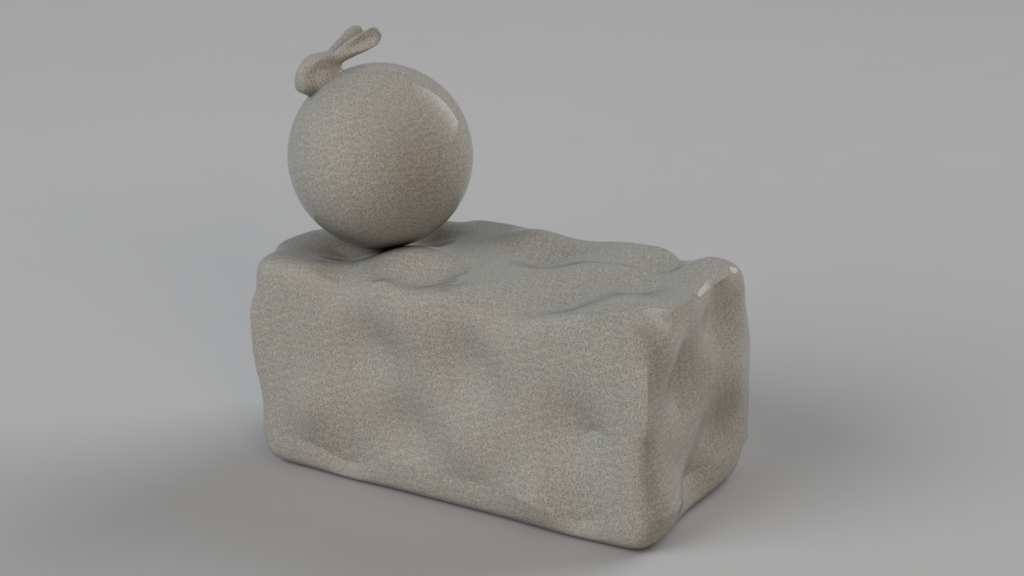
- In the Design workspace, select Create Form and make a Quadball (similar to a sphere but without troublesome polar coordinates, making for a better Boolean operation).
- Transform (Move and Scale) the two Bodies so the Bunny head is just popping out of the ball.
- Still in Design, using the Solid toolbar, select Modify > Combine and use Join in the dropout.
To add one more element to better emulate the Bourgeois scheme, go to Create Form > Box and roughen it up by applying Modify > Crease to random edges, then move random points and edges on each face. This suggests a rough block of stone in contrast to the smoothly “carved” Boolean. Move and scale these to a position that suggests the Bourgeois scheme, illustrated by the rendering and model embedded below.

Support issues
Potential liabilities with this configuration include lots of hard-to-clean support near the intersection of the sphere and the rougher solid. This can be avoided by making the model in two parts and gluing them together.
Bourgeois Bunny, model by the author
David Mack/Rachael Whiteread Bunny
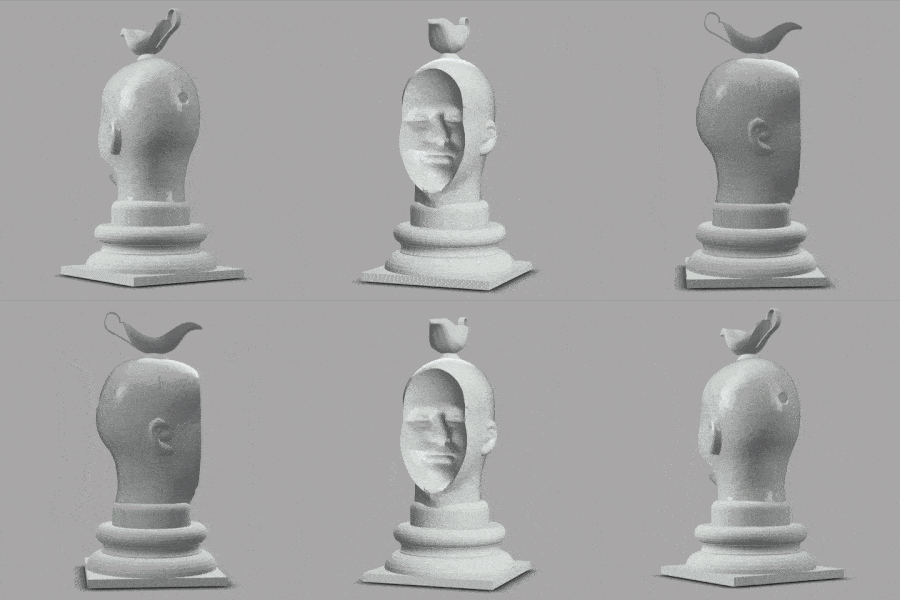
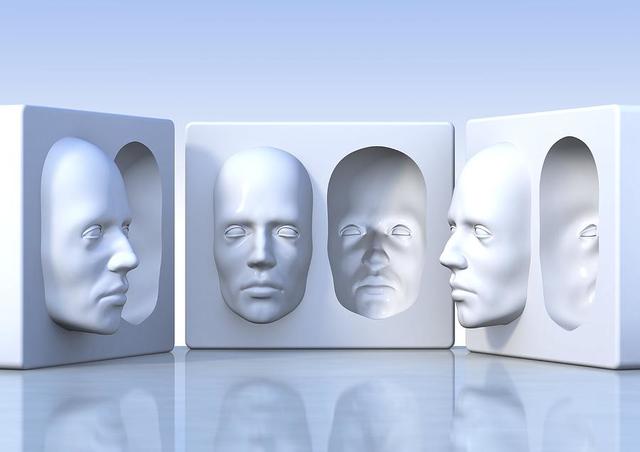
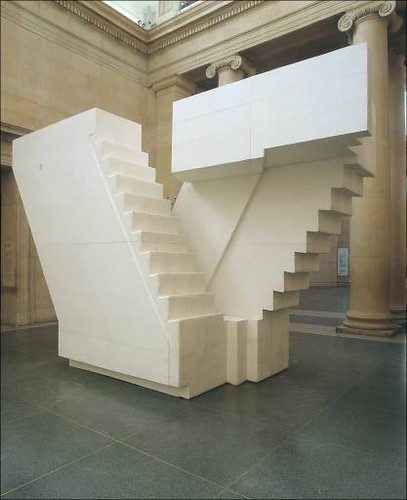
David Mack is a digital artist who models surreal optical illusions such as the hollow face that wavers back and forth between popping out and receding back in the image at left. Rachael Whiteread is a British artist who also plays with inverting form by making gigantic molds of architectural spaces. Though not directly tied to the Surrealist movement in art, both artists play with inversion of mass and void to very surreal, albeit different, effect.
Workflow:
- Import a mesh as per Importing and converting a mesh above. Again, we base ours on the Stanford Bunny OBJ.
- In the Design workspace, select Create Form and make a Box, making sure to Modify > Crease all corners.
- Transform (Move and Scale) the two Bodies so the Bunny head is intersecting the Box.
- Still in Design, using the Solid toolbar, select Modify > Combine and use Intersectin the dropout.
- Duplicate the new Body this created so you have two partial Bunnies.
- Make a second Box that can sponsor both Bunny Bodies.
- Transform (Move and then Rotate 180 degrees) one Bunny Body so it intersects inside the box Body, with just enough sitting outside to intersect with the box face.
- Transform (Move) the other Bunny so it sits right outside the box, with just enough inside to intersect the box face.
- Select the interior Bunny and the box, and still in Design, using the Solid toolbar, select Modify > Combine and use Cut in the dropout. The “negative” shape is created.
- Select the remaining Bunny and the box, select Modify > Combine, and use Join in the dropout. The “positive” shape is created next to the “negative.”
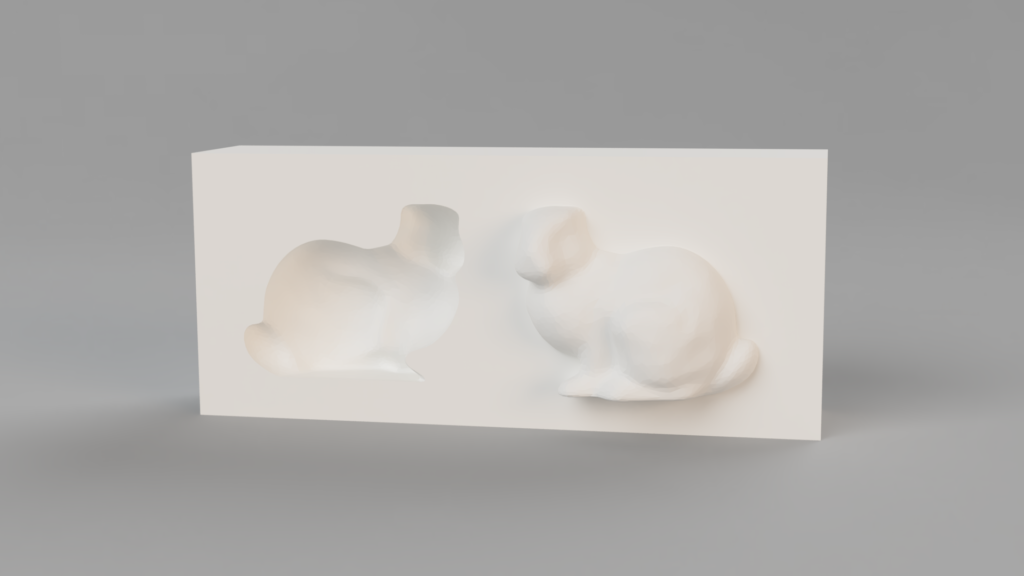
This creates illusions similar to the face model above, seen in the rendering and the model embedded below.
Support issues
To avoid being overrun with supports on the interior, which may be impossible to clean, print a model like this with the front rotated to the top.
Mack-Whiteread Bunny, model by the author
Rene Magritte Bunny
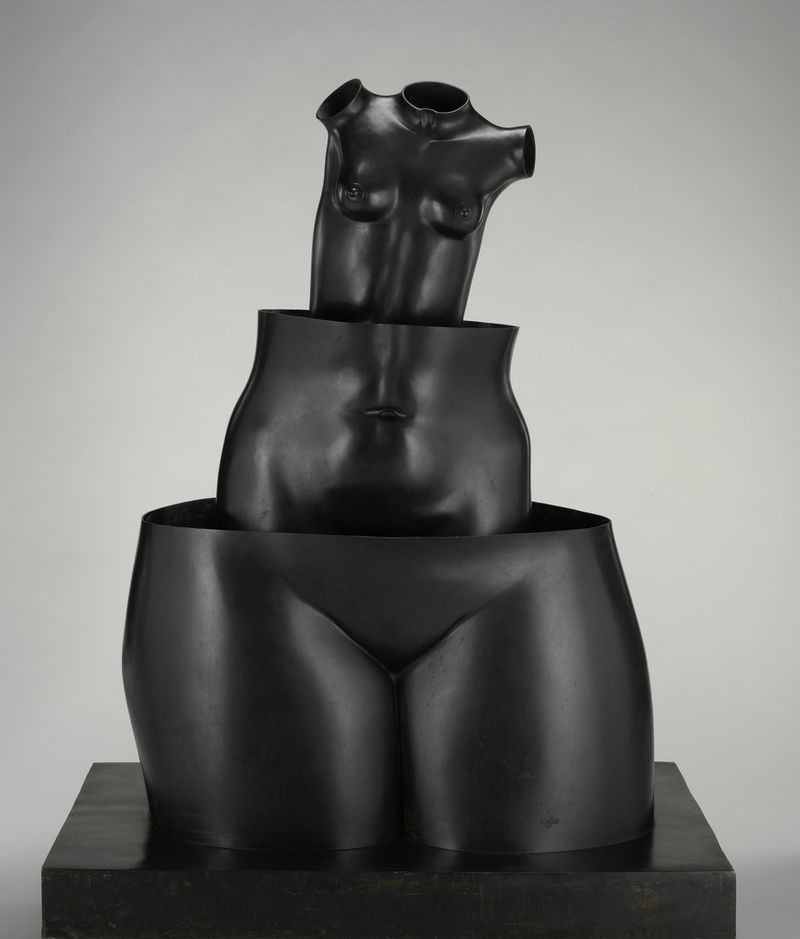
Rene Magritte is better known for his disturbing, philosophical Surrealist paintings, but he explored sculpture late in his career. His figurative style lends itself well to a series of sculptures based on motifs found in his 2D work. The work at right generates a strange, nested-doll phenomenon.
Workflow:
- Import a mesh as per Importing and converting a mesh above. Again, this stars our friend, the Stanford Bunny OBJ.
- In the Design workspace, select Create Form and make a Plane large enough to surround the entire Bunny Body.
- Transform (Move) the two Bodies so the Bunny is intersected by the Plane about a third of the Bunny’s height.
- Still in Design, using the Solid toolbar, select Modify > Split Body and keep both halves. The Bunny Body is now two Bodies.
- Repeat the slicing process by making another Plane and slicing somewhere below the Bunny’s ears. This creates a third Bunny Body.
- Select the two highest Bodies in the Browser, and still in Design, use Modify>Scale to reduce these Bodies by about 75%. Hint: Use a Point selected in the Scale dialog, and select any point that is congruent with the edge of the base of the lower Body. This keeps the scaled Bodies coplanar with the lower Body.
- Repeat the Scale process, this time with only the highest body selected.
- Horizontally Transform (Move) the scaled Bodies to position roughly centering each smaller Body in the Body below it.
- Still in Design, using the Solid toolbar, select Modify > Combine and use Join in the dropout.
The finished result is seen in the rendering at right and the embedded model below.
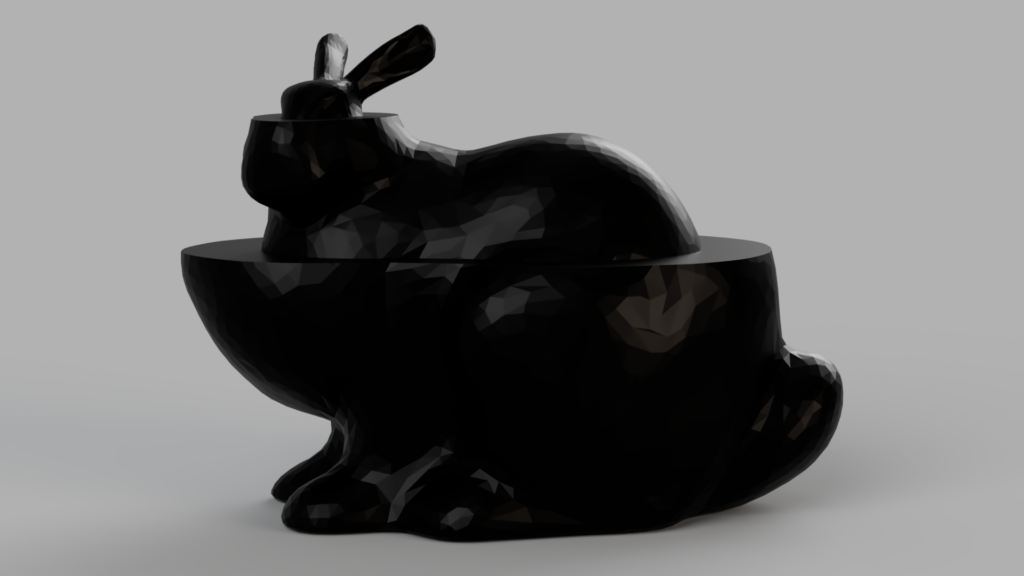
Support issues
The potential liability of this model includes lots of hard-to-clean supports. This could be mitigated by printing the actual slices as separate bodies instead of using Combine to join them (the Boolean would only remain as a conceptual device and not an actual modeling step!).
Magritte Bunny, model by the author
Arman Bunny
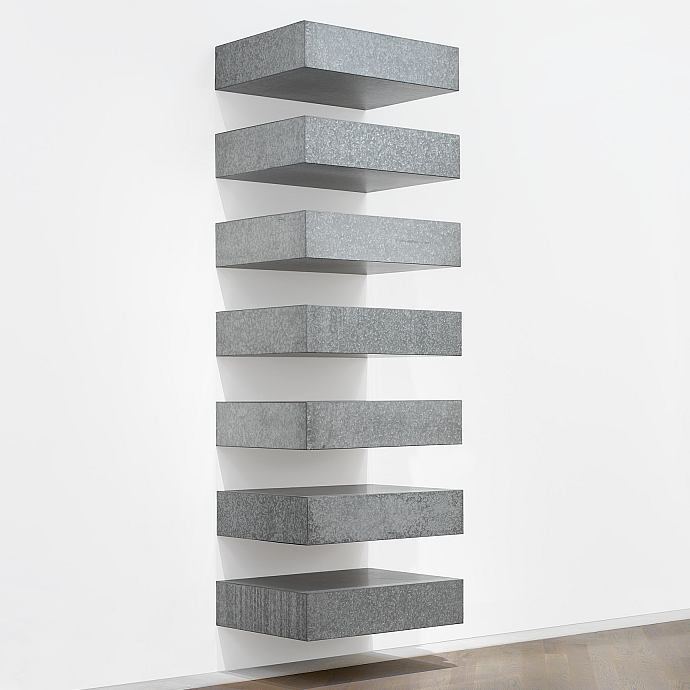
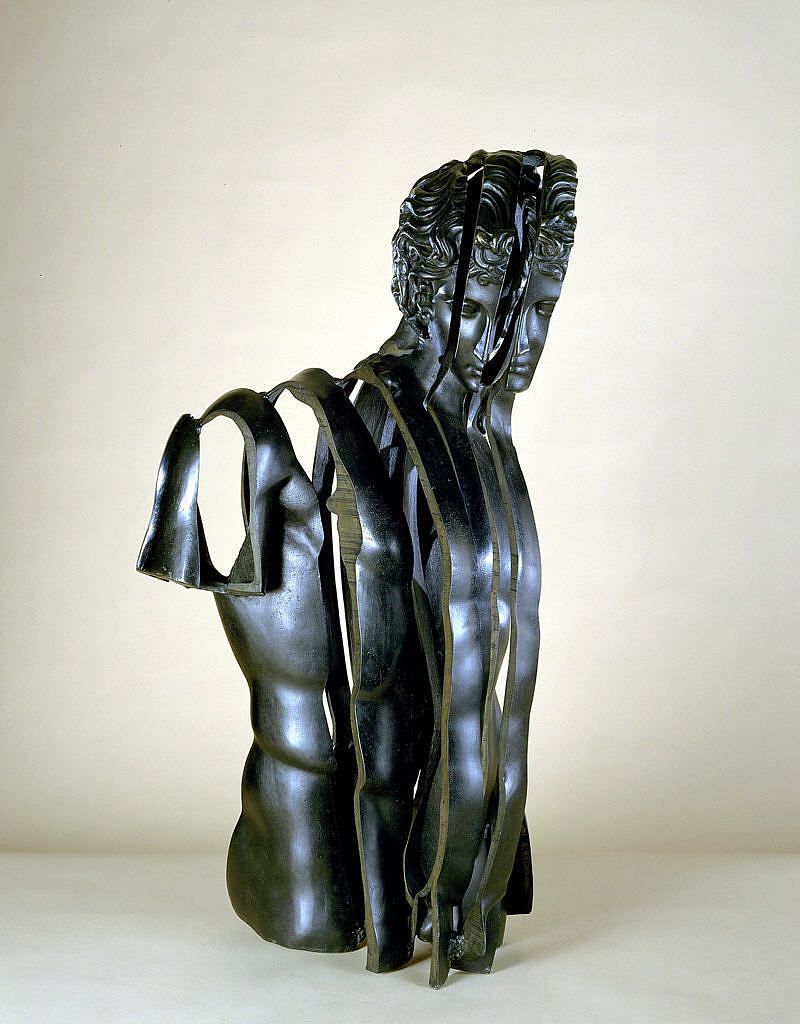
Arman is best known for his “accumulation” works, stacks of objects welded or otherwise joined together, often at a gigantic scale (he once “accumulated” over 80 military tanks for a monument in Lebanon). Later he took an opposite, destruction and recomposition approach to existing objects. We see the latter in the work at right.
Workflow:
- Import a mesh as per Importing and converting a mesh above. Again, we use the Stanford Bunny OBJ.
- In the Design workspace, select Create Form and make a Plane large enough to vertically surround the entire Bunny Body. We created the Plane from a Right ortho view in the XY coordinate plane.
- Transform (Move and Rotate) the two Bodies so they intersect. In this case, we Rotated the Plane to be roughly parallel to the axis of the Bunny’s face.
- Select the Plane Body in the Browser, Right-click, and select Move/Copy.
- We do this several times until we have a good quantity of equally spaced parallel Plane Bodies.
- Select the first Plane Body and the Bunny Body, and still in Design, using the Solid toolbar, select Modify > Split Body and keep both halves. The Bunny Body is now two Bodies.
- Repeat the Split Body for each Plane and unsliced portion of the Bunny.
- In the Browser, select every other Bunny Body.
- Horizontally Transform (Move) the Bodies so that they are visibly offset from the original position, but not so far that they detach from the stationary Bodies (in other words, no “floating” slices!). Hint: Use the Point-to-Point option, selecting two points congruent with a sliced plane.
- Still in Design, using the Solid toolbar, select Modify > Combine and use Join in the dropout.
Our final result is seen in the rendering at right and the model embedded below.
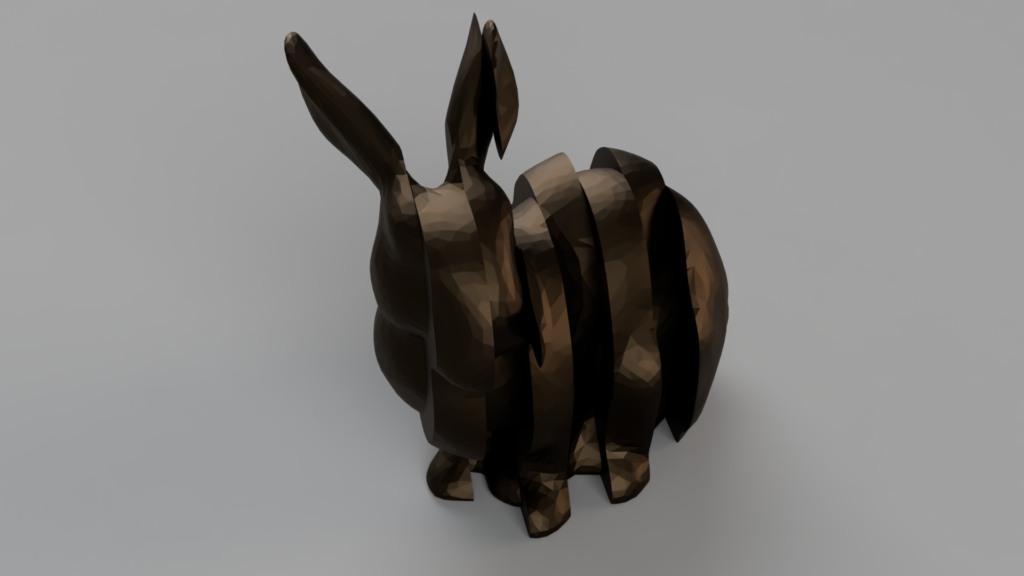
Support issues
There is surprisingly little support liability in this particular configuration, but the slicing could lead to big cleanup issues in another direction or orientation.
Arman Bunny, model by the author
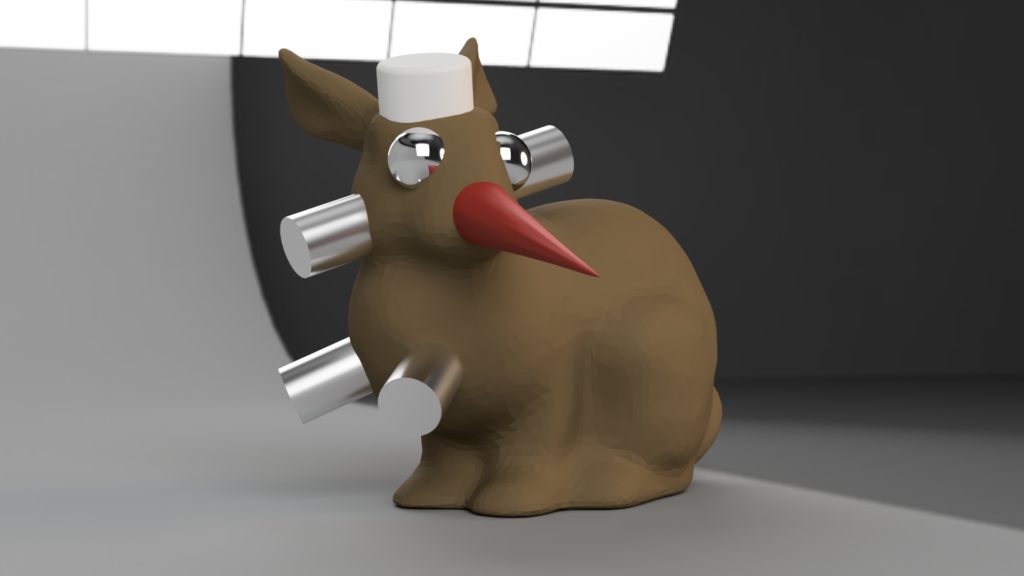
Paul McCarthy Bunny
McCarthy’s work often borders on the abject or the obscene, at the same time it exhibits an almost childlike sense of play. The cognitive dissonance between the two often leads to a surreal disorientation for audiences.
Workflow:
- Import a mesh as per Importing and converting a mesh above. You guessed it: we use the Stanford Bunny OBJ a final time.
- In Design workspace, select Create Form and make a set of Bodies, including:
- A Quadball represents the large eyes. We duplicate this once.
- A Cylinder represents an aluminum can. Remember, Cylinders are not watertight, so we need to select the top and bottom edges, go to Modify > Fill Hole, and select Collapse, Weld Center Vertices, and Maintain Crease Edges. We Move/Copy to create several cans.
- Another Cylinder representing the white container “hat” incorporates a fillet created in the Design workspace under Modify > Fillet.
- A third element is a large cone, and Fusion does not create a cone as a primitive under Form. So ours is derivative of a Cylinder, and one way to do this is:
- Create a Cylinder, with a Height Faces value of 1.
- Select the top Edge, and RtClick to select Edit Form.
- Scale the edge until the diameter value is 0.
- Select the bottom Edge and fill the hole as above.
- Transform (Move, Scale, and Rotate) the various Bodies so they intersect appropriately with the Bunny Body. This can be tricky: observe the Transform from various views to ensure proper orientation, and inspect to see if there is adequate intersection between each element.
- Select all Bodies in the Browser, and in Design, using the Solid toolbar, select Modify>Combine and use Join in the dropout.
In the final result, we emphasize unique materials by rendering in the Render workspace, which we can see at left and in the model embed below.
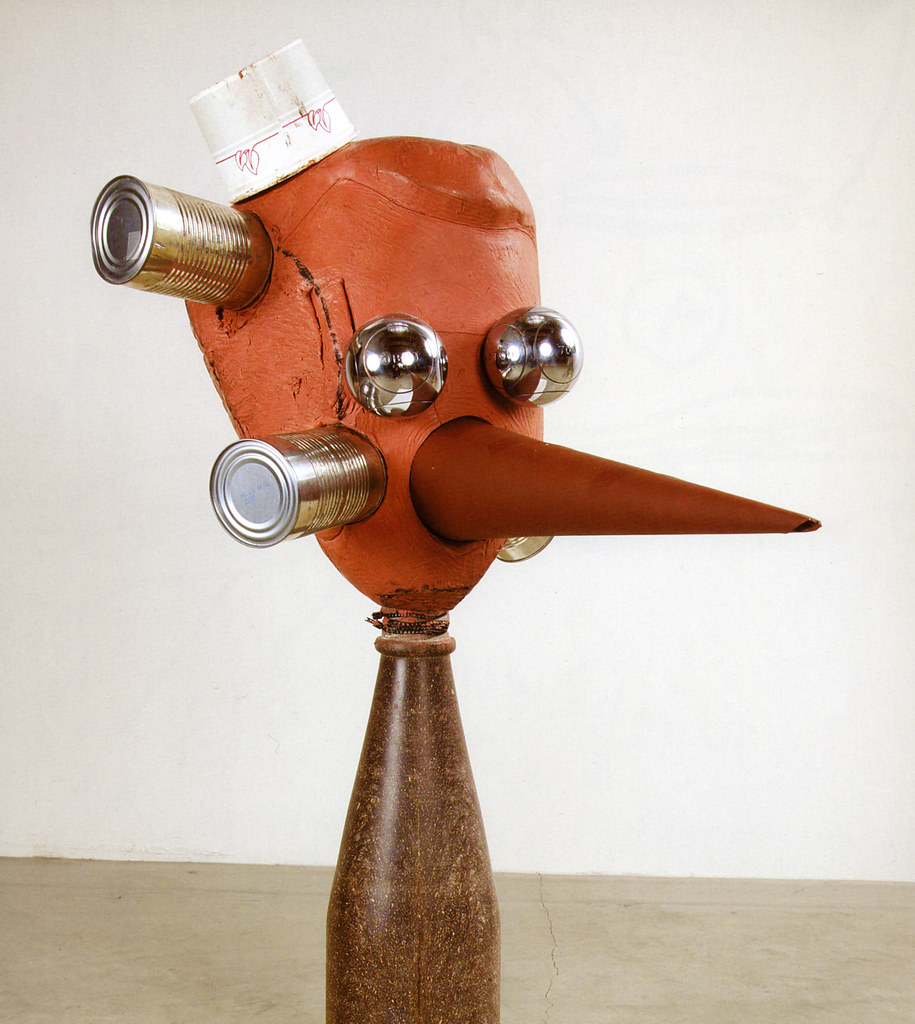
Support issues
Depending on the orientation and accumulation of many Bodies, this can result in super tricky support issues. Alternative to avoid supports is a “fake Boolean,’ where by you duplicate objects to be intersected, and instead of Join, use Cut to create holes where these duplicate Bodies can be inserted with glue. Hint: with balls and cones, you can create terrible keystones (holes angled inward) that can’t be used, so inspect these carefully if you take this strategy.
McCarthy Bunny, model by the author
Your turn
Using a clean, watertight version of the scan you created for the Mesh Mods exercise, emulate ONE of the case studies you explored above. You may tweak the illustrated workflows to suit your particular model.
When finished, embed the Fusion 360 model in your blog or process journal.


