3D modeling: Fabrication
Digital fabrication: 3D printing your Maya object
Digital fabrication is a blanket term for a lot of processes, from laser cutting to CNC routing to 3D printing to robotic welding. Regardless of whether your process is subtractive like a milling machine or additive like 3D printing, or no matter what scale you work at, the fundamentals are the same: you have to tell the machine what to do.
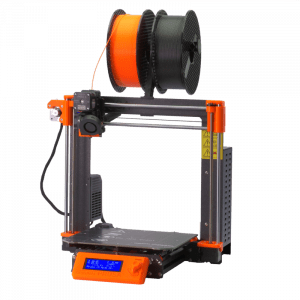
We’ll use one of the elements we are creating in this project to become familiar with the common workflow associated with digital fabrication. We’ll use the 3D printer to make one of your models a reality.
File setup for fabbing
Make a copy of one of your element scenes and save as yourname_lookingGlass_fab.mb
Fabbing files must be polygons. Do you have a NURBS object you wish to 3D print? Select the model and go to Modify>Convert>NURBS to Polygons in any menu set. Often the converted object needs the normal angle reset (see explainer below). It may also want more geometry, created via Smooth Mesh Preview conversion.
If this or any other model situation depends on Smooth Mesh Preview (3 on the keyboard), be aware that what you see in the Maya viewport is not what will be printed. The 3D driver does not recognize the Smooth Mesh. While you are still in Maya you can go to Modify>Convert>Smooth Mesh Preview to Polygons and get a high-resolution mesh. Be careful, however, that the file stays a reasonable size—3D printers will choke on too much data.
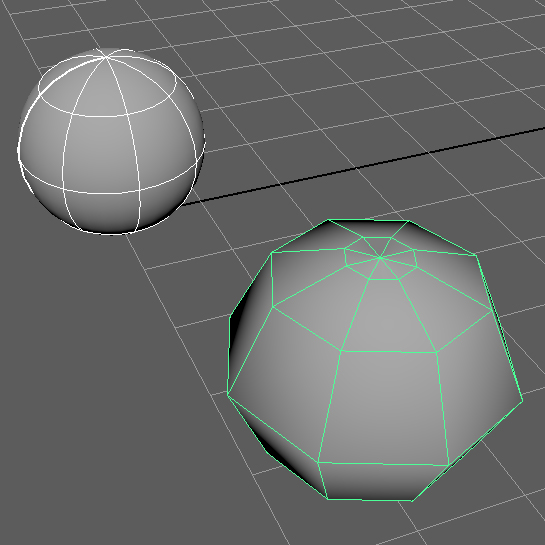
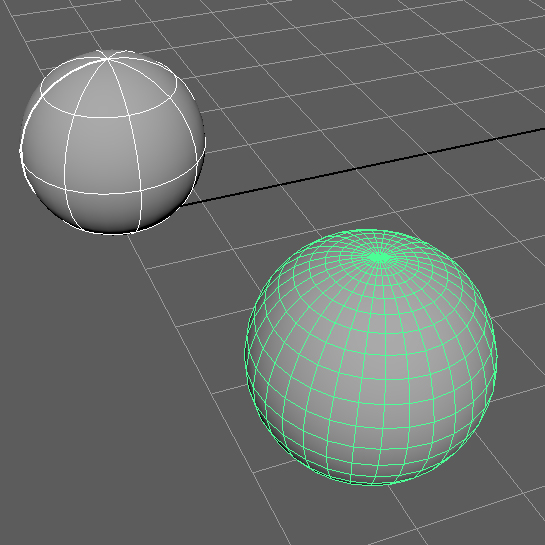
Meshes to be printed must be closed and unified. If you find any holes in your mesh, they can be filled (see below), and if you’re carrying multiple parts together, you can Boolean them together. Be aware you’ll need to Target Weld the seam between the original objects (see below) after any Boolean operation.
Lastly, there is no need for any material other than a standard Lambert, so don’t supply a fancy material!
Diagnosing messy meshes
Printers like clean meshes, but Maya doesn’t necessarily create the most printer-friendly models. However, while it’s not hard-wired for fabrication, Maya can be coaxed into creating solid meshes.
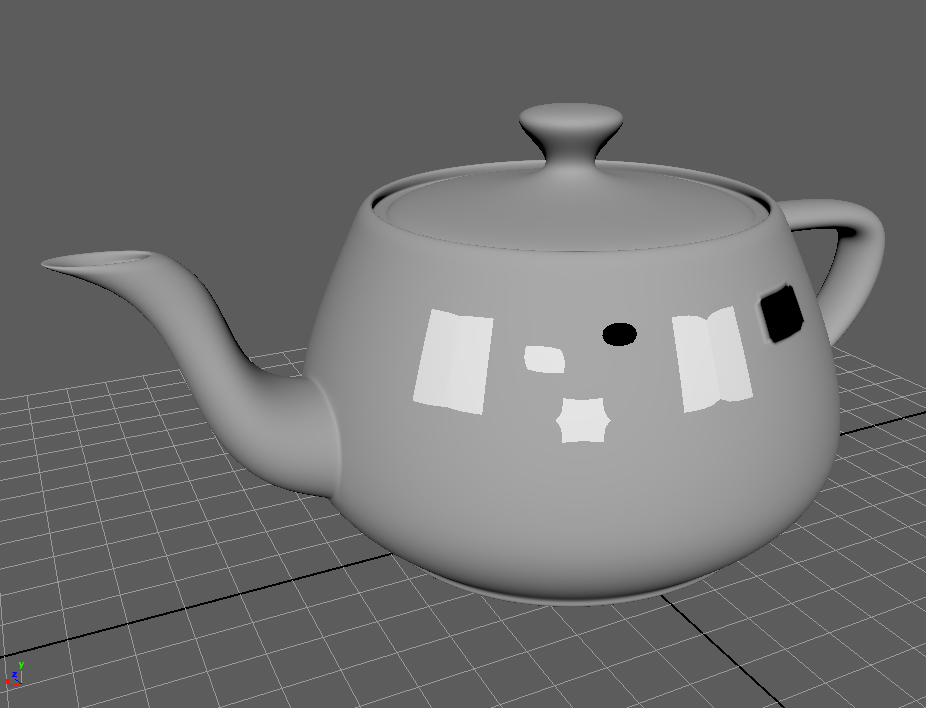
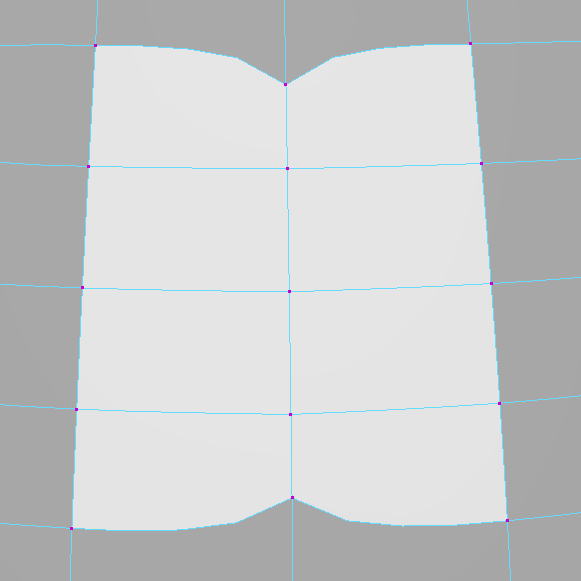
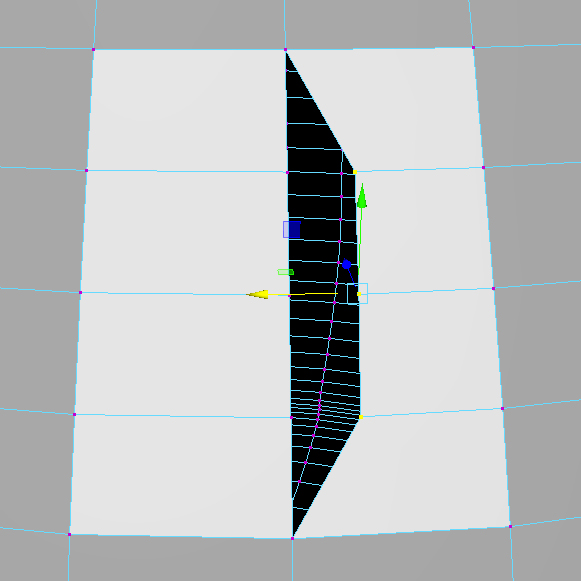
There are many inadvertent problems that can arise that can make your print a bit wonky, if not outright breaking it. We’ve deliberately created several common mesh problems in the Utah Teapot model found in the sample file you can download above. These include congruent vertices, polygon edge definition, holes, “rips” in the mesh, and reversed normals, all described with their fixes below.
Congruent vertices
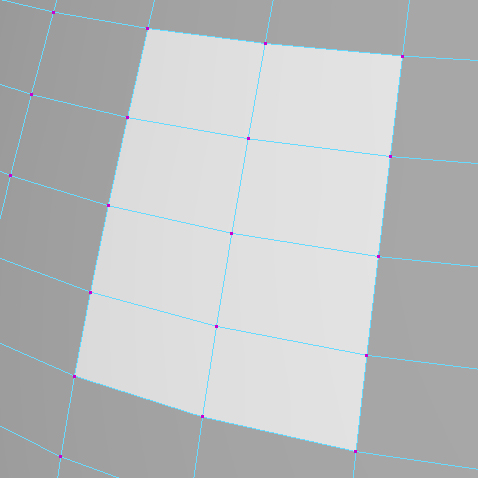
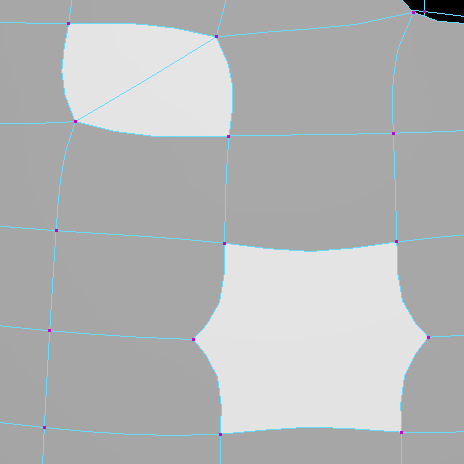
Congruent vertices can make a real mess and are tough to spot. In the white area adjacent to the spout, without smoothing they are impossible to detect. Congruent vertices can happen during NURBS conversion, inadvertently when performing point snaps, and careless beveling on a flat surface. To fix, select one of the congruent vertices, move it, then perform a Target Weld.
Polygon definition
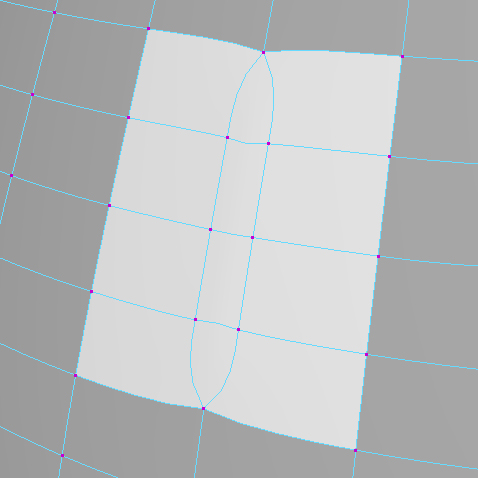
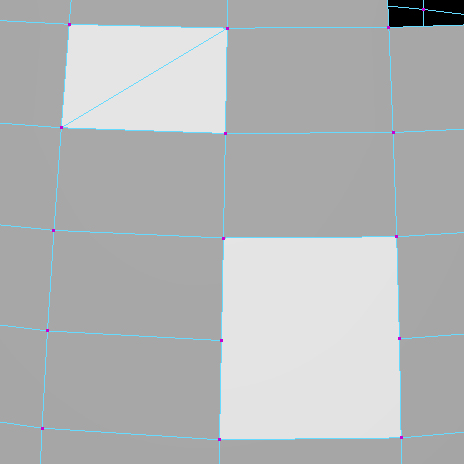
Printers hate n-gons: any polygon larger than a triangle or a quadrangle. When cleaning your model for printing, keep your models consistently defined by triangles or quads. Use Mesh>Triangulate or Quadrangulate as appropriate to your situation. This will solve most problems, but sometimes a more granular solution needs to be sought: delete edges or add edges using the Multi-Cut Tool.
Holes
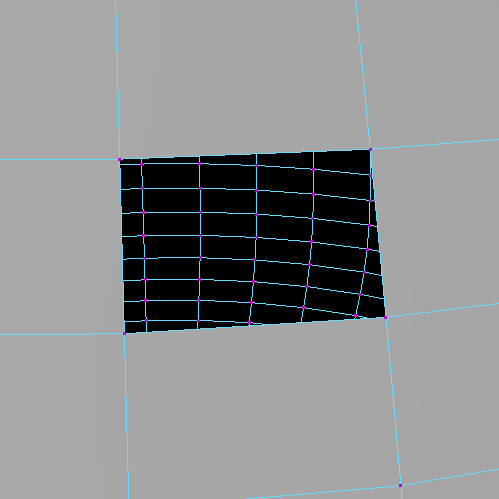
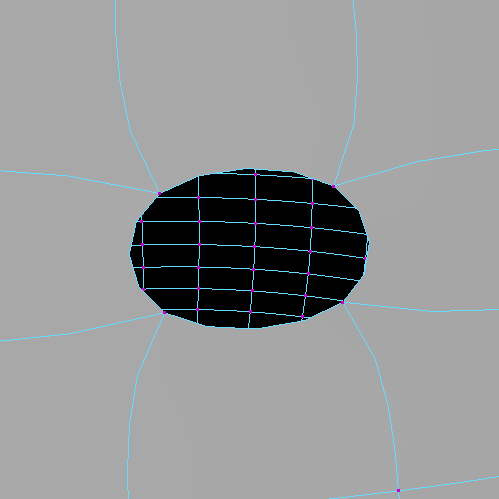
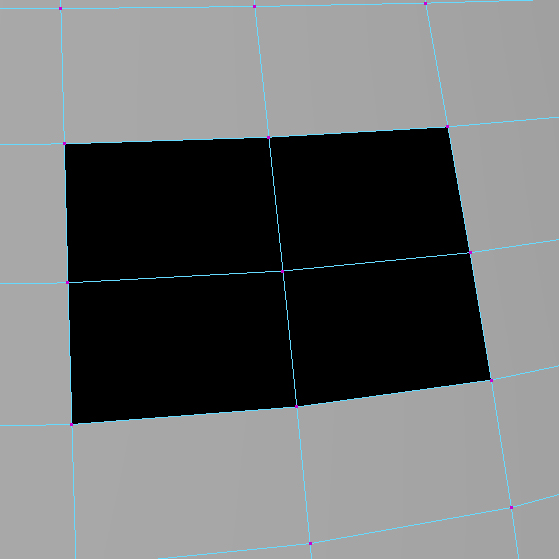
That dark area is not a different material applied to a face: it’s a missing face altogether. To fill a hole, select the edges of the hole and to go to Mesh>Fill Hole.
“Rips”
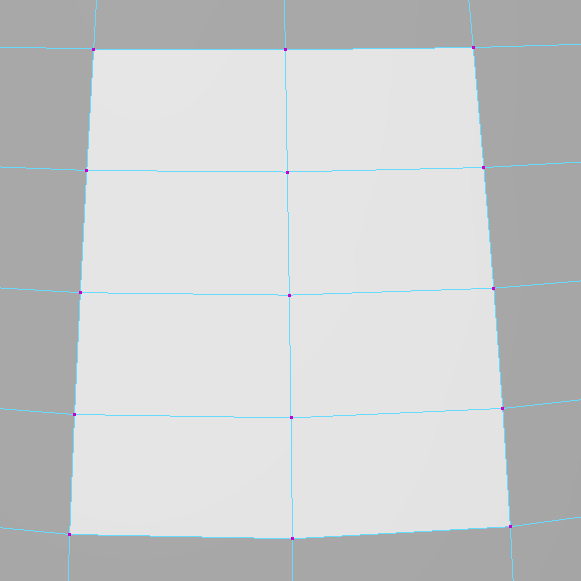
A “rip” in the mesh is an unholy combination of a hole with congruent vertices. These often occur when Boolean operations are performed. They can really break an otherwise decent model. The fix is identical to the fix for congruent vertices. Use a vertex move followed by a Target Weld. You can see how, even with smoothing in operation, rips are pretty tricky to spot.
Normals
Because a normal defines the “front” and “back” faces of a polygon, poorly defined normals often won’t even print, creating a hole in your physical model. Normals must face the exterior of the model to be “seen” by the printer. Use Mesh Display>Reverse, opening the dialog and checking Reverse normals on Selected faces.
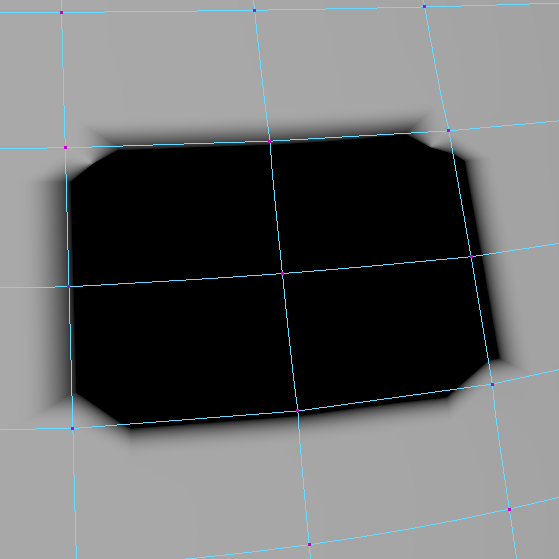
Normals can also develop odd angles during modeling; the “front” is sort of facing “sideways.” We can recognize this by seeing funny highlights or shadows that seem out of place on the mesh. Fix these “twisted” normals by going to Mesh Display>Set Normal Angle… and selecting the default value of 30.
Create a generic file type
Once your mesh is selected and cleaned up, get the mesh out of Maya by exporting it. Go to File>Export All… and in the dialog select .stl or .obj as your output.
3D printer safety training
Hello MakerSpace
The moment of truth has arrived! It’s time to meet the MakerSpace. Visit the website to become familiar with it.
General shop safety forms
Since this may be the first tool you’re learning, you may not be familiar with safety issues that affect every machine in the lab. We are required to keep paper copies of all training records. We recommend you keep a copy as well. Familiarize yourself with the following:
- General Shop Information | Please read this general orientation
- General Shop Safety Training | Please read and fill out form
Equipment-specific safety forms
Once general training is complete, we can turn our attention to individual equipment, in the form of our Prusa 3D printers. You’ll use this form to record your training on specific machines:
- Equipment Specific Safety Training | Please read the front page of this form, and have it filled out for your specific training below.
Hello Prusa
Safety training step by step
- 1 — 3D Printer SOP | Read this standard operating procedure prior to live demo.
- 2 — Live Safety Demo | This occurs during studio time. If you miss this demo, you must still receive this step of training outside of studio time. For outside of studio training, read here and then reserve a time below.
After training: safety resources
Follow up your training with refresher materials, or expand on your training by diving into the tool documentation.
- 3D Printer at Abington∞MakerSpace | Visit this page at the MakerSpace website for troubleshooting, material guide, software guide, and safety videos that parallel our live training.
- Prusa i3 3D Printing Handbook | Long form reference. There is a copy of this manual in the red binder found adjacent to the machine.
Production
Reserve the tool
First, reserve tool time. Even if you are printing during class time, reserve the tool. Reservation sign-up sheets are at the website main page:
If this is your first time reserving, read the How to Reserve section of this page for policies and general guidelines on figuring out how much time to reserve.
Run the job
This is a general overview. Many of these steps are detailed in the live safety demo, and can be reviewed in the safety video referenced above if you need a refresher.
- Bring your fabrication-ready file to the 3D printer computer by downloading from the cloud or transferring on a flash drive. NOTE: Copy the file from the flash drive onto the hard drive. Never work a file directly off of a flash drive. Immediately after transfer, safe-eject the flash drive and remove. Every time you try to reboot a computer with a flash drive still mounted, Elon Musk beats a baby seal with a baseball bat! Please don’t let that happen!
- Run your file through the Prusa Slicer software to obtain a print file (known as a GCode file).
- Transfer the GCode file to the printer using an SD card, found in the space.
- Select your desired filament and change the roll if necessary.
- Maker sure the printer’s spring metal bed is clean and free of grease or debris. Clean with isopropyl alcohol or Windex if needed.
- Run the job. Watch the first layer print completely. Print adhesion of the first layer is where 95% of all print fails happen.
- Once the print is well-established, you may leave and pick up your print when ready.
Post-production
The machine is very slow, but post-production can also be time consuming! Training for post-production work has already been covered by the live demo and the safety training video mentioned above. Typically, you are removing a brim and support material from the model, with some sanding or smoothing from time to time.
Reserve a time
Most people find it more convenient to use our tools to do these steps. Reserve an Open Workspace (just one of the empty tables) at the MakerSpace. Reserving not only guarantees that you have a space to work, but it gives us data to prove the MakerSpace is wanted and needed by our community — meaning we are rewarded with more resources to serve you!
Document the results
Show off your finished print on your process journal or blog by taking simple but careful photographs.
- Clean the lens! | When you pull your phone out of your linty pocket with your smudgy fingers, the lens gets dirty. Lens cloth and cleaner are best, and MakerSpace has some. But even wiping with your T-shirt is OK!
- Framing | Use the Grid to help compose your image. (In iOS: Settings > Camera > Grid. In Android: Settings > Apps > Camera > Grid Lines). Choose a frame proportion (like Photo or Square in iOS) and orientation.
- Composition | Your work is the focal point. Provide only enough background for us to understand this is an image of your fabrication in real space, and make sure everything the field of view is there because you want it there.
- Avoid digital zoom | Instead, move closer to your subject.
- NO flash | Always a terrible outcome! Use natural light or position indoor lights deliberately. MakerSpace has a light-box and phone tripod. Just sign up for an Open Workspace, and use these tools for easy, simple, professional results!
- Steady yourself or use a pocket tripod | Lean against a wall or furniture to help steady your hand. Otherwise, a small tripod is a good choice. MakerSpace has a phone tripod you may use.
- Play with editing and exposure | You can make color more saturated, crop an image, brighten a dark image or vice versa. But: avoid filters, please! They are a passé, gimmicky unforced error.
