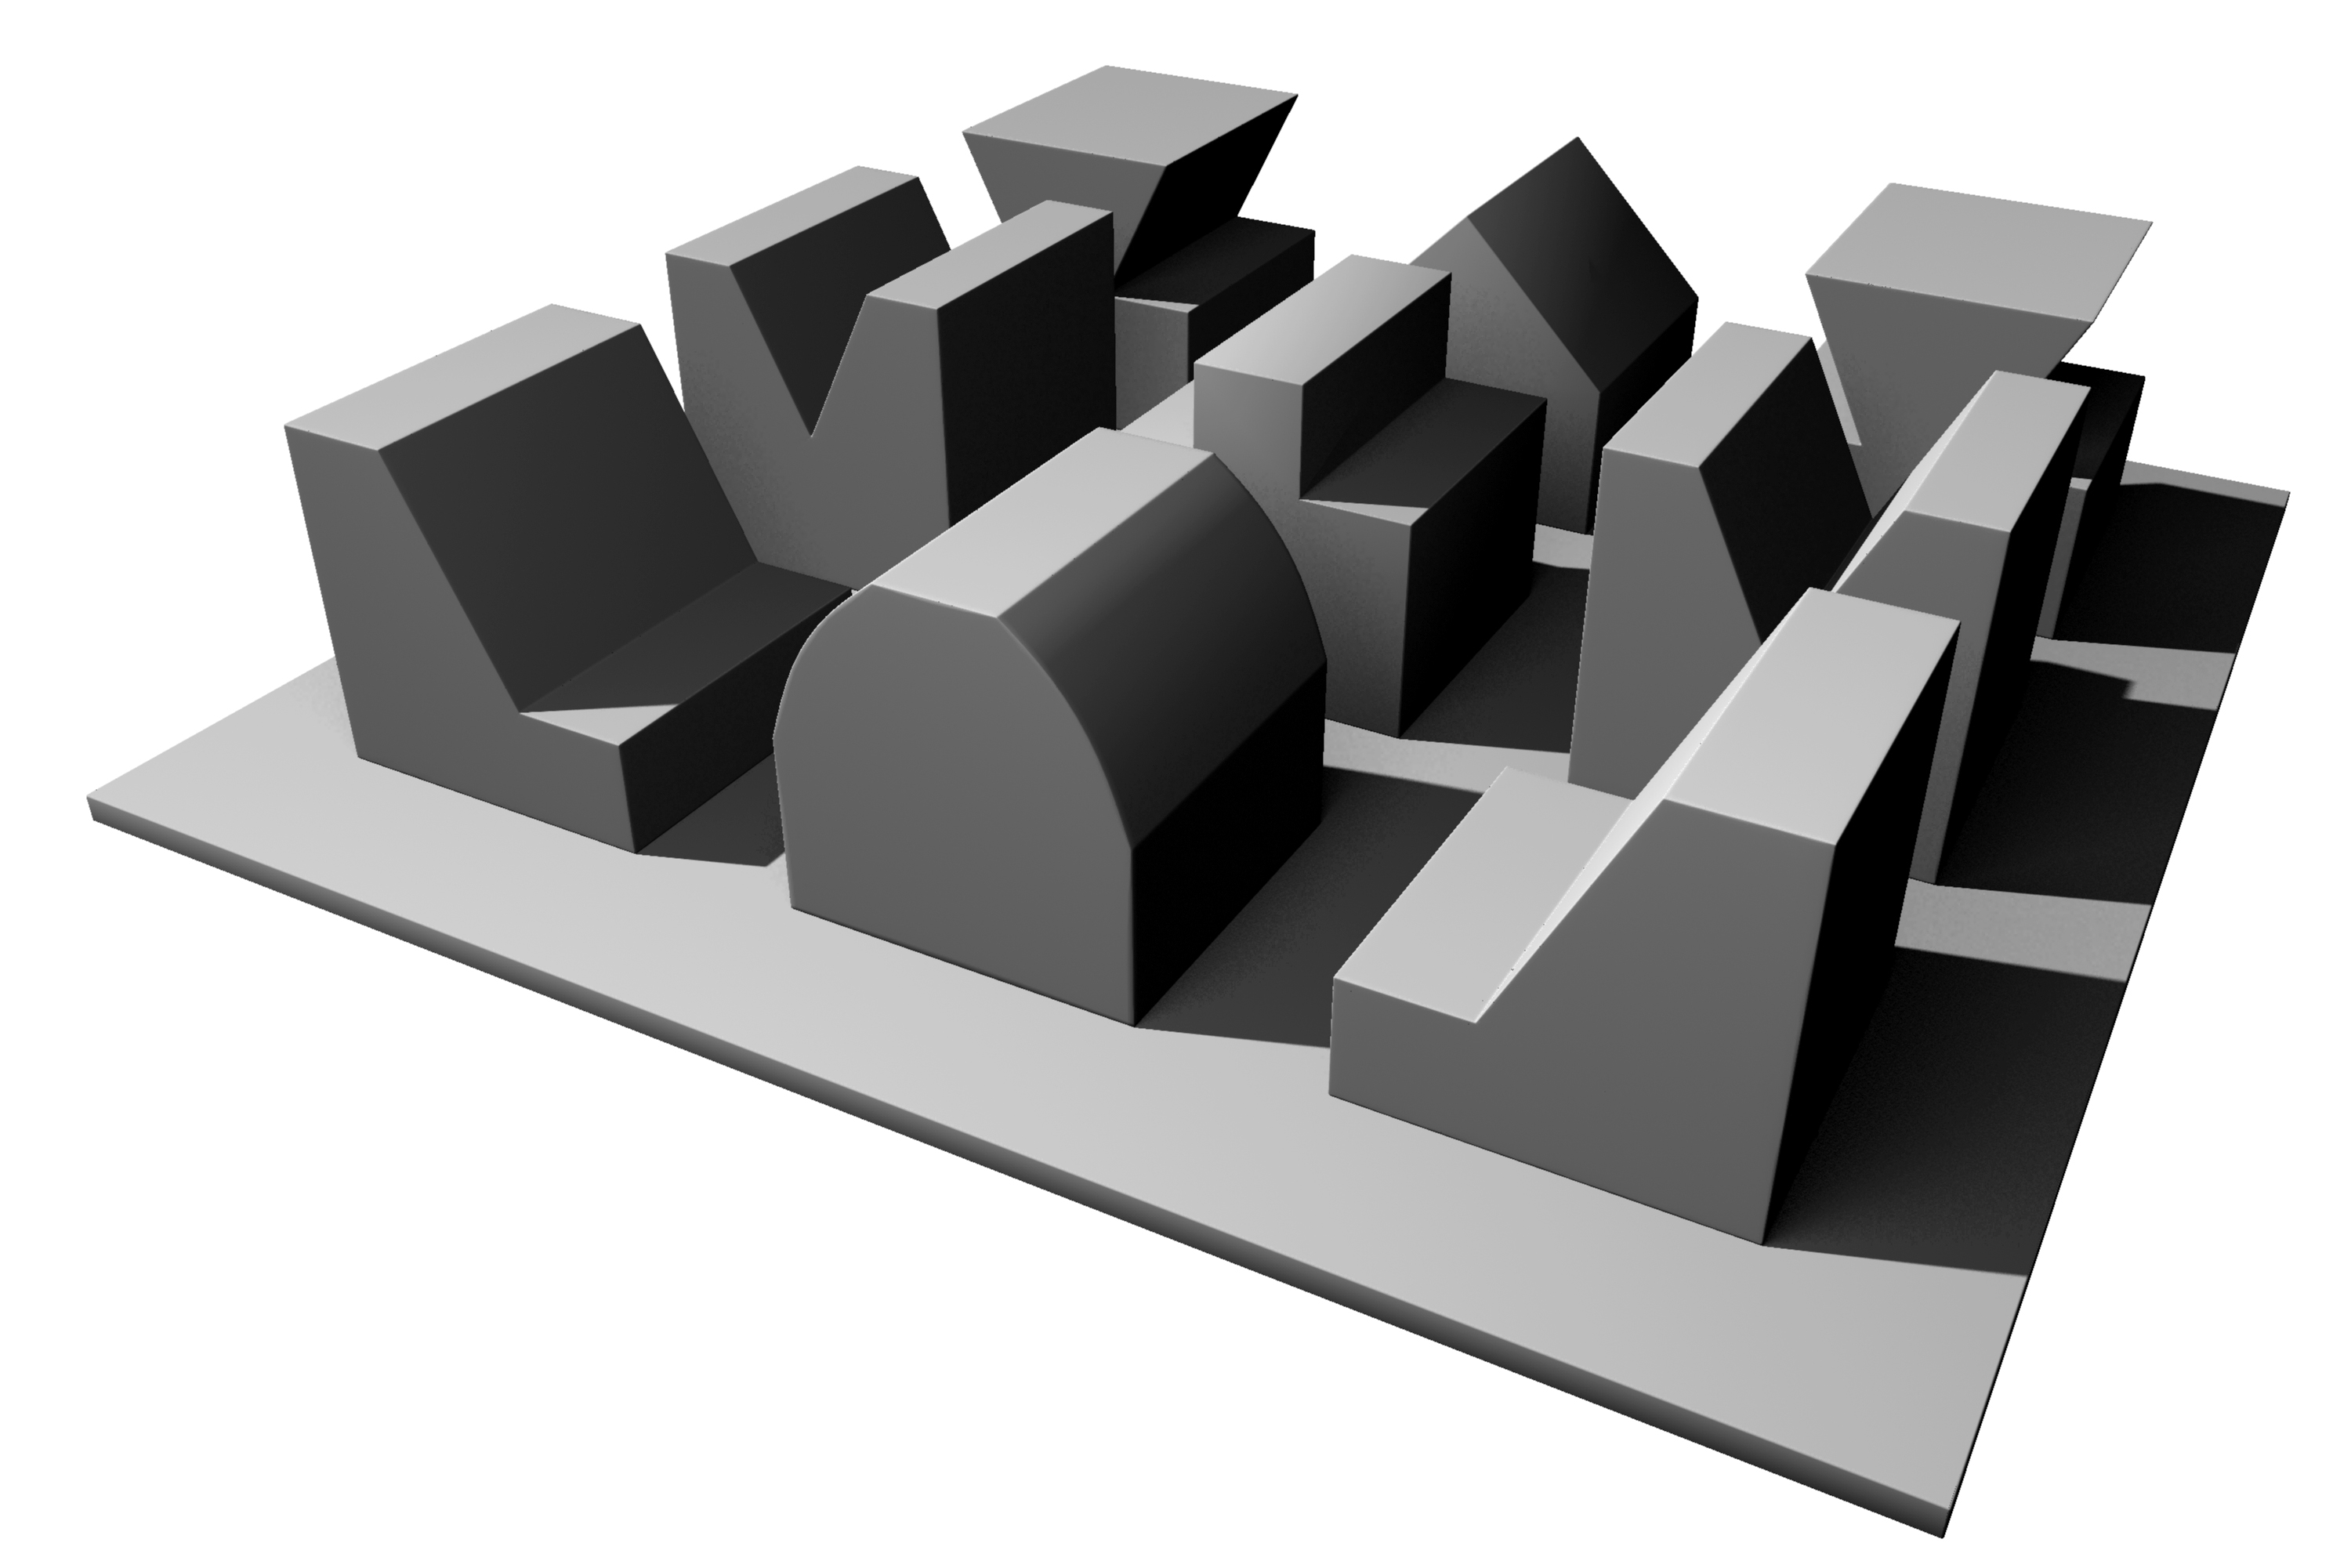
3D modeling: Nine square grid
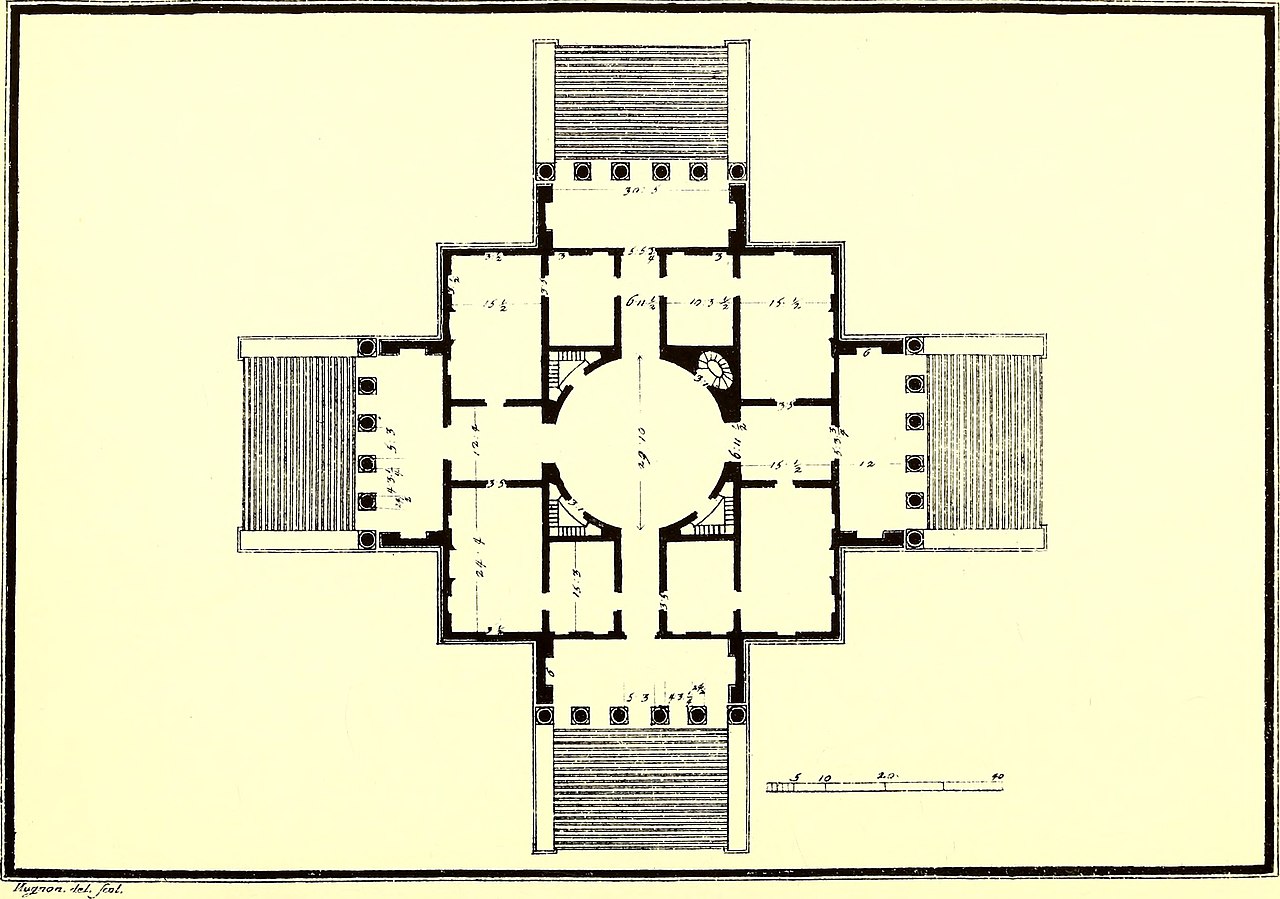
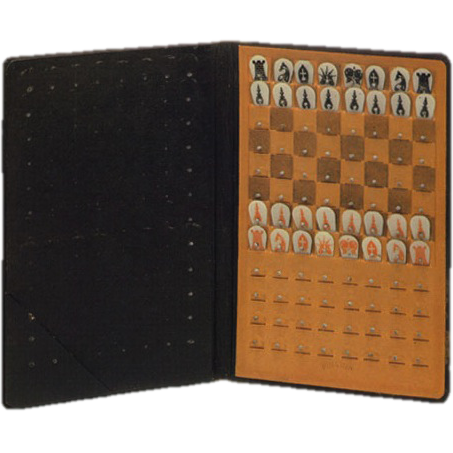
A classical precedent of the Nine Square Grid exercise performed in many design studios.
Can you find the grid in the floor plan?
Nine square grid
Put your Model and Sculpt expertise to the test in a classic Grid Exercise, borrowed and adapted from basic 3D visual design. Learn how to turn overly rigid “perfect” geometries into “real-world” geometries. The practice this exercise provides will eliminate most of the frustrations you might encounter when modeling your artwork.
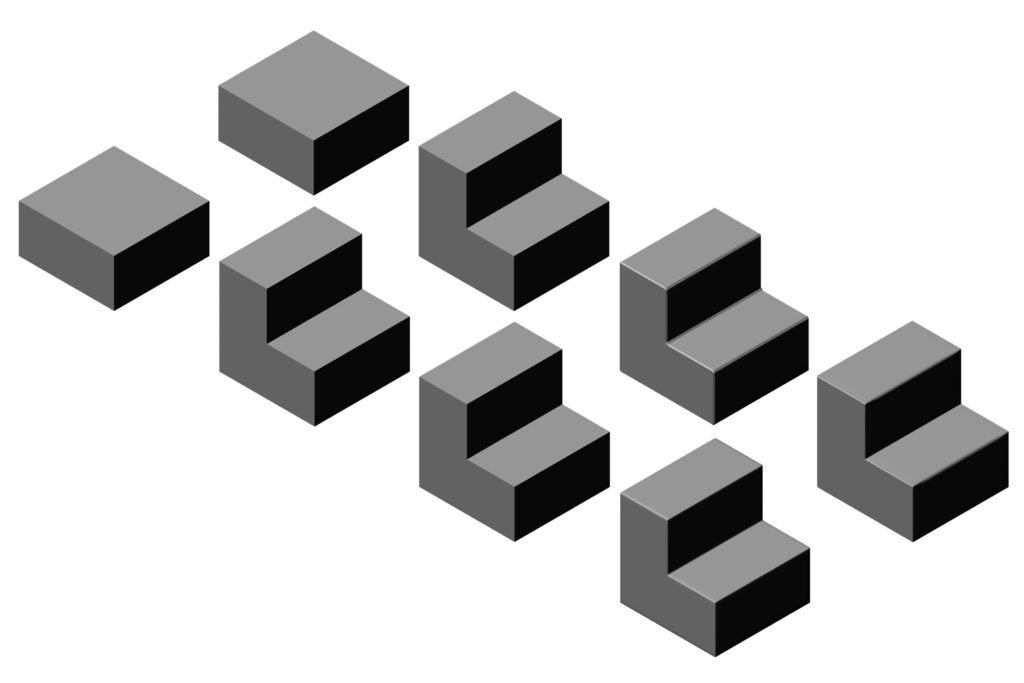
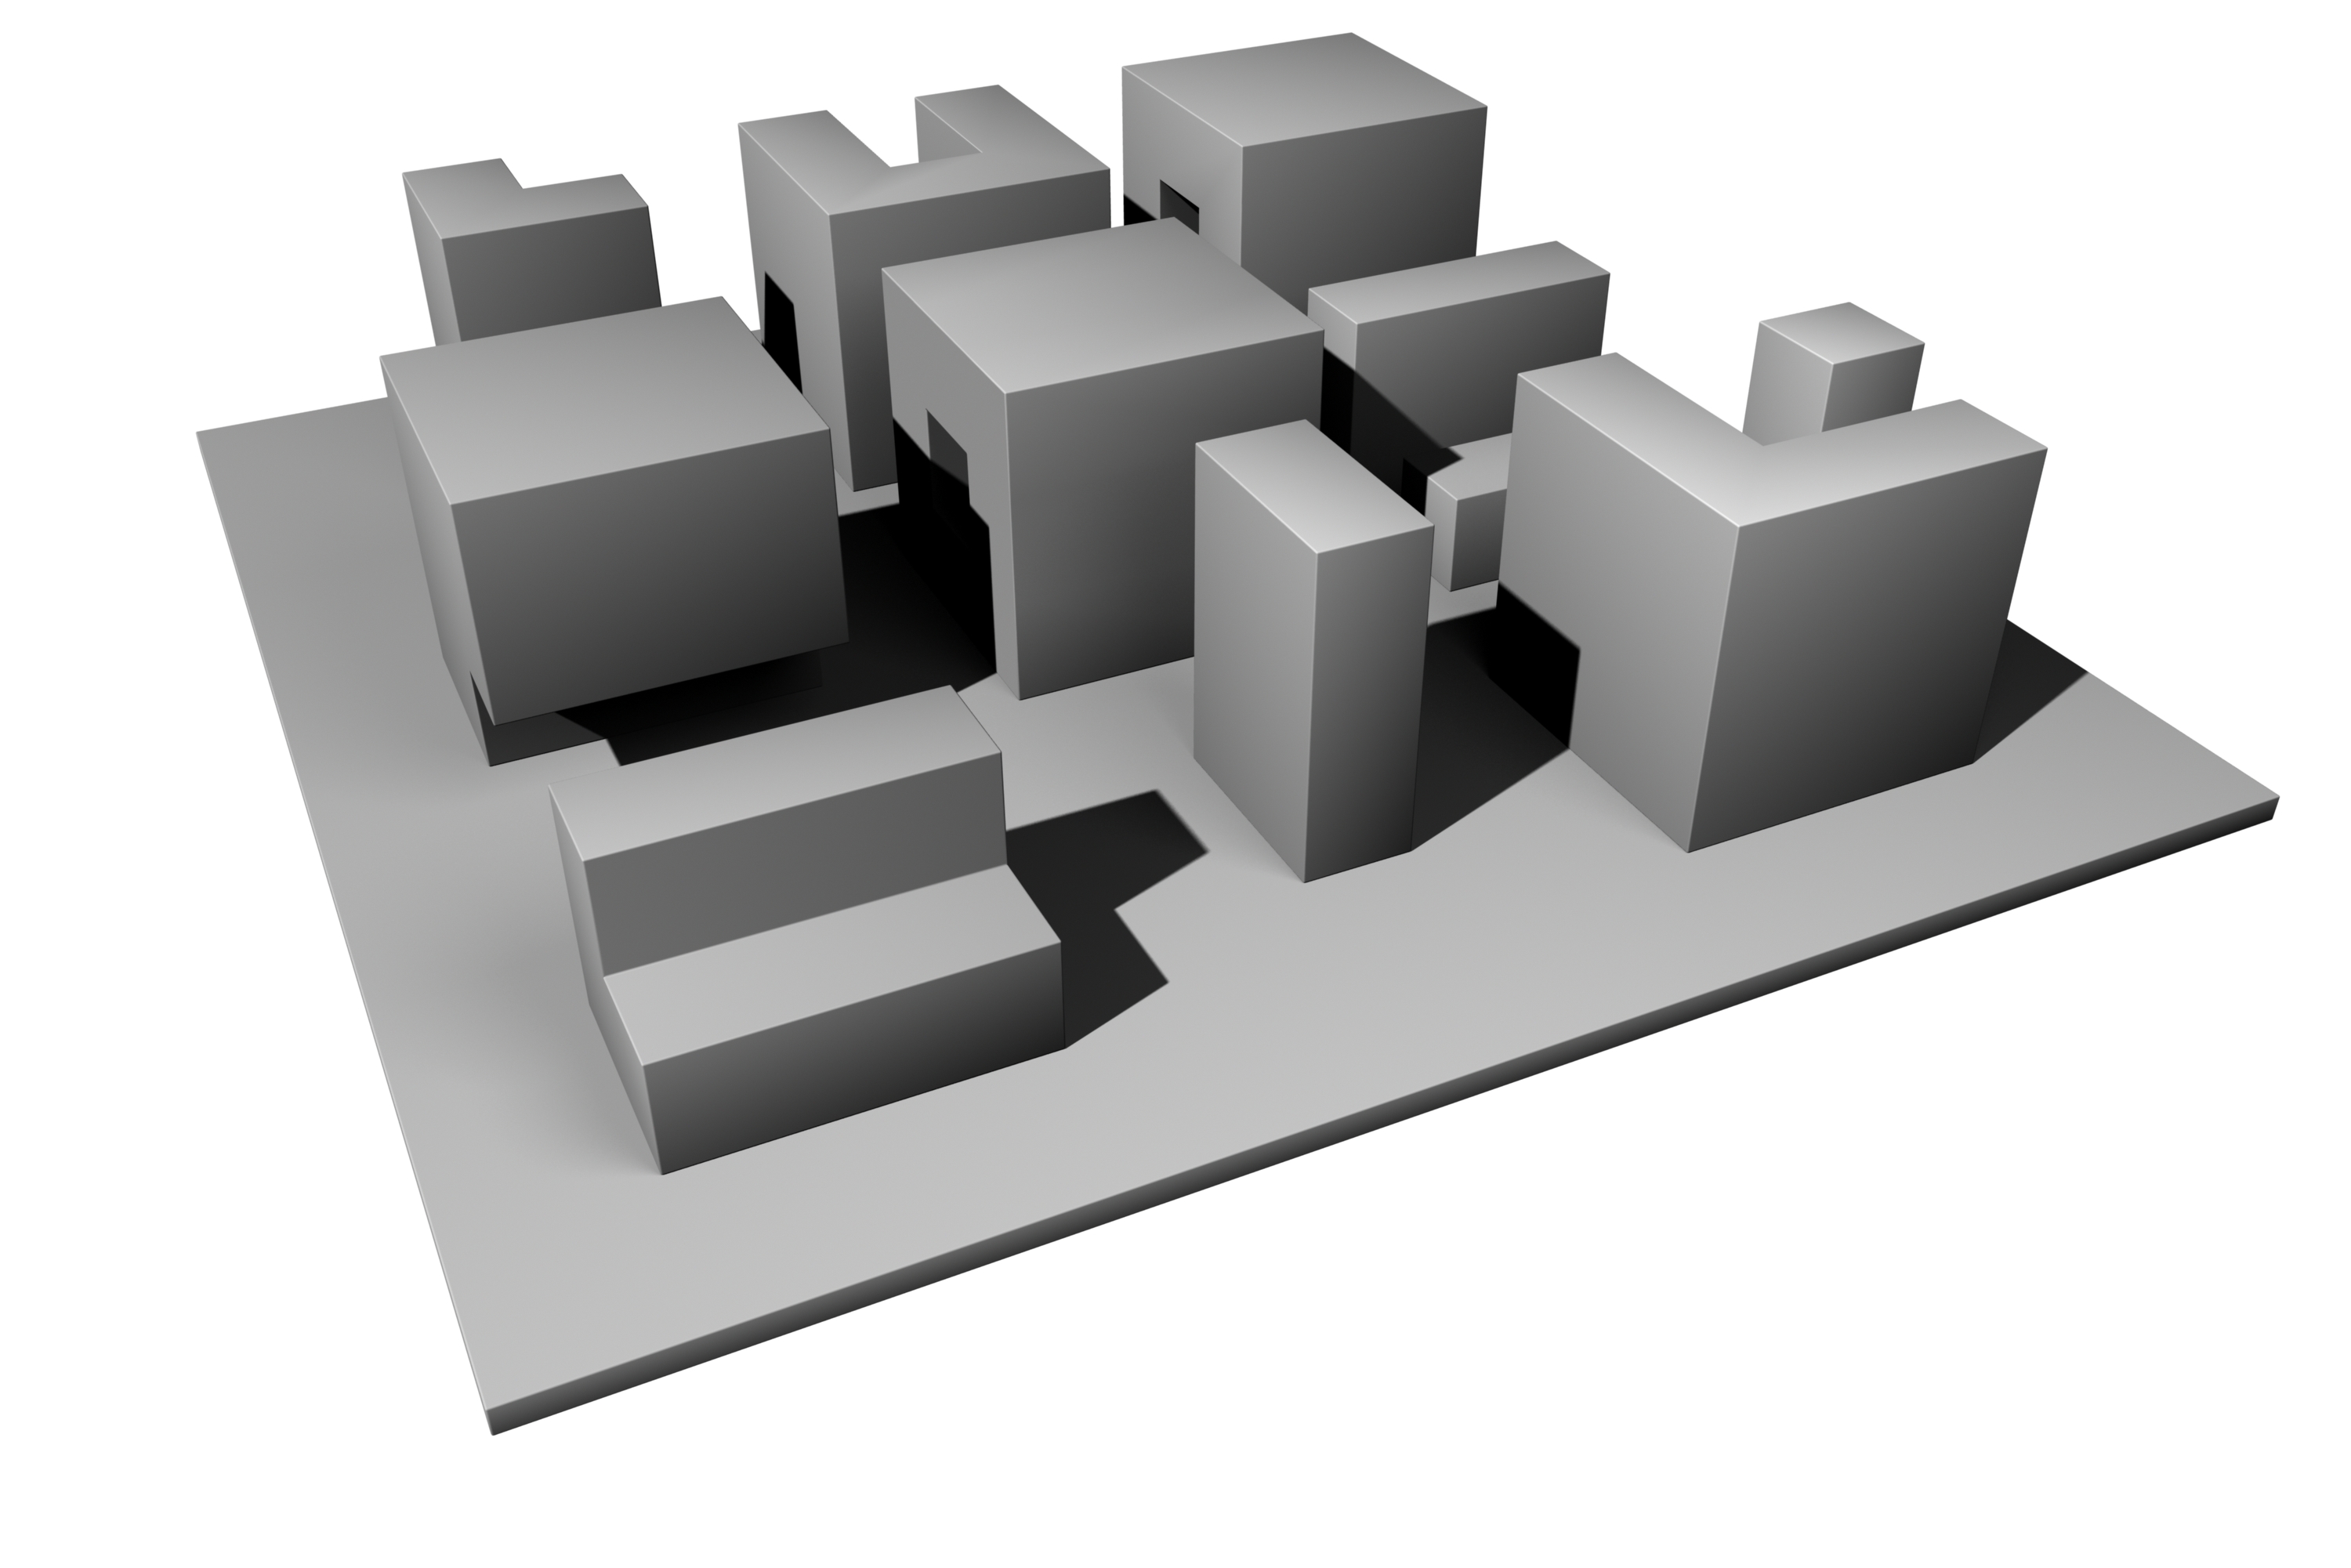
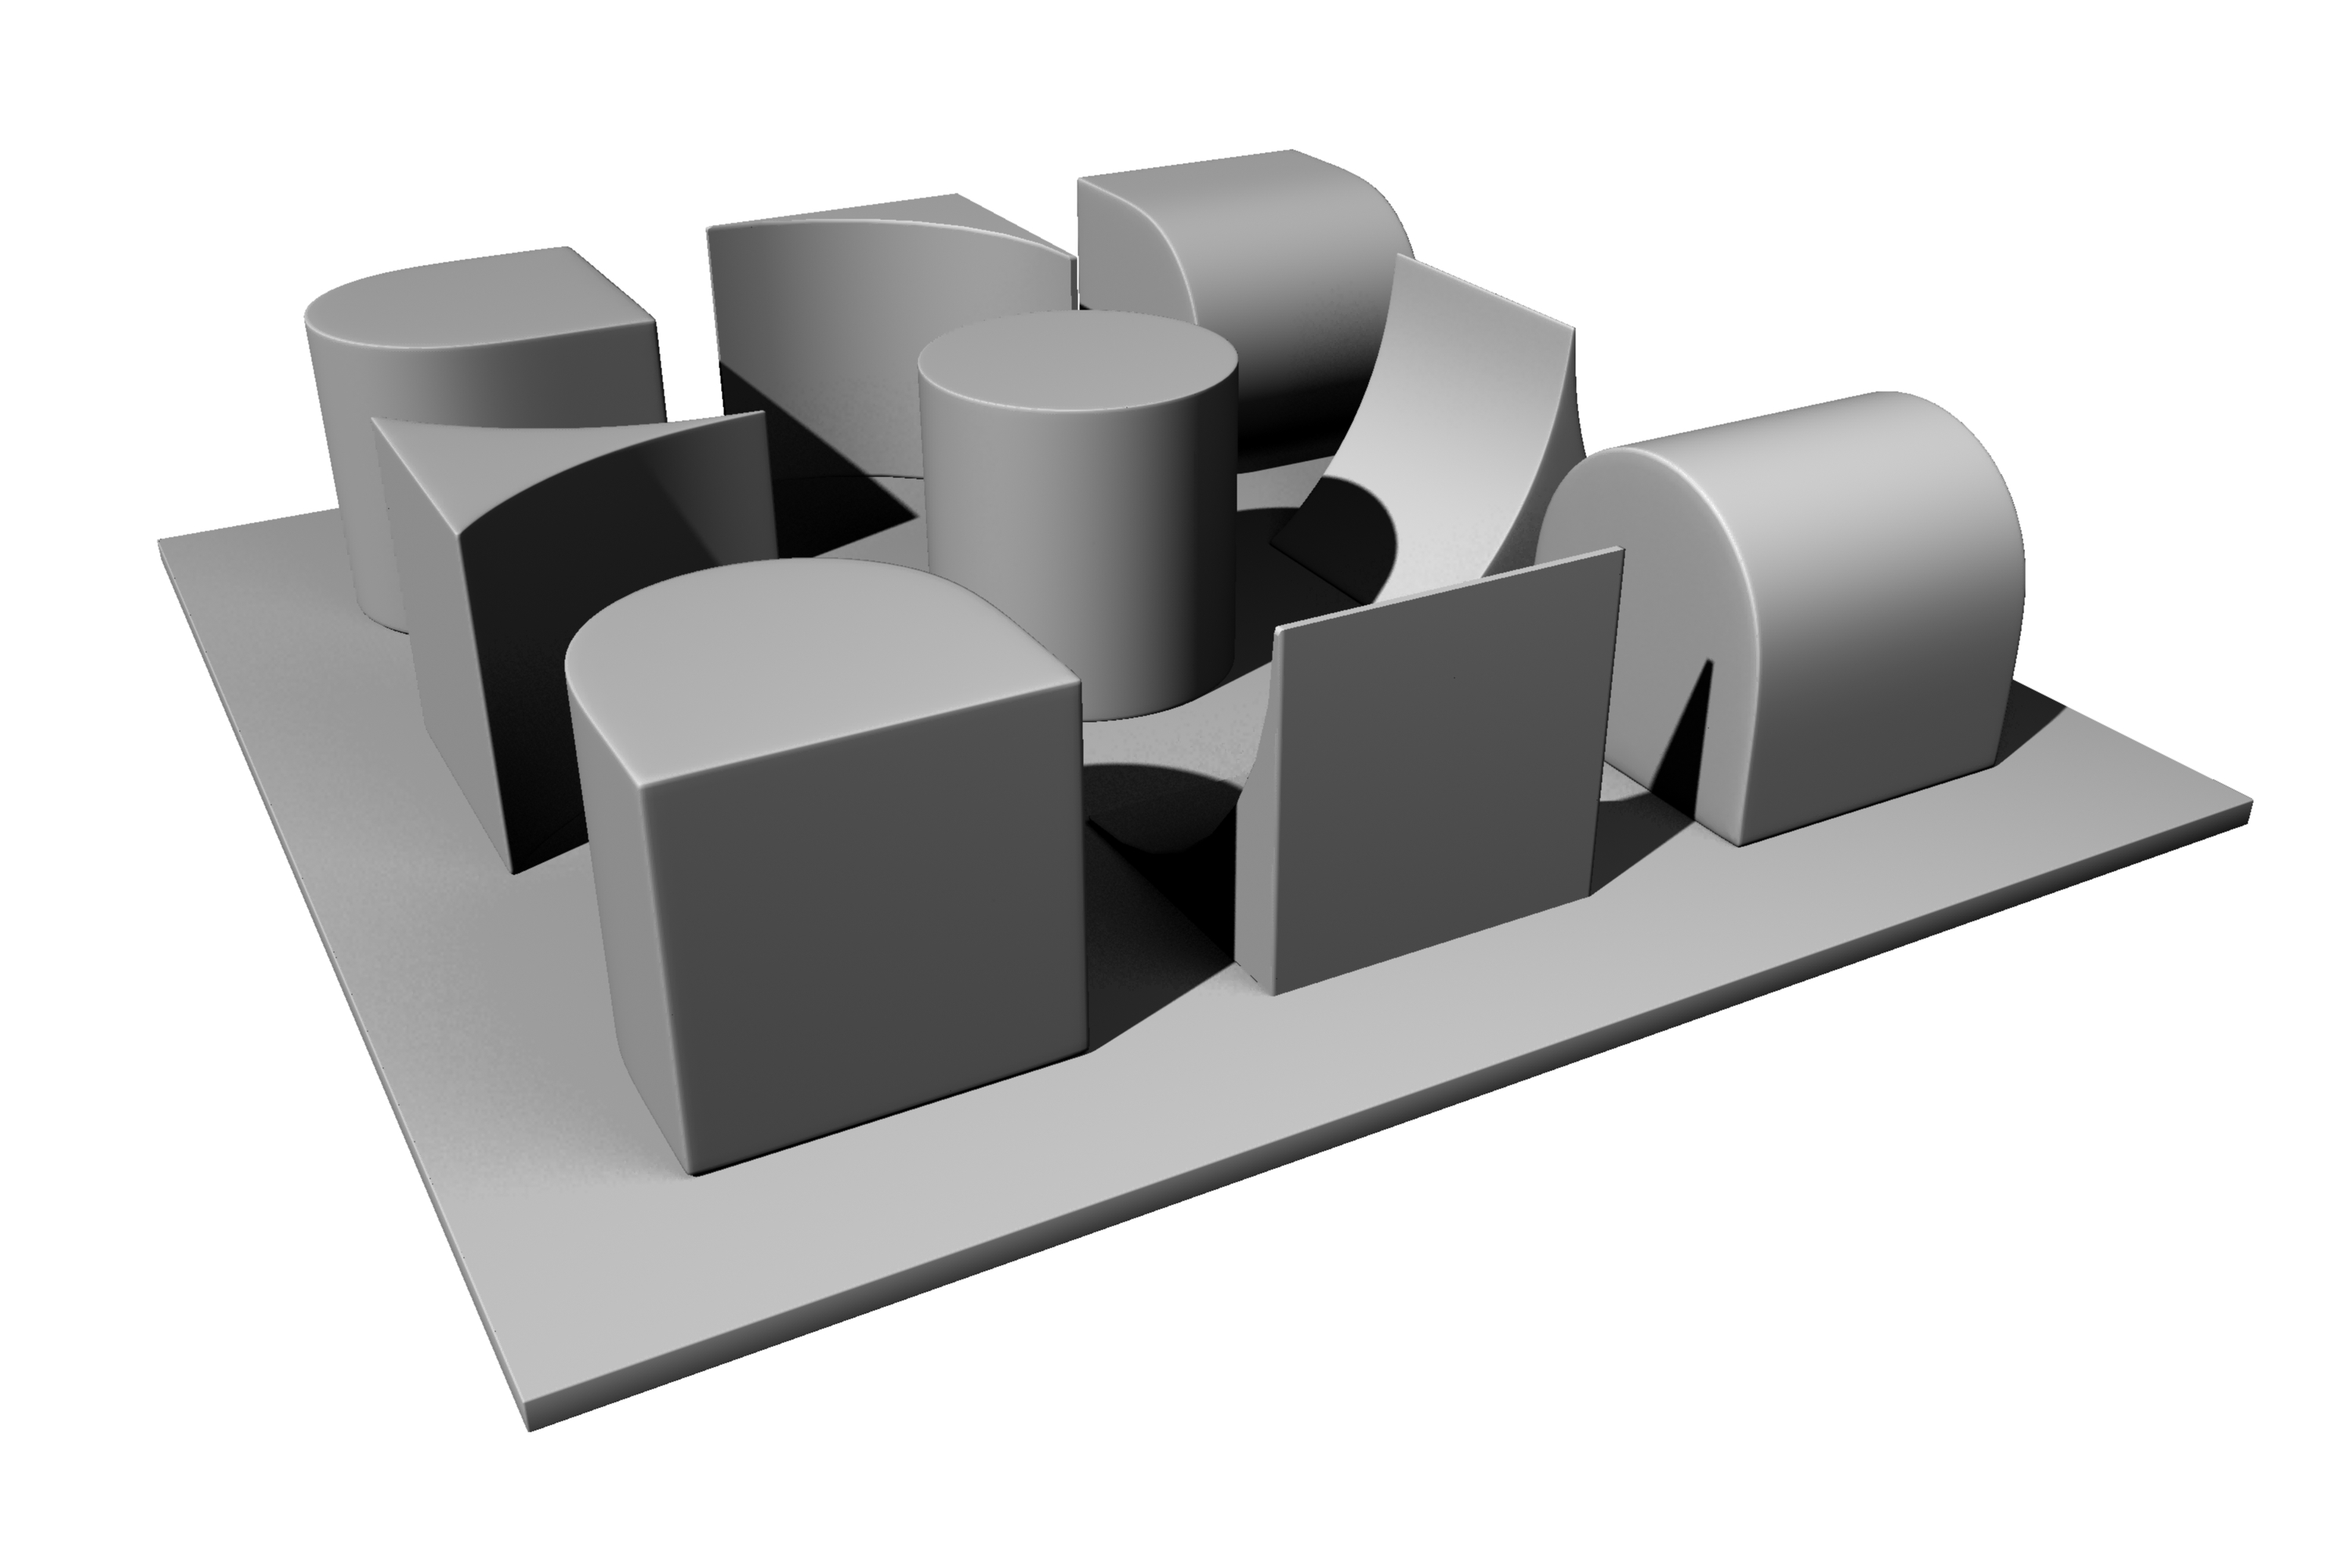
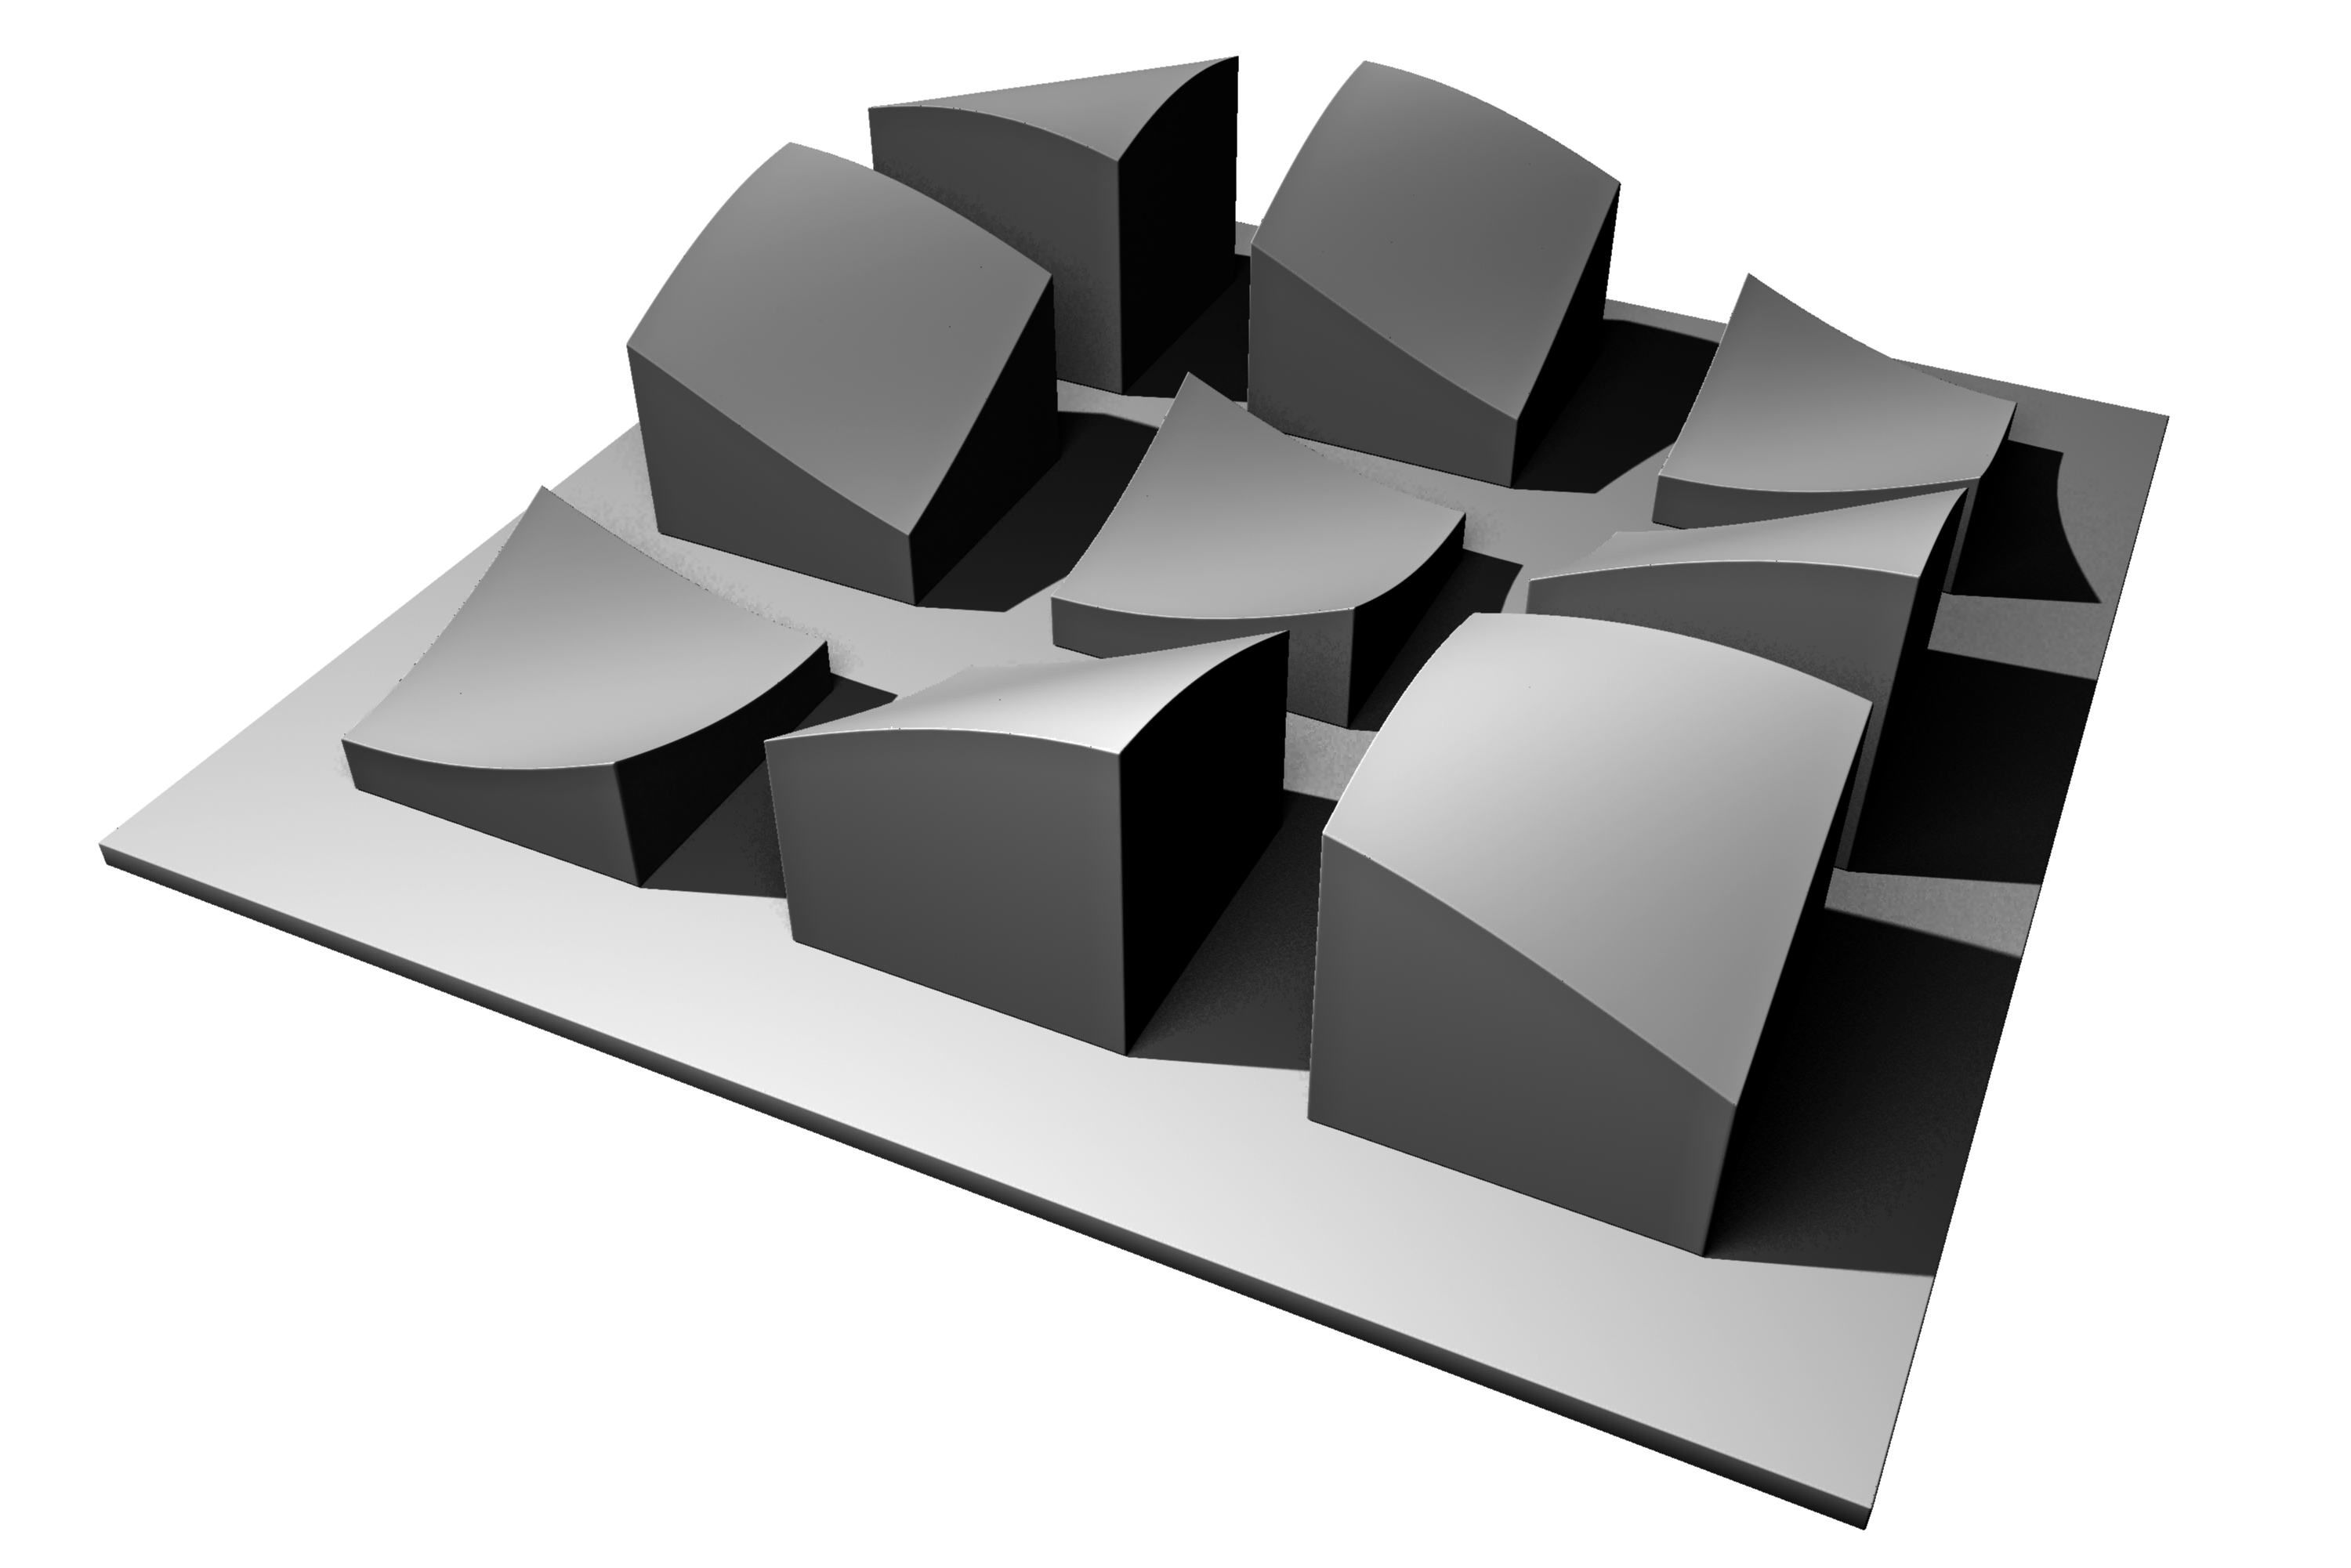
In a tactile 3D design course, the classic Nine Square Grid is done by exploring different materials, such as plaster or bristol board, and explores processes such as additive or subtractive modeling. The forms are typically abstracted materially by applying white paint—a suitable move for our exercise, with its emphasis on form and volume. In a 3D design course taught by Ray Horner at Kean University, students create the variety of forms seen below.
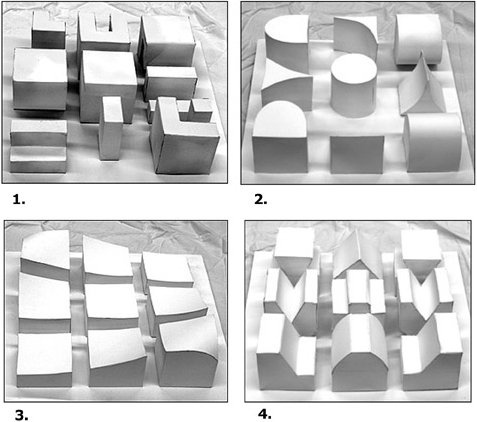
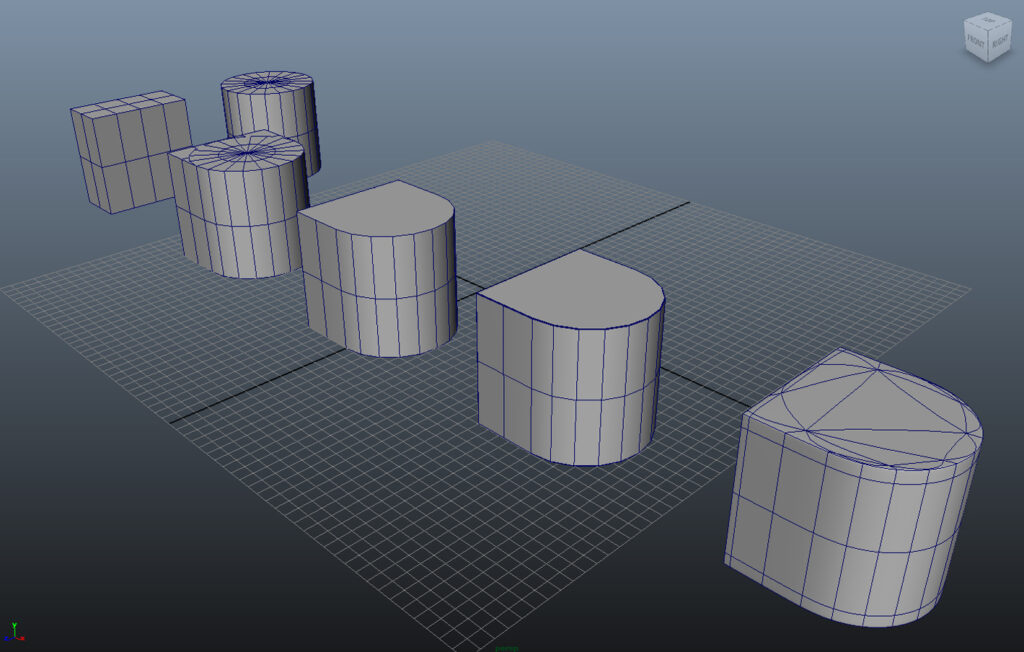
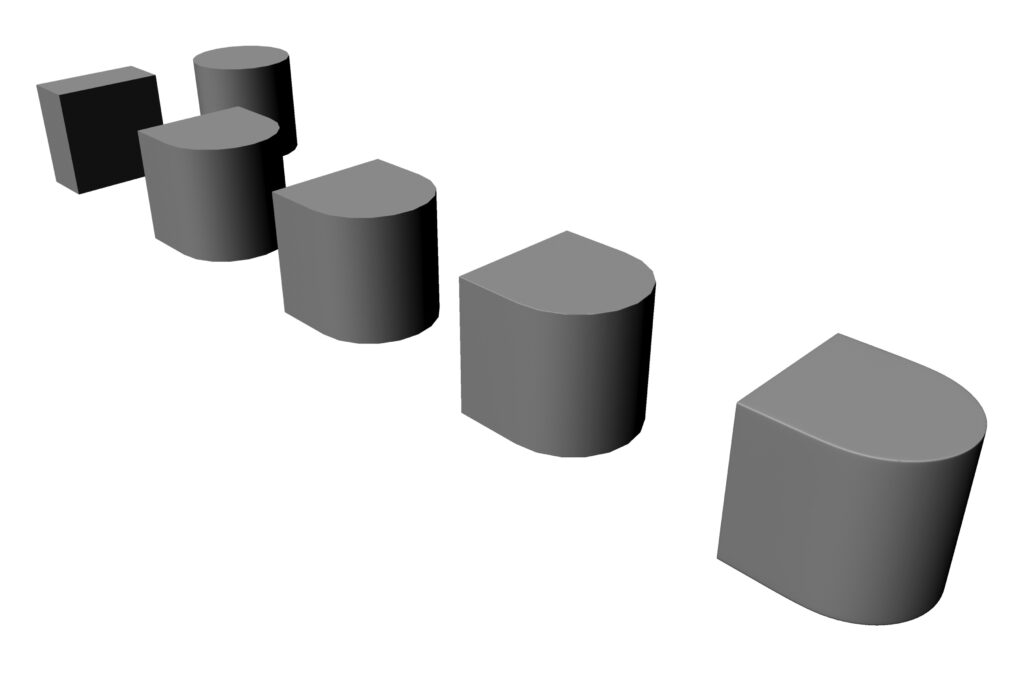
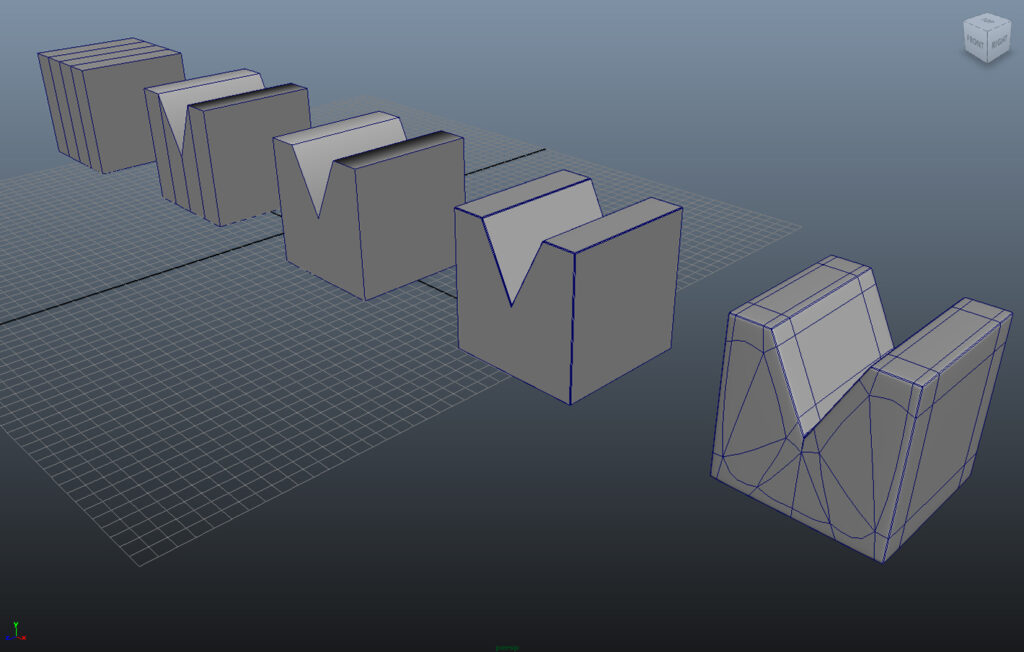
Ray Horner, examples of students’ Nine Square Grid:
- Rectangular
- Rectangular & cylindrical
- Curved
- Angular
How do the students use visual principles to achieve conceptual clarity and the complementary qualities of unity/diversity?
Getting Started
Use the physical project above as the inspirational basis for creating a digital version of the Nine Square Grid. But we do it with a twist: we don’t fill every space in the grid! Five out of the nine spaces will be filled with some kind of mass. The remainder will become a negative space or void. Mass and void are the 3D equivalents of Gestalt figure and ground.
Below you can see an orthographic top view of a variety of mass-void relationships in a nine-square grid, where the white square represents the presence of a mass. The dark and light gray squares represent void spaces on the grid, a bit like the pattern of a tiny chess-board:
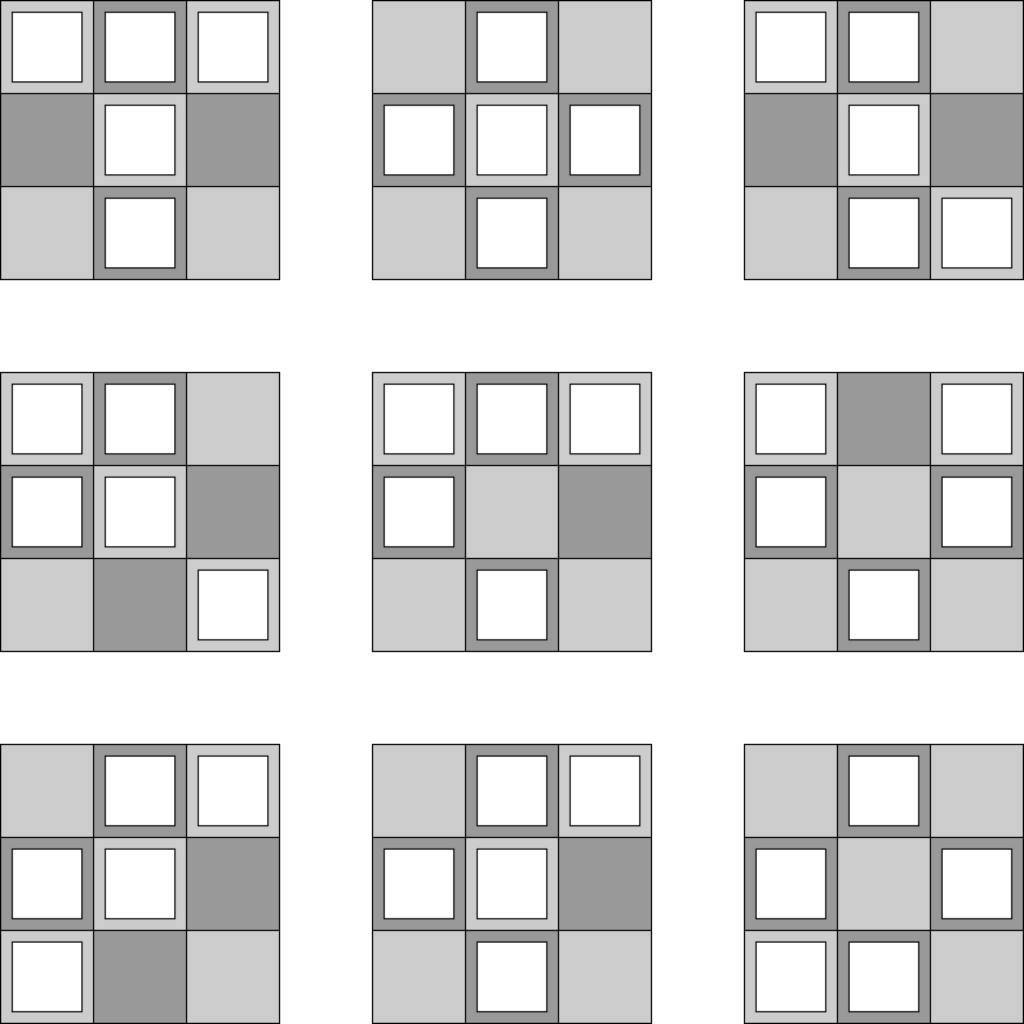
Our first job will be to model the “chessboard” spaces, which we’ll call the datum.
Modeling the base and cubes
- Create a new Maya Project folder, named nineSquareGrid.
- Create a scene named yourname_nineSquareGrid.mb and save it to the project scenes folder.
- Make the chess-board-like base:
- Using Grid Snaps and/or parametric input, generate a shallow rectangular solid, 0.5 units high (in the Y direction) and 24 units in the X and Z directions.
- Create 3 subdivisions in the X and Z directions to generate 9 squares; each square should be 8 units.
- Using Face sub-object selection and applying a simple Lambert material, alternate the colors of the faces in very subtle shades of gray, like a chessboard.
- Center the object in the reference grid, and make the top face congruent with the XZ axis.
- In the scene, create 5 cubes (unique instances: don’t copy them).
- Each cube should be 6X6X6 units.
- The base should be congruent with the XZ reference grid.
- Center each element on a square in the “chessboard.” Use the illustration above for inspiration.
- Apply a white Lambert material to each cube.
- Add at least two light sources and use a white environment in your camera background.
- When complete, save the file and render at 3000 wide X 2000 high pixels in .jpg format.
- Save the scene and close Maya.
We’ll return to this scene later.
Modifying the cubes
Now, drawing inspiration from the Horner projects above, imagine a visual vocabulary that will distort the cubes, carving or molding them into new forms whose origins are still recognizable as having started out as cubes.
- In a sketchbook or equivalent ideation tool, create a sketch of what you’d like to do with your cubes. Keep the forms highly abstract and simple. Conceptually transform/deform each cube into a new, unique form. At the same time that each form is unique, the relationships between the forms should create a sense of unity, wholeness, and conceptual clarity.
- Remember visual principles: repeating an element can create a pattern, mirroring it can create symmetry, etc. Most importantly, consciously develop mass and void relationships.
Save your file and sketches for later. Before we apply your sketched transformations to your scene, we need to learn a workflow technique essential for any high-resolution photo-real project. Discover the wonders of the micro-bevel…
Micro-beveling: the hidden challenge
The Elements project attempts a means of expression based on Realism. Observe the test rendering you created above, and you might notice they appear too, well, perfect.
In reality, we don’t experience geometry the way an algorithm creates it. Look at the corners of anything that exists in the world, and they are rounded, even ever so slightly, even if that’s at a quantum level. At some scale of observation, things just are not perfect expressions of geometric precision. In modeling, we call this knock-down a micro-bevel.
One of the most difficult conceptual leaps 3D modelers have to make is understanding that they are not making a thing: they are manipulating a database. From an algorithmic standpoint, surfaces are databases, whose visual expression is your model. Object subdivisions are roughly analogous to cells in a spreadsheet database. How you set up your database affects the outcome of future operations in a workflow. In other words, if your end goal is to create a complex shape that has 4 operational steps applied to it, you need to start with a database that will allow those operations without suddenly turning completely wonky on you at step 3.
So the case studies below will help you get past the frustrations this workflow logic creates for newbies. You’ll begin to see that getting a great micro-bevel typically takes about 3-5 steps with careful planning, the right number and kind of subdivisions or the correct initial setup being of chief concern.
Case Studies
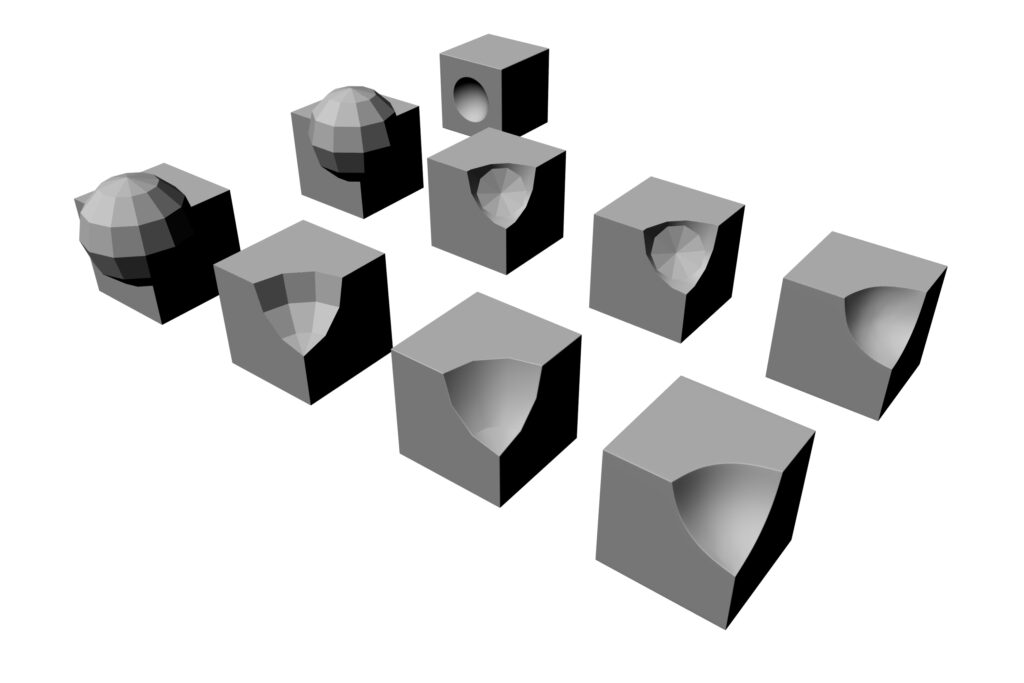
Below, consider a model of some distorted cubes that contain about a half-dozen common modeling situations:
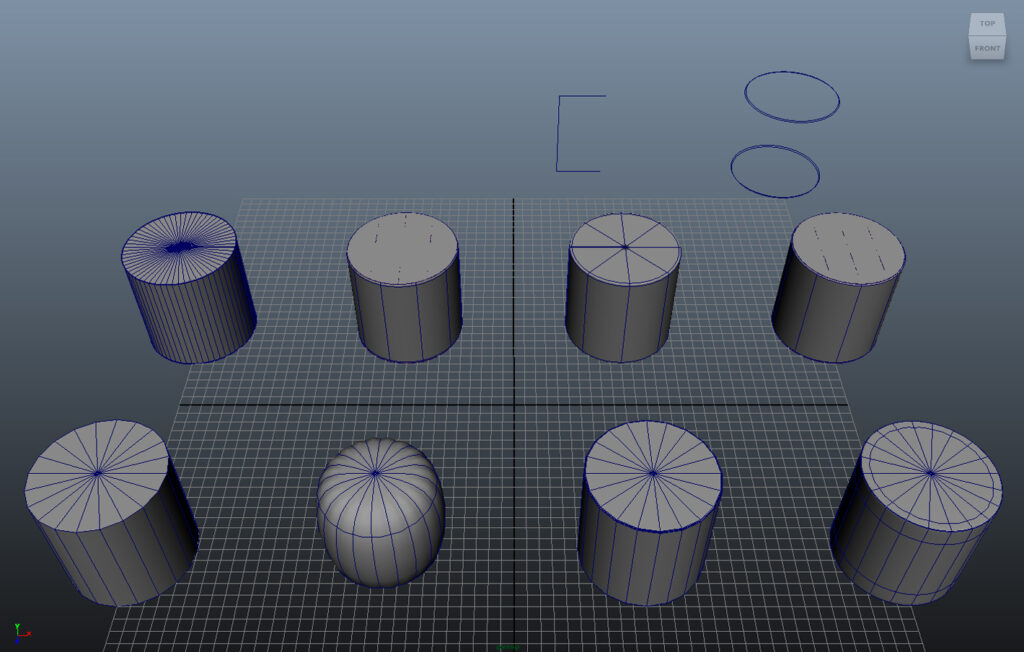
- A simple cylinder
- A union of a cylinder with a rectangular solid
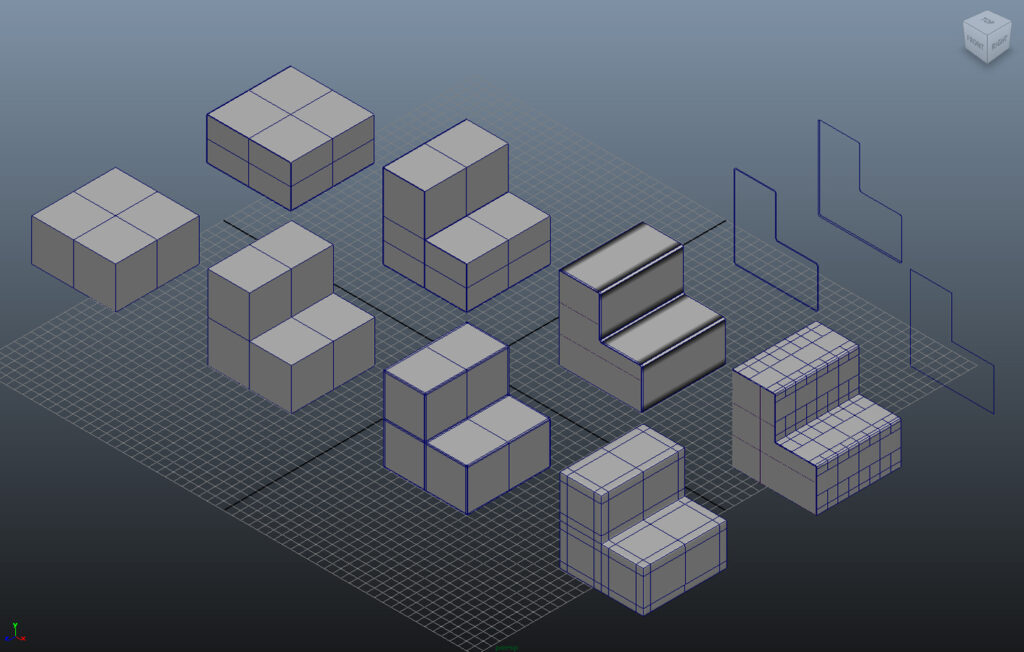
- A rectangular L-shaped solid
- An acute angle cutout
- An irregularly curved surface
- A spherical cutout
For each of these, we model in polygons or NURBS as appropriate, with a few containing solutions in both polys and NURBS. Each case study has a downloadable file for inspection, a viewport shot for reference, and a high-resolution rendering to observe the outcome in its intended production quality.
Note: Proper display of micro-bevels will depend on the Smooth Mesh Preview function in Maya—pressing the 3 key. Depending on your rendering engine, Smooth Mesh Preview may not render; instead, you’ll render the low-resolution mesh. If so, convert a smooth preview to a smoothed polygon mesh using Modify > Convert > Smooth Mesh Preview to Polygons, and render the result.
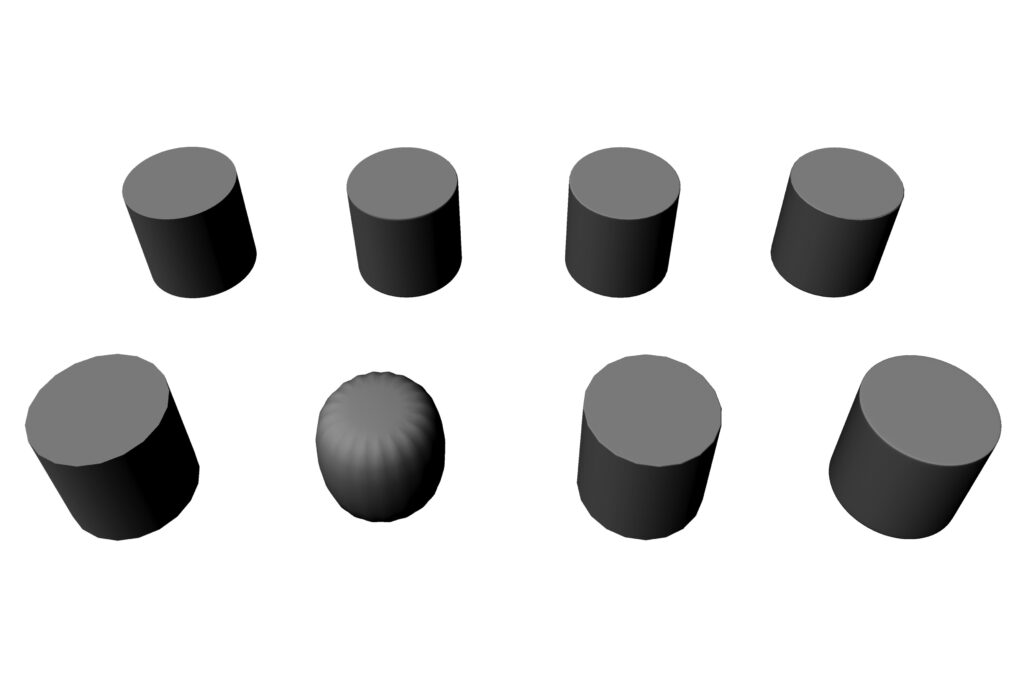
Simple cylinder
Goal: create a simple cylinder with micro-bevels
Sample: 1.1_cylinders.mb
Back row = NURBS. From l to r, 1) the primitive is too sharply “perfect,” so one solution is to 2) delete the top and bottom from the primitive, add isoparms near the top and bottom curves, minutely scale the top and bottom curves equally in XZ toward the interior, and finish using Planar to create new caps. Other solutions include 3) revolving a curve with bevels built in (see behind volume) or 4) lofting a set of curves (again, behind the volume) and using Planar to cap. Which is “best?”
Front row = polygons. From l to r, 1) the primitive shows its faces, but 2) pressing 3 to soften reveals there’s not enough geometry. We add 3) a bevel with the Bevel tool to the top and bottom edge, and then 4) pressing 3 for Smooth Mesh Preview yields a well-crafted micro-bevel.
Rectangular L-shaped solid
Goal: create a rectangular, L-shaped solid with micro-bevels
Sample: 1.2_recshape.mb
This geometry is challenging because it is not a primitive. Either we are creating a volume out of Boolean operations or extruding/extending surfaces from a primitive. Whenever you have an alternative to Booleans, use the alternative.
Upper right row = NURBS. 1) We start with the base of the L, then 2) detach and extend surfaces to make the upright, which is too sharp—try isoparm addition/scaling and it’s too much work to do, so faster options are needed. 3) A horizontal loft of a set of curves with built-in bevels is OK, but the character is more like a chamfer than a smooth bevel, so 4) we risk the Bevel tool on a curve, but it crimps. We could keep tweaking this, but NURBS persists in being troublesome. Maybe polys are better!
Lower left row = polygons. 1) Start with the base of the L and 2) extrude 2 faces for the upright. 3) Instead of Bevel, which will crimp the concave corner, go to Front and Side ortho views and create new edges near all corners using Mesh Tools > Multi-Cut Tool then 4) press 3 to smooth.
Boolean union half-rectangle, half-cylinder
Goal: create a half-rectangular, half-cylindrical solid with micro-bevels
Sample: 1.3_boolean_union.mb
We implied above that Booleans should be avoided. To be clear, Booleans are great, but they need planning so they don’t break. Having said that, when choosing between a poly or NURBS Boolean, a polygon Boolean is almost always the better option. So, we won’t waste time with NURBS in this demo.
From l to r: 1) Start with a vertical-oriented half-cube and a cylinder of congruent geometric density—preferably with faces, edges, and vertices that will align perfectly when overlapped. 2) Overlap volumes precisely, then Boolean union. Booleans + Maya = tricky: if you pick the half-cube last, the volumes disappear. So try again with the cylinder as the last selection, and voila. 3) The union creates very eccentric geometry on the top and bottom of the solid, so select all these edges and delete them. 4) Apply a Bevel to all corner edges. This creates large n-gons (multi-sided polygons). 5) Maya dislikes any polygon larger than a quadrangle, so we Triangulate the top and bottom faces, then hit 3 to smooth.
NOTE: Booleans were recently updated in Maya. This workflow was valid as of Maya 2022, but may no longer be relevant after that.
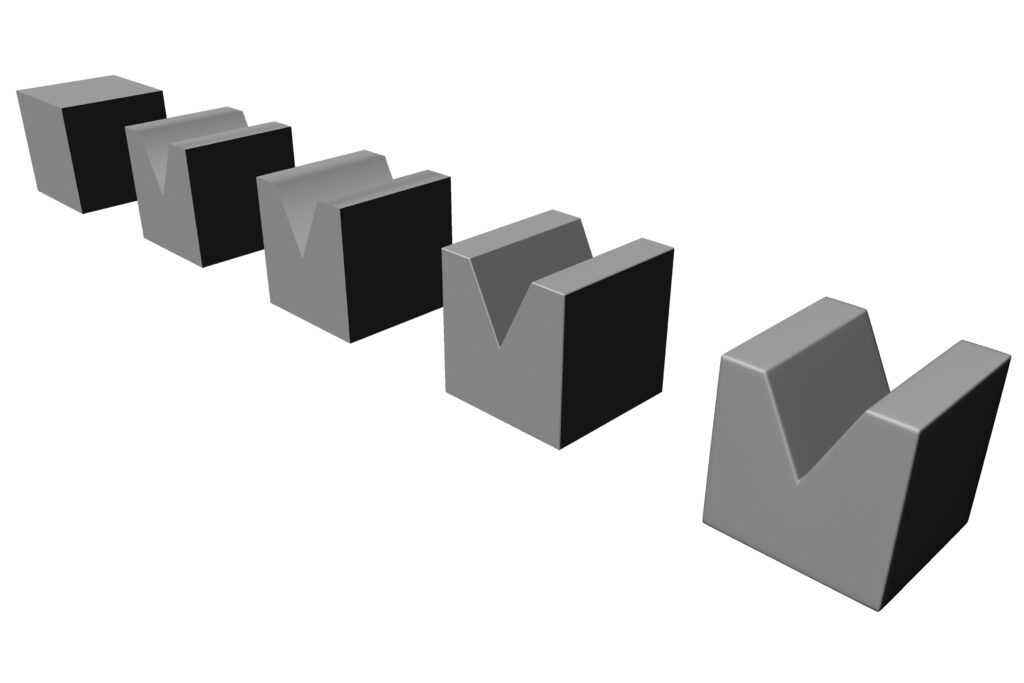
Acute angle cutout
Goal: create a rectangular solid featuring a steep, acute V-shaped cutout with micro-bevels
Sample: 1.4_inv_triangle_cutout.mb
Sharp acute angles present a particular difficulty with micro-bevels. Again, NURBS is not worth our time.
From l to r: 1) Create a polygon cube subdivided with vertical faces as shown in the viewport above. 2) Instead of Booleans, we’ll select the middle edge and move it down. This creates the V but it also creates a suspicious geometry—note the odd lighting effect on the top faces. 3) Ignore that for the moment and delete the three interior vertical edges connecting the vertices of the V to the base of the solid, on both front and back. 4) Apply a Bevel, and you get a nightmare fold at the acute angle. Solve the fold by applying the Insert Edge Loop tool to the interior faces of the V, very near the bottom angle. Then 5) Triangulate any n-gon faces larger than quads and hit 3 to smooth.
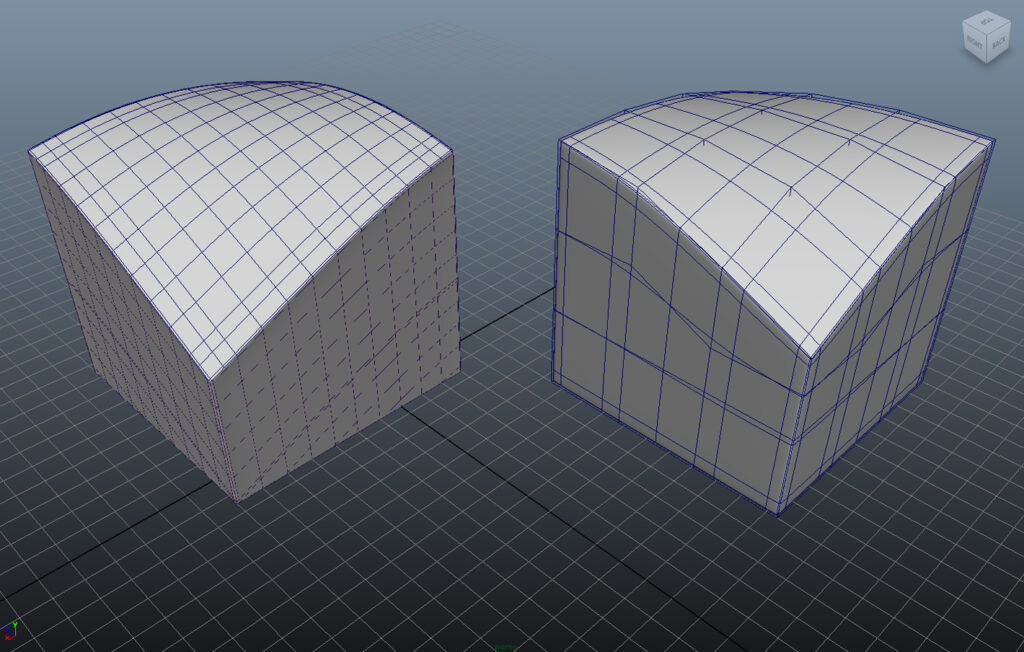
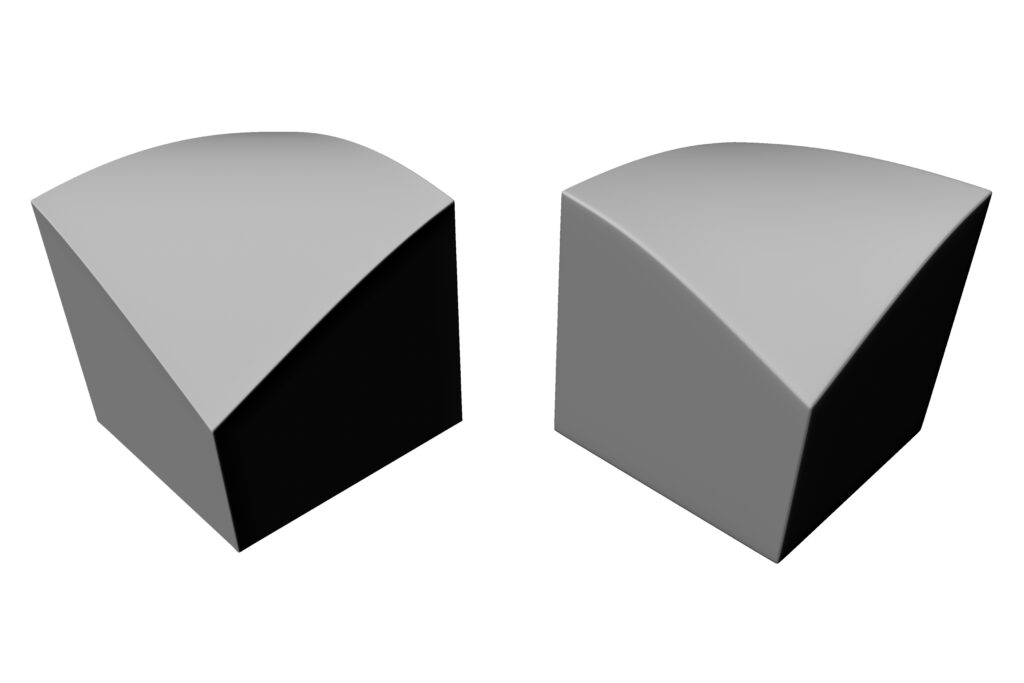
Irregularly curved surface
Goal: create an irregularly curved cut from the top of a cube with micro-bevels
Sample: 1.5_deformers.mb
This problem has valid NURBS and poly solutions.
Left: NURBS. 1) Create a well-subdivided NURBS cube (10x10x10 in the sample). 2) Apply a Non-Linear Sine Deformer and delete the bottom plane. 3) Create a NURBS Plane that intersects the volume and then apply Intersect Surfaces (with the plane selected last). 4) Using the Trim tool, delete the bottom portion of the vertical planes and the outer area of the horizontal bottom plane. 5) Select all the planes, and apply Edit NURBS > Stitch > Global Stitch, and move the resulting odd-looking duplicated object away from the original. 6) Using Surface Points and Insert Isoparms, adding isoparms close to the corners of the ORIGINAL object will fix the Global Stitched object. Hit 3 on the keyboard to smooth. Sometimes requires tweaking of control vertices at corners.
Right: Polygons. 1) Create a polygon cube with a few subdivisions (4x4x4 in sample). 2) Apply a Lattice Deformer with a few divisions (3x3x3 in the sample—it helps visually to not have the same number as on the geometry). 3) Move Lattice Points to deform the cube. You may need to tweak the edges of some subdivisions depending on the severity of your deformation. 4) Apply a Bevel to the corners and hit 3 to smooth.
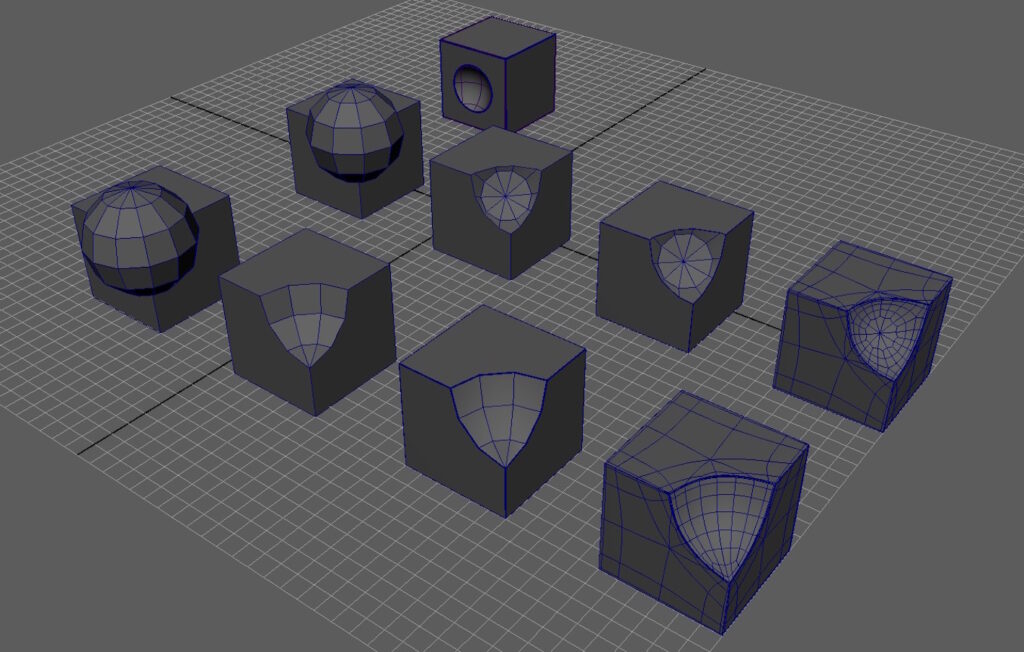
Spherical cutout at corner
Goal: create a complex spherical cutout at the corner of a rectangular solid with micro-bevels
Sample: 1.6_cube_sphere_hole.mb
A tricky challenge, best solved with polys and careful planning on subdividing geometries. Not to leave NURBS out: a bonus in the back row shows a sphere cutting a cube on its face.
Lower left row = sphere with vertical poles. 1) Create a cube with no subdivisions and a sphere with a few subdivisions (6 height and 12 axis subdivisions in sample). Intersect them so the “equator” of the sphere is congruent with the horizontal edges of the cube and the “south pole” is congruent with the vertical corner edge. 2) Perform a Boolean to subtract the sphere. 3) Select corners and Bevel with 4 divisions. This looks good but still crude. 4) Select Mesh>Smooth, and the resolution of the geometry improves immensely.
Upper right row = sphere with pole oriented at cube center. The workflow for this solution is identical, but the “south pole” is angled to face the center of the cube and vertex snaps to edges are completely avoided, yielding a slightly smoother result. In the sample, the sphere values are Rotate X = 35.9, Rotate Y = -9.6, and Rotate Z = -52.2. When using this solution take care with subdivisions of the sphere to avoid tough-to-resolve vertex results in the Boolean operation. In the sample, 6 subdivisions for height were still good, but axis subdivisions changed from 12 to 10.
Bonus NURBS: spherical hole in the face of a cube
A counterintuitive workflow, but one that gives insight into NURBS logic. 1) Don’t start with a cube, but rather with a sphere whose radius equals the radius of your micro-bevel. 2) Select isoparms and Detach, splitting into 8 spherical quadrants, and move these to develop the beveled corners of the cube (you can use a throwaway cube as a reference object, or use data in the Channel Box. 3) Select the edge isoparm from two opposing spherical quadrants, and perform a loft. This is done 12 times, for each beveled edge of the cube. 4) Select the edge isoparm from each of the lofts that defines a cube face, and perform a Planar. Do this six times, one for each face, and the cube is now complete. 5) Create a NURBS sphere and intersect it with a face. 6) Use Intersect to create a curve between the two objects, then Trim to delete the areas you don’t wish to keep. 7) Select Trim Edges belonging to the cube face and sphere, then create a small radius Curves>Fillet.
Scenarios
Let’s apply these case studies to some actual scenarios. Here, you can find reference files that are digital replications of Ray Horner’s student objects above. Take a look at each file as a reference to help you understand similar circumstances in your model.
Your turn
Return to the Maya scene file in the scenes folder of your project. COPY IT, rename the file yourname_nineSquareGrid02.mb, and open it to make, or in some instances re-make, the objects, this time to create realistic micro-bevels. Here, Maya will frustrate you, but there are some hints and tricks to getting it to act like you want it to:
- Depending on how you choose to model, your original reference objects may end up simply being “placeholders” and that’s OK. In other words, you will likely decide it’s better to start the form with some other object than the original reference object—in which case you’ll delete and replace the original.
Polygons
- If you are using polygons and you reach for the Bevel command, you’ll most often want to avoid Boolean-formed objects, although some Boolean formations will work. Instead, think about how to use extrusion/face-scaling and other tools to mold the shape:
- After you Bevel a poly object, you might notice some unsightly “folds” in your face. Depending on the nature of the object, you’ll want to experiment with deleting unnecessary edges and vertices before Bevel. Be aware of the number of Undo levels you have available as you experiment, perhaps working on a copy of the object off to one side for safety.
- If the “folds” persist, you can experiment with adding edge loops, applying Add Divisions and/or Triangulate and/or Clean-up commands, and/or pressing 3 on the keyboard to smooth.
- In the case of very acute or oblique angles, you may have to experiment with a variety of experimental combinations of the above. There is no magic bullet, but you want to shoot for the simplest (least number of steps) solution. If it feels convoluted, it probably is.
NURBS
- If you are using NURBS, here follows a decent workflow for many circumstances:
- Create the form by applying Loft or Revolve to a curve, and any kind of sculpting or deformers to that.
- Apply Global Stitch to the object and move it away from the original. The stitched object will look strange at first. Don’t worry.
- Add Isoparms very close to the edges of the original object, and observe the changes in the stitched object. This will constrain the odd stitching and bring it under control.
- Delete By Type>History will isolate the stitched object for further refinement, but be sure that you’ll not need to do anything further to the original objects. Again, working on copies off to one side and being aware of Undo levels are your safety tips.
- Press 3 on the keyboard to smooth, which people often forget you can do with NURBS.
Staging and lighting
- Don’t forget to micro-bevel your “chessboard.”
- Add simple lighting and a Camera and Aim, such as you’ve done for earlier projects.
When you have finished your work, render the first and second versions of the file at 3000 wide X 2000 high in .jpg format, upload it to your image host, and post it to your blog. In the blog, describe your idea for the exercise and your modeling methodology in Maya. Compare the test images (with sharp, “unreal” edges) to the final micro-beveled versions.
In our next exercise, we’ll add different kinds of materials to a copy of this model!
